
My Cozy Kitchen Secret
A good Classic Chicken Pot Pie is a hug on a plate. I believe that. It’s the ultimate comfort food. The smell fills your whole house with warmth. Doesn’t that smell amazing?
This recipe is my easy version. It uses a handy rotisserie chicken. That’s the secret to a Homemade Chicken Pot Pie without the fuss. Why does this matter? Because a busy day still deserves a special dinner. What was your favorite meal as a kid?
The Story in the Simmer
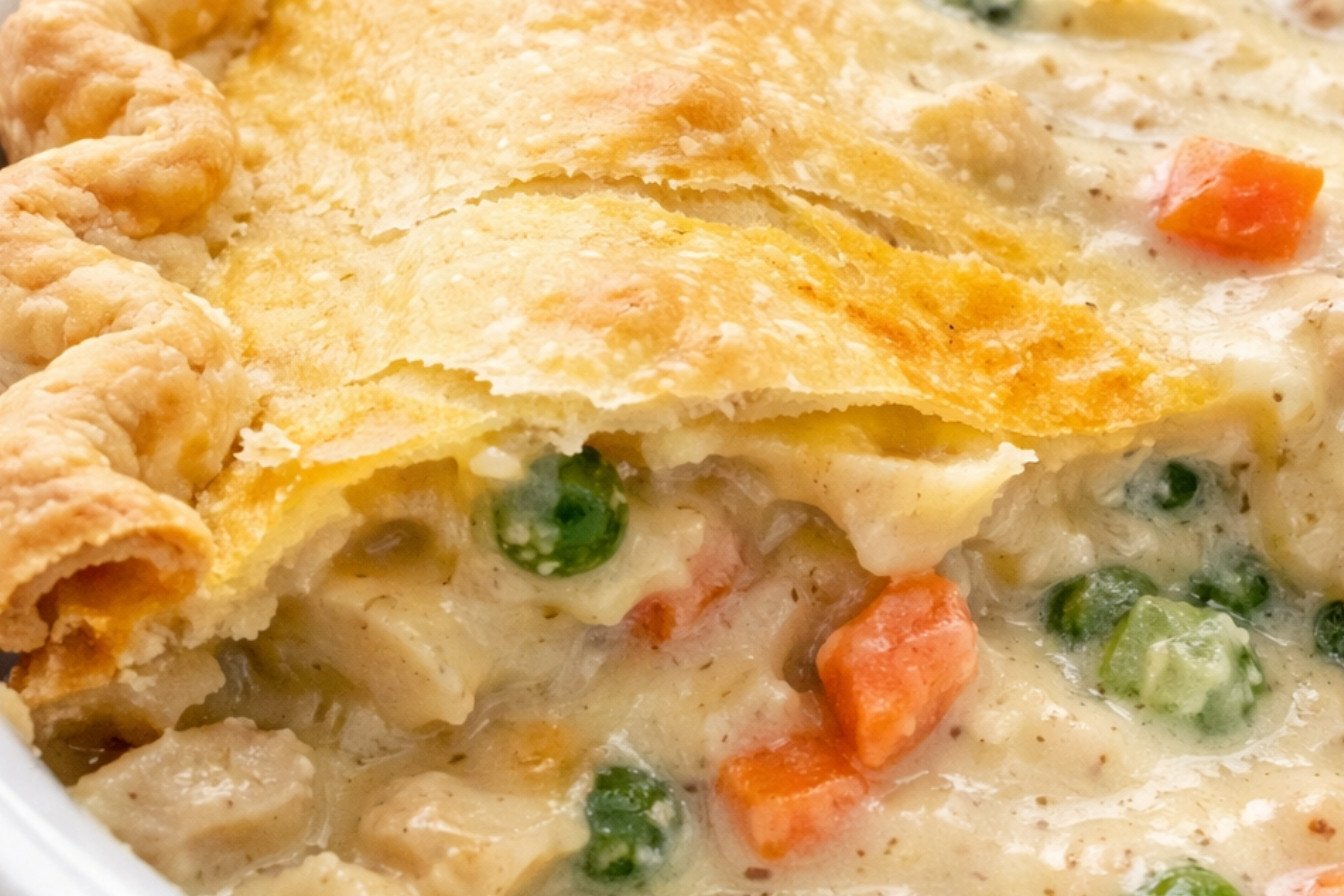
Let me tell you a little story. My grandson once called the peas and carrots “little green and orange coins.” I still laugh at that. He thought they were treasure in the gravy. Now I always smile when I stir them in.
Making the filling is where the magic happens. You cook the celery and onion in butter. Then you whisk in the flour and broth. This makes a rich, thick sauce. It holds all the goodness together. This step is the heart of any great Chicken Pot Pie Recipe.
Why Two Crusts Are Best
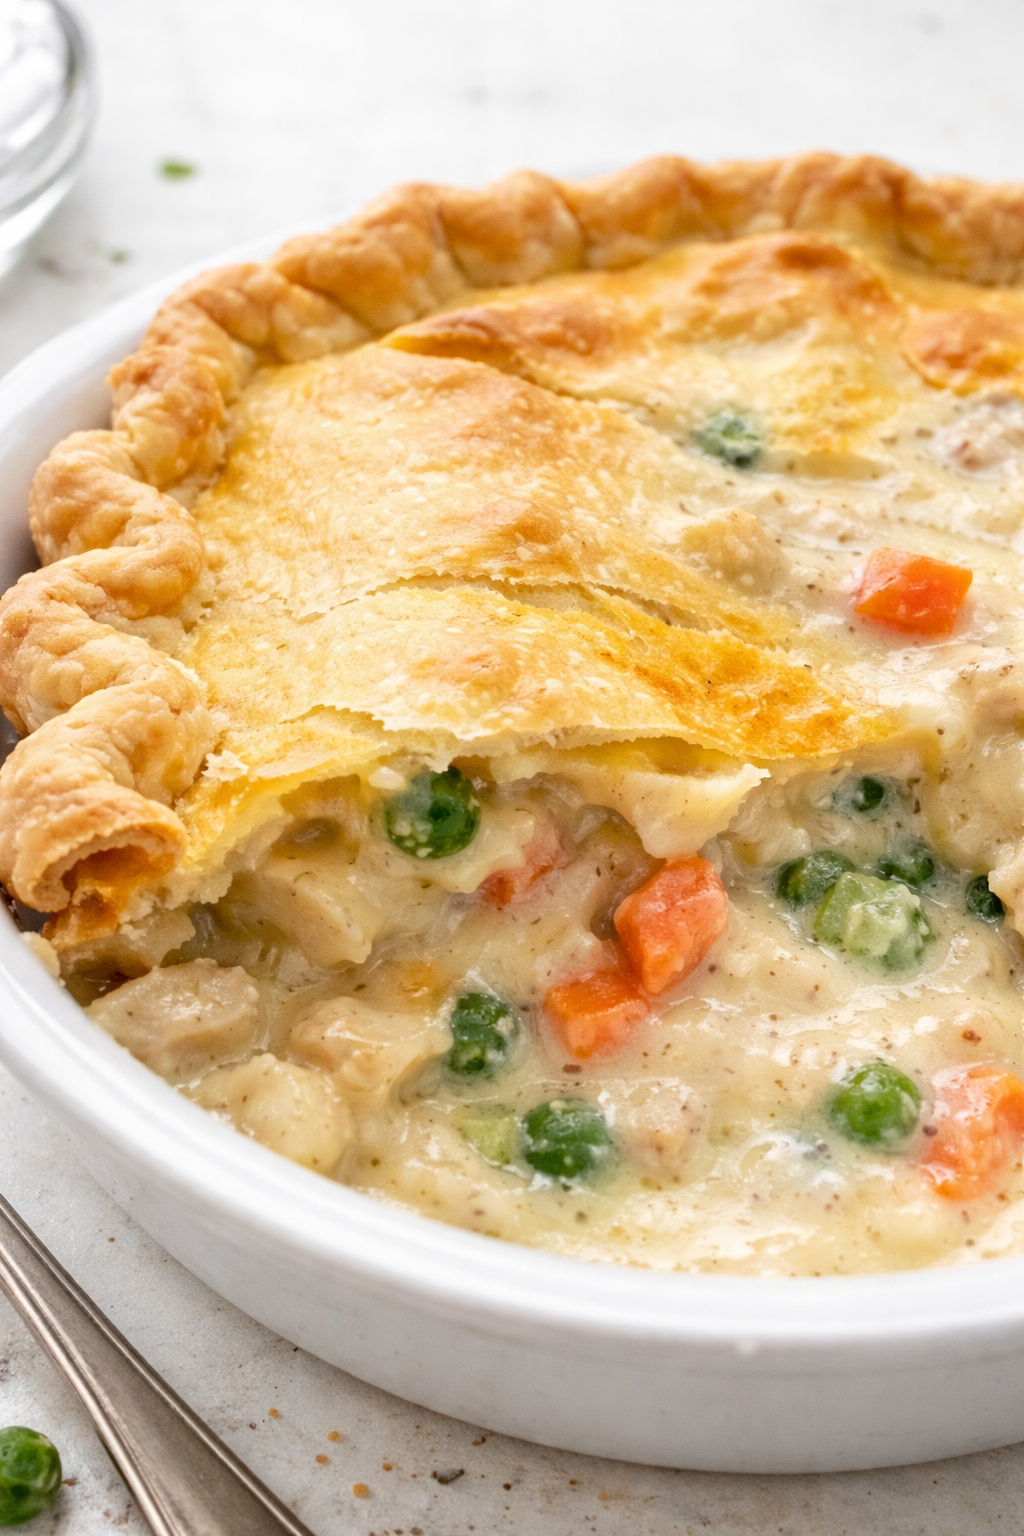
Some folks make a casserole with one crust on top. But for the Best Chicken Pot Pie, you need two. A bottom crust and a top crust. This makes every bite perfect. You get flaky pastry with the creamy filling.
*Fun fact*: The top crust wasn’t just for taste long ago. It kept the filling clean while baking! Today, it’s all about that wonderful texture. A true Two-Crust Chicken Pot Pie is a classic for a reason. Do you prefer a top crust or a bottom crust on your pies?
Putting It All Together
Let the filling cool a bit before you pour it in. This keeps the bottom crust crisp. Lay the second crust over the mountain of filling. Then crimp the edges with your fingers. I like to make little pinches all around.
Don’t forget to cut slits in the top! They let the steam out. This is the key to How to Make Chicken Pot Pie that isn’t soggy. Why does this matter? Little details make a big difference in cooking. They turn good food into great food.
The Golden Brown Wait
Baking it is the hardest part. You have to wait! It bakes until it’s golden and bubbly. Let it rest for ten minutes after. This helps the filling set. Then you can scoop it into bowls.
This Easy Chicken Pot Pie feeds a family and warms hearts. It’s one of my top Comfort Food Recipes. What’s your go-to meal for a cozy night in? I’d love to hear your stories.
Instructions
Step 1: First, warm up your oven. This is the start of your Homemade Chicken Pot Pie adventure. I always preheat mine to 375 degrees. It feels like giving the kitchen a cozy hug. Doesn’t that smell amazing already?
Step 2: Now, let’s cook the veggies. Melt butter in a big skillet. Add your onion and celery. Stir in thyme and mustard powder. Cook until they smell wonderful and get soft. (A hard-learned tip: go slow here for the best flavor.)
Step 3: Time to make the sauce! Sprinkle in the flour and whisk. It will look pasty. Take the skillet off the heat completely. This is key for your Chicken Pot Pie Recipe. Whisk in broth and evaporated milk a little at a time.
Step 4: Bring your sauce back to the stove. Whisk until it’s thick and bubbly. Then, stir in your cooked chicken and frozen peas and carrots. I use rotisserie chicken to make this Easy Chicken Pot Pie. Season it well with salt and pepper.
Step 5: Let’s build our Two-Crust Chicken Pot Pie! Press one pie crust into your dish. Pour in the cooled filling. Top with the second crust, seal the edges, and crimp them. What’s your favorite way to crimp a pie crust? Share below! Cut a few slits in the top.
Step 6: Almost done! Brush the top with egg wash for shine. Bake first on the lowest rack, then move it up. You want that top crust golden and the filling bubbling. This creates the Best Chicken Pot Pie. Let it rest for 10 minutes before serving.
Creative Twists
Biscuit Topping: Skip the top crust! Use drop biscuits instead for a Chicken Pot Pie Casserole feel.
Curry Comfort: Add a teaspoon of mild curry powder to the filling. It’s a warm, cozy surprise.
Potato Patch: Swap the peas and carrots for diced, cooked potatoes. So hearty and good.
Which one would you try first? Comment below!
Serving & Pairing Ideas
This Classic Chicken Pot Pie is a full meal! But a simple green salad cuts the richness perfectly. For a real cozy night in, pair it with roasted carrots. A scoop of cranberry sauce on the side is my little secret. It’s sweet and tangy. You’ll love these Comfort Food Recipes like our creamy lemon chicken. Which would you choose tonight?
Keeping Your Chicken Pot Pie Cozy For Later
Let’s talk about storing your Homemade Chicken Pot Pie. A full, baked pie keeps in the fridge for three days. Cover it loosely with foil first. For longer storage, freeze it! Wrap the cooled pie tightly in plastic, then foil. It will be happy in the freezer for two months.
I remember my first Two-Crust Chicken Pot Pie. I was so proud! I froze half for my busy son. He reheated it weeks later and said it tasted just like Sunday dinner. That is the magic of batch cooking. It turns a busy Tuesday into a special, cozy night.
To reheat, thaw a frozen pie in the fridge overnight. Warm it in a 350°F oven until bubbly. Cover the crust with foil if it gets too dark. This careful reheating keeps your Comfort Food Recipes tasting fresh and delicious. Have you ever tried storing it this way? Share below!
Simple Fixes for Common Pot Pie Hiccups
Even grandmas run into little kitchen troubles. First, a soggy bottom crust. To fix this, always bake your Classic Chicken Pot Pie on the oven’s lowest rack first. This crisps the bottom perfectly. I once forgot this step. My crust was a bit soft, but still tasty!
Second, a filling that is too runny. Make sure your sauce is bubbly and thick before adding the chicken. It should coat the back of a spoon. This matters because a thick filling holds each slice together beautifully. Third, a pale top crust. An egg wash gives a lovely golden shine.
Using a Rotisserie Chicken Pot Pie makes this Easy Chicken Pot Pie even simpler. These small fixes build your cooking confidence. They ensure every bite is full of flavor. Which of these problems have you run into before?
Your Quick Questions, Answered
How long to bake chicken thighs at 400?
Bake bone-in, skin-on chicken thighs at 400°F for 35 to 45 minutes. The skin will get crispy. The meat must reach 165°F inside. Use a meat thermometer to be sure. This high heat gives you a juicy inside and a perfect, crunchy outside every single time. It is a very reliable method for a simple, delicious dinner.
What is the secret to crispy chicken skin in the oven?
The secret is dry skin and hot air. Pat the skin very dry with paper towels first. You can even leave the thighs uncovered in the fridge for an hour. Then, bake them at a high temperature, like 400°F or 425°F. Do not cover the pan. The hot, dry air will make the skin wonderfully crispy and golden brown.
Should you bake chicken thighs covered or uncovered?
Bake them uncovered for crispy skin. Covering them with foil traps steam. That steam makes the skin soft. If you want tender, fall-off-the-bone meat without crispy skin, you can cover them part-way. But for the Best Chicken Pot Pie of crispy skin, always bake your thighs uncovered from start to finish.
What temperature should chicken thighs be baked at?
A temperature of 400°F to 425°F is best. This high heat renders the fat under the skin. It makes the skin crackle. It also cooks the meat quickly so it stays juicy. For slower, more tender meat, you can bake at 350°F. But you will not get the same level of crispy, delicious skin at that lower temperature.
How do you keep chicken thighs from drying out?
Do not overcook them! Use a meat thermometer. Pull them from the oven at 165°F. Also, bone-in thighs are more forgiving than boneless. The bone helps conduct heat gently. Let the thighs rest for five minutes after baking. The juices will settle back into the meat. This keeps every bite moist and flavorful.
What seasoning is best for baked chicken thighs?
Keep it simple. Salt and pepper are essential. Garlic powder and paprika are my other go-to spices. Paprika adds a nice color. You can also use herbs like thyme or rosemary. *Fun fact: Rubbing the seasoning under the skin, not just on top, gives the meat more flavor.* Which tip will you try first?
From My Kitchen to Yours
I hope you love this Chicken Pot Pie Recipe as much as my family does. It is the heart of a cozy meal. Sharing How to Make Chicken Pot Pie brings me so much joy. Every kitchen has its own stories. I would love to hear yours.
Tell me all about your cooking adventure in the comments. Did your family ask for seconds? Did you add your own special twist? Your stories are my favorite thing to read. Have you tried this recipe?
Happy cooking!
—Clara Cooper

Classic Chicken Pot Pie
Description
A comforting and hearty classic chicken pot pie with a flaky crust and creamy vegetable filling.
Ingredients
Instructions
- Preheat the oven to 375 degrees F.
- In a large skillet, melt the butter over medium heat, then add the thyme, mustard powder, onion and celery, cooking until the vegetables soften, approximately 10-12 minutes, stirring often.
- Add the flour and cook for 1-2 minutes, whisking constantly until the flour is light golden brown; remove the skillet from the heat.
- Once the skillet has been removed completely from the heat, use a flat whisk to incorporate the evaporated milk and broth into the roux (the flour/butter mixture), adding it a little at a time.
- When the liquids are fully incorporated, return the skillet to the burner over medium heat, continuing to cook and whisk the sauce until it is bubbly and thickened.
- Stir the chicken, peas, and carrots, into the sauce, then remove from the heat and let cool. Season to taste with kosher salt and ground black pepper.
- Meanwhile, press one of the pie crusts into a deep dish 9-inch pie plate; when the prepared pot pie filling has cooled, pour it carefully into the pie crust.
- Place the second pie crust over the filling, pressing the edges of both pie crusts together around the edge of the pie plate. Trim any excess pie crust that hangs over the pie plate.
- Using your fingers, crimp and flute the edge of the pie crusts as desired. Using a paring knife, cut a few slits for air vents into the top pie crust at the center.
- Brush the top pie crust with egg wash, if desired.
- Bake the pot pie, uncovered, on lowest rack of the oven for 25 minutes. Move the pot pie to the center oven rack and continue to bake for an additional 15-20 minutes or until the top crust is nicely golden brown and the filling is hot and bubbly throughout. Note: If the top pie crust begins to brown too quickly or too much, gently lay a sheet of foil over the top, not sealing the edges.
- Let the baked chicken pot pie cool for 10 minutes before serving so the filling can set up a bit.
- To serve, use a large serving spoon, scooping the hot pot pie filling from the pie plate placing each serving into a shallow bowl or onto a plate; serve at once.
- If you want to serve the pot pie in slices, let the pot pie cool completely, then slice into 6 pieces. Reheat each piece in the microwave a bit, then serve.
Notes
- For a richer filling, use heavy cream instead of evaporated milk. You can also add other vegetables like diced potatoes or mushrooms.