
The Joy of a Tiny Tart
There is something special about a small dessert. It feels like a gift just for you. My grandson calls these tarts “sunshine in a cup.” I still laugh at that. Making them is almost as fun as eating them. It is a happy little project.
These lemon raspberry tarts are perfect for that. They are sweet, a little sour, and very pretty. You can make them for a party or a quiet afternoon. Do you have a favorite small treat? I would love to hear about it. For another classic small treat, try these classic Canadian butter tarts.
A Little Story About Lemons
When I was a girl, we had a neighbor with a lemon tree. She would let me pick a few. My job was to zest them. I loved the bright, clean smell. It filled the whole kitchen. Doesn’t that smell amazing?
That smell is the start of our lemon curd. The zest and juice go right into the pot. *Fun fact: The oil in lemon zest holds the strongest flavor.* This is why it matters. Using both zest and juice gives you a full, wonderful taste. It is the heart of the tart.
Why Patience is a Secret Ingredient
The recipe asks you to wait. You must chill the dough and the curd. I know, waiting is hard! But this matters so much. Cold butter in the dough makes the shells flaky. Chilled curd becomes beautifully thick and smooth.
Think of it like a good story. It needs time to become its best. While you wait, you could make some perfect homemade ladyfingers. What is your least favorite part of waiting when you bake? Mine is watching the oven!
The Magic of the Final Touch
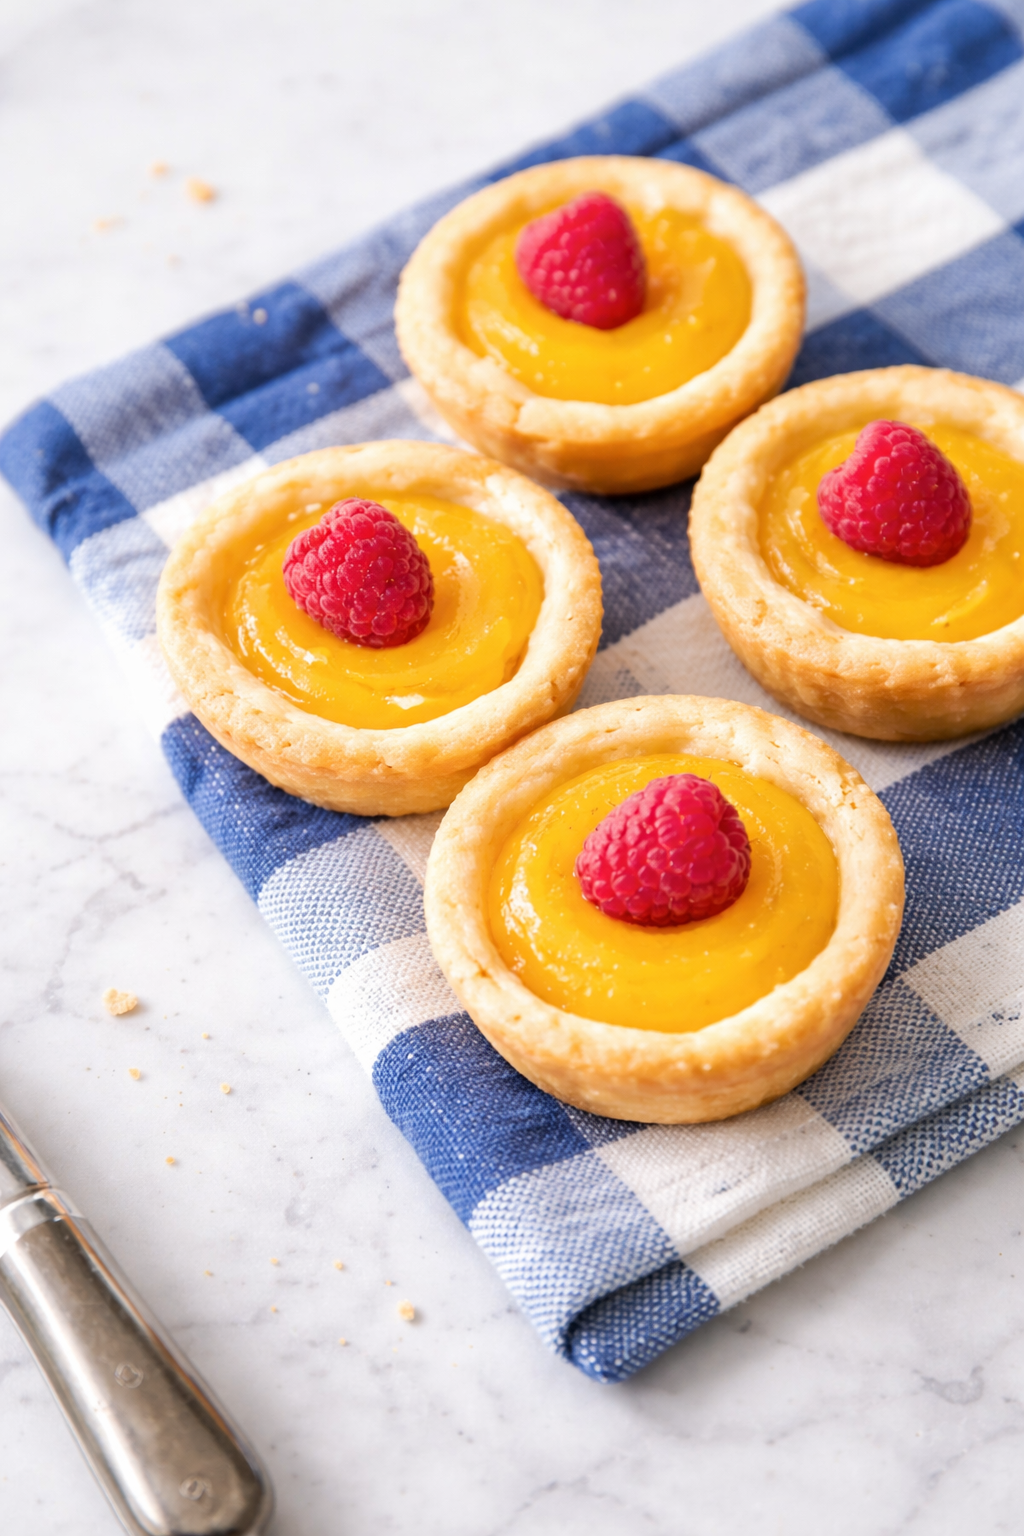
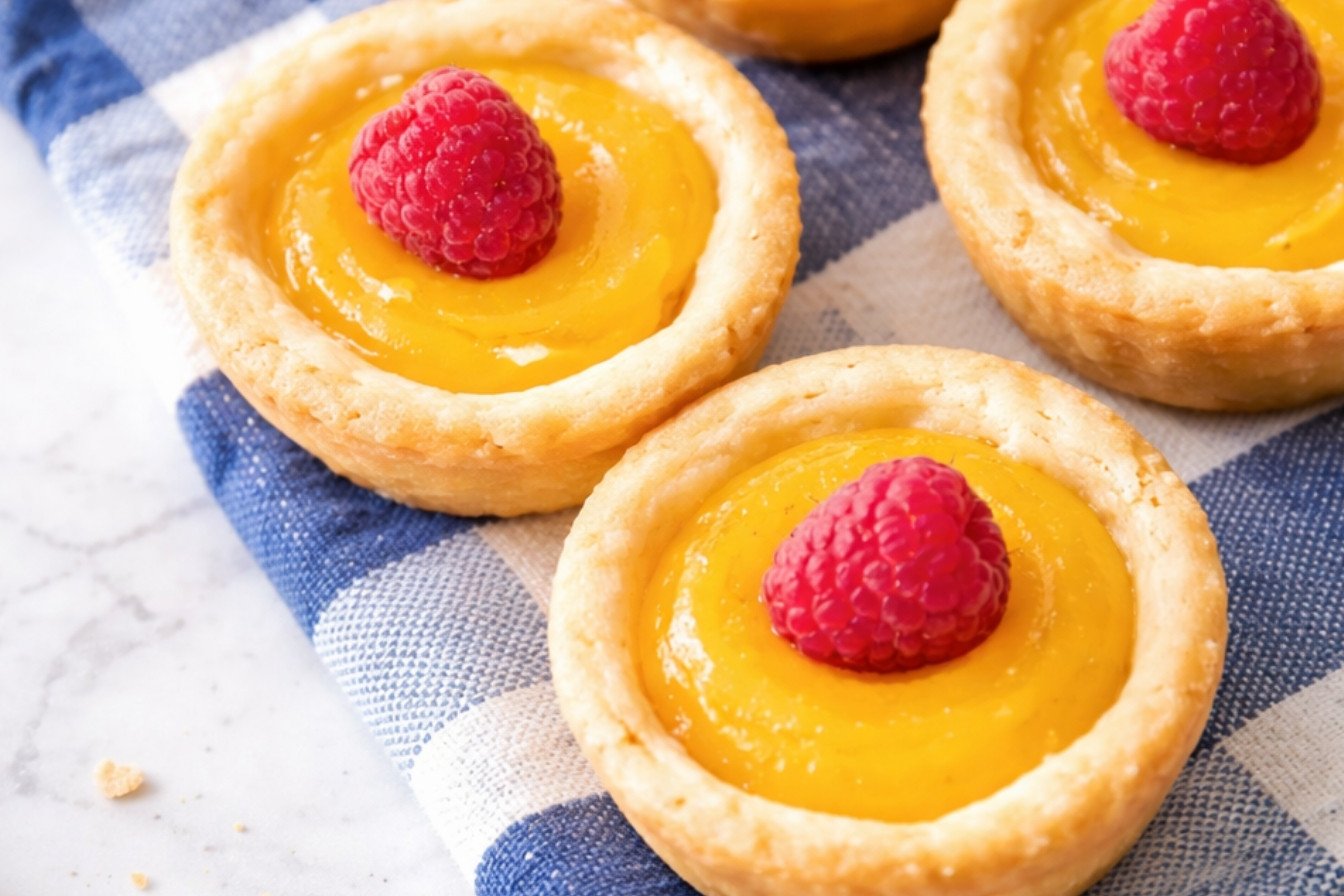
After baking and chilling, we get to assemble. Spoon the yellow curd into the golden shell. Then, place one plump raspberry on top. That red berry is like a jewel. It makes everything look finished and special.
This final touch is important. It is about caring for the person who will eat it. You are saying, “I made this just for you.” For another beautiful fruit dessert, this upside-down caramelized apple tart is wonderful.
Your Turn in the Kitchen
Now, it is your turn. Do not worry if your first tart shell is not perfect. Mine never are! The taste is what people remember. The mix of tangy lemon and sweet berry is a happy dance for your mouth.
Will you try making these tarts? Tell me how it goes. If you love tarts, you can find more ideas on this page of tart recipes. Or, if you want something chocolate, these black cherry chocolate linzer cookies are a delight.
Instructions
Step 1: First, make your lemon curd. Whisk the yolks, sugar, lemon juice, and zest in a pan. Cook it on low heat, stirring all the time. Keep stirring until it coats your spoon. (A wooden spoon won’t get too hot!)
Step 2: Take the pan off the heat. Stir in the cold butter, one piece at a time. It will get wonderfully thick and shiny. Press plastic wrap right on the curd so no skin forms. Then let it chill in the fridge. Why do we press the wrap on the curd? Share below!
Step 3: Now, for the tart shells. Mix your flour, sugar, and salt. Cut in the very cold butter until it looks like crumbs. Slowly add the ice water until a dough forms. Wrap it up and chill it, just like the curd.
Step 4: Roll out your dough and cut little circles. Gently press them into a greased muffin tin. Bake them empty until they’re just golden. Let them cool completely on a rack. I always sneak one plain shell—so good!
Step 5: Finally, the fun part! Spoon the chilled lemon curd into each tart shell. Top each one with a plump, beautiful raspberry. Doesn’t that look pretty? (For easier filling, use a small spoon or a piping bag.)
Creative Twists
Swap raspberries for blueberries or blackberries.
Add a tiny dollop of whipped cream on top.
Mix a few raspberries right into the lemon curd before chilling.
Which one would you try first? Comment below!
Serving & Pairing Ideas
These tarts are lovely on a fancy plate. Serve them with a dusting of powdered sugar. A cup of herbal tea or a glass of cold milk is perfect alongside. For a real treat, add a scoop of vanilla ice cream. You could even crumble some simple cookies on top for crunch. Which would you choose tonight?
Keeping Your Tarts Tasty for Later
These little tarts are best fresh. But you can save them for later. Store filled tarts in the fridge for two days. Cover them well so they don’t pick up other smells. You can also freeze the baked, empty shells for a month. I once froze a whole batch for my grandson’s surprise visit. It was a lifesaver!
Batch cooking the shells is a smart trick. Make a double batch of dough. Bake all the shells at once. Let them cool completely. Then, freeze them in a single layer. This matters because it turns a big job into a quick treat. You can pull out a few shells anytime. Fill them with fresh lemon curd and a raspberry. Have you ever tried storing it this way? Share below!
Little Fixes for Common Tart Troubles
Sometimes, cooking has small hiccups. First, if your lemon curd is too thin, you did not cook it long enough. Cook it until it coats your spoon thickly. I remember when my first curd was runny. I was so disappointed! Second, if your tart dough is tough, you added too much water or over-mixed it. Use just enough ice water for the dough to come together.
Third, if your shells shrink in the oven, the dough was not cold enough. Always chill it first. Fixing these issues matters for your confidence. You learn that mistakes are just lessons. It also matters for flavor. A tender shell and thick curd make a perfect bite. Which of these problems have you run into before?
Your Quick Questions, Answered
Can I use frozen raspberries for lemon raspberry tarts?
Yes, you can use frozen raspberries. Thaw them first on a paper towel. This helps soak up extra juice. If you put them on wet, the tart can get soggy. Frozen berries work great for baking inside things, like an upside-down tart. For topping, fresh berries look prettier. But frozen will still taste delicious.
What’s a quick substitute for lemon curd?
You can use thick lemon pudding or a store-bought curd. Another idea is to mix lemon zest into vanilla custard. For a different twist, try a dollop of sweetened mascarpone cheese. It will be less tangy but still creamy. This lets you make tarts even faster. It is a good trick for last-minute guests.
How do you keep tart shells crispy with a wet filling?
The secret is a barrier. Brush your baked, cooled shell with melted chocolate. Let it set for five minutes. Or brush it with a little egg white and bake for two more minutes. This creates a seal. *Fun fact: This same trick works for keeping ladyfingers crisp in tiramisu!* Then add your lemon curd. The shell stays wonderfully crisp.
Can lemon raspberry tarts be made ahead of time?
You can prepare all the parts ahead. Make the curd and shells up to two days early. Keep them separate in the fridge. Assemble the tarts a few hours before serving. This keeps the shells from getting soft. It is a great plan for a party. You get to enjoy your company instead of cooking all day.
What are easy no-bake lemon raspberry tart options?
Use ready-made mini phyllo or graham cracker shells. Fill them with your homemade or store-bought lemon curd. Another no-bake idea is a cookie crust. Crush cookies, mix with butter, and press into a pan. Chill it, then add filling. Top with berries. It is simple, cool, and perfect for a hot summer day.
How do you garnish lemon raspberry tarts for a fancy look?
Add a mint leaf next to the raspberry. A light dusting of powdered sugar looks like snow. You can also add a tiny drizzle of melted white chocolate. For more ideas, look at pretty linzer cookies. Their designs are inspiring. A beautiful garnish makes people smile before they even take a bite. Which tip will you try first?
From My Kitchen to Yours
I hope you love making these sunny little tarts. Cooking is about sharing joy and sweet moments. I would love to hear about your baking adventures. Did you add your own special twist? Tell me all about it in the comments below. Your stories are my favorite thing to read. Have you tried this recipe?
Happy cooking!
—Clara Cooper

Lemon Raspberry Tarts in Ten Minutes
Description
Lemon Curd and Raspberry Tartlets
Ingredients
For The Lemon Curd:
For The Tart Shells:
Additional:
Instructions
- Lemon Curd: Combine yolks, lemon zest, lemon juice, and sugar in a small saucepan. Whisk to combine.
- Cook over low to medium heat, stirring constantly with a wooden spoon, making sure to stir sides and bottom of pan. Cook until mixture is thick enough to coat back of wooden spoon, about 5 minutes.
- Remove saucepan from heat. Add butter, one piece at a time, stirring with the wooden spoon until consistency is thick and smooth.
- Transfer mixture to a bowl. Lay a sheet of plastic wrap directly on the surface of the curd to avoid a skin from forming; wrap tightly.
- Refrigerate until firm and chilled, at least 1 hour.
- Tart Shells: Preheat oven to 350 degrees.
- Add the flour, sugar and salt to a stand mixer with paddle attachment. Beat on low to combine. Add cold butter, beat until butter is the size of small peas with the flour mixture. This can also be done in a food processor.
- With the mixer on, slowly add the ice water until dough forms and is combined.
- Transfer dough to a lightly floured countertop, kneading a couple times to combine. Divide dough in half, flatten slightly and wrap tightly with plastic wrap.
- Refrigerate for 1 hour before using.
- When ready to use, roll out the dough. Cut individual circles for each tart shell using a glass or pastry cutter. Push each circle into a greased cupcake tray.
- Bake empty tarts for 5 – 10 minutes or until a light golden color. Allow to cool.
- Fill each tart shell with lemon curd and top with a raspberry.
Notes
- Nutrition information is an estimate for one tartlet, calculated based on the ingredients. Actual values may vary.