

The First Time I Made These
I still remember the first time I made these sugar cookie bars. My grandkids were coming over, and I wanted something fun. I didn’t want to roll out a single cookie. That sounded like too much work. So I spread the dough on a pan instead. Doesn’t that smell amazing when it bakes? I still laugh at how easy it was. You just mix, spread, and bake. No fuss. No mess. Try these simple chocolate sugar cookies next time you want a quick treat. Have you ever made cookies in a sheet pan instead of cutting them out?
Why Sour Cream Is My Secret
You might wonder why this recipe has sour cream. It is not just for tang. It keeps the bars soft and tender. I learned this from my own grandma. She added sour cream to everything. She said it was her little trick for moist cakes and cookies. She was right. *Fun fact: Sour cream in baking makes the crumb softer because it adds fat and moisture without making things greasy.* This is why these bars stay chewy for days. That matters because leftovers are the best part. Want more soft cookie ideas? Check out these perfectly soft and chewy sugar cookies. Do you have a secret ingredient you always add to your baking?
My Favorite Frosting Adventure
The frosting is where you can have fun. I love using almond extract. It gives the buttercream a sweet, nutty taste. But one time, I used strawberry flavor instead. My grandkids thought I made pink frosting from real berries. They were so happy. I did not tell them it was just extract. That is my little secret. This is why this recipe is flexible. You can change the flavor to match any holiday or mood. For a cozy fall twist, try this spiced apple cake with sweet brown sugar glaze. What is your favorite frosting flavor?
Spreading Dough Like a Pro
Spreading the dough onto the pan can feel tricky. It wants to stick to your hands. I use a spatula or lightly buttered hands. You do not need it perfect. The dough will spread a little more in the oven. That is why this recipe is so forgiving. It does not care if your edges are messy. It still tastes wonderful. This matters because baking should not stress you out. It should feel like a hug. If you like easy, forgiving recipes, try these lighter holiday sugar cookies. Have you ever baked something that turned out ugly but tasted amazing?
Cooling Is Not Optional
I put that in all caps for a reason. You must let these bars cool completely before cutting. I learned this the hard way. One time, I was in a hurry. I cut them while they were warm. They turned into a crumbly mess. The frosting slid right off. My husband still ate them with a fork. He said they were delicious anyway. But I knew better. This is why patience matters in baking. Waiting just twenty minutes makes your bars look pretty. And pretty bars make you proud. Need another easy treat? Look at these make-ahead toaster oven sugar cookies. Do you ever struggle with waiting for food to cool?
Sprinkles Make Everything Better
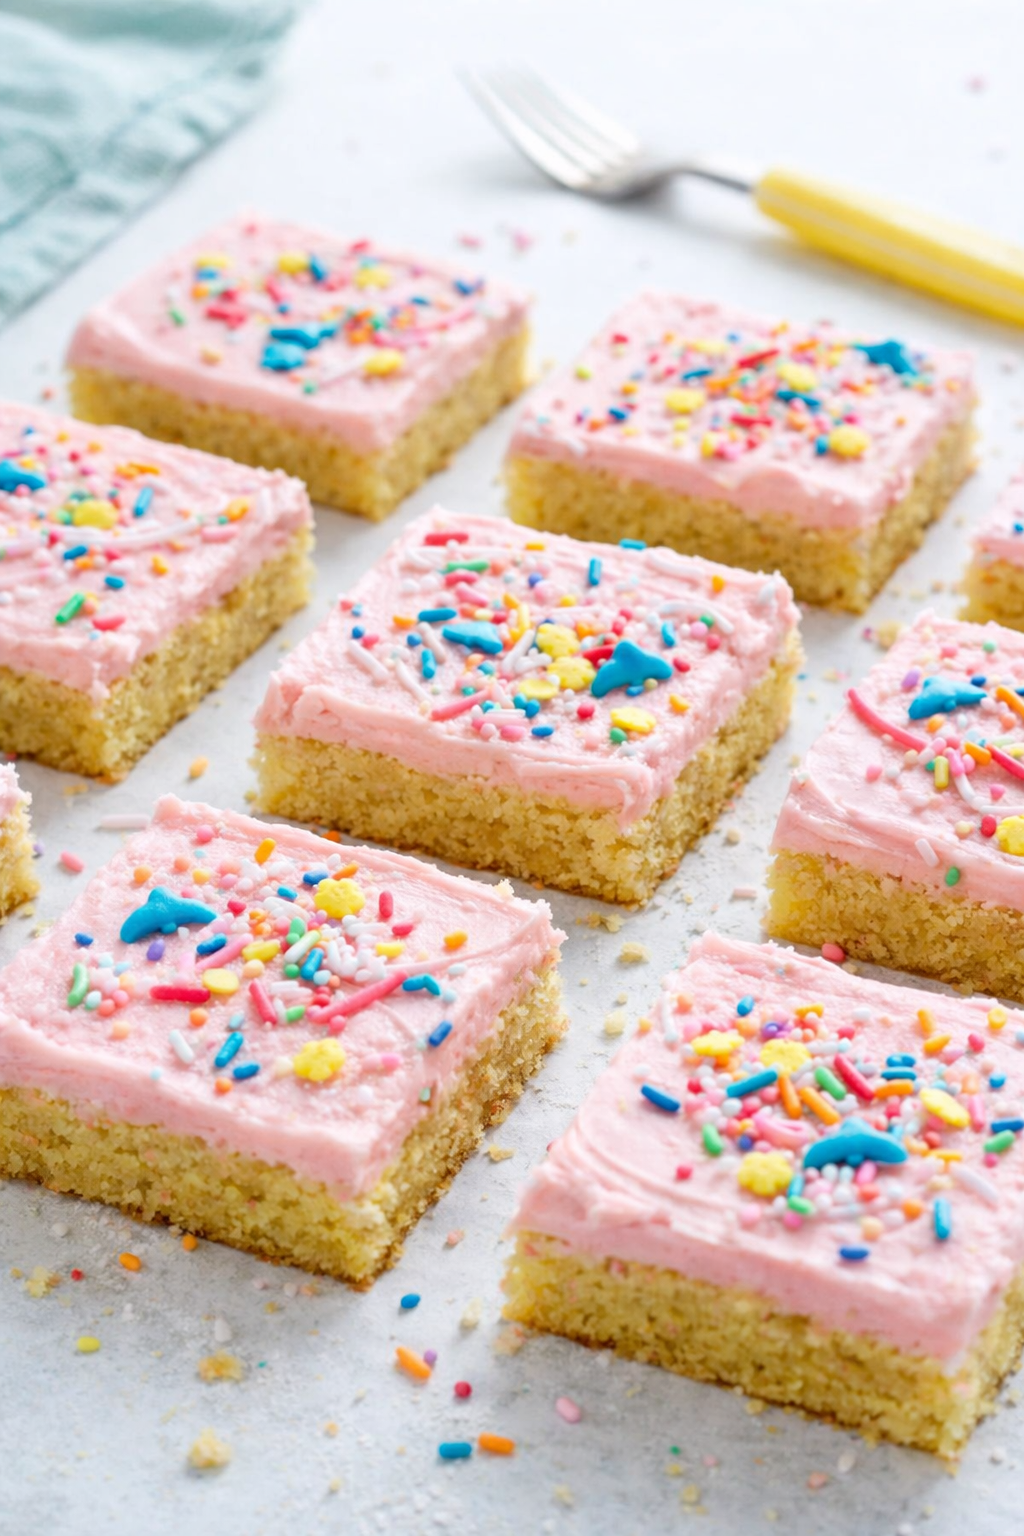
Summer sprinkles are my favorite for this recipe. They remind me of July barbecues and sunshine. But you can use any sprinkles you want. Halloween sprinkles for October. Red and green for Christmas. Rainbow sprinkles for a birthday. That is the fun part. You can make these bars match any celebration. It also makes kids want to help. My grandson loves to sprinkle them on top. He puts way too many, but I never stop him. That is the joy of baking together. For another festive idea, try this glazed cider and brown sugar ham for a big dinner. What is your favorite kind of sprinkles?
Why This Recipe Stays in My Pocket
I keep this recipe on a wrinkled index card in my kitchen drawer. It is my go-to when I need a quick dessert. No rolling pins. No cookie cutters. Just one pan and a spatula. It makes a big batch, so there is enough for sharing. That is what I love most. Food is about giving. And these bars are easy to give away. This matters because the best recipes are the ones you can share without stress. Try these lemon ginger sparkle cookies for another simple idea. Do you have a recipe you keep on a wrinkled piece of paper?
Instructions
Step 1: Cream your room-temperature butter and sugar together until fluffy. I use a hand mixer and think of my grandma’s kitchen. (A cold butter tip: let it sit out for an hour first — it makes all the difference.) Does that smell amazing? It always reminds me of birthday mornings.
Step 2: Add the eggs, sour cream, salt, and both extracts. Blend until smooth and happy. I once forgot the sour cream — the bars were still good, but not as soft. Have you ever baked with sour cream before? Share below!
Step 3: Mix in the flour, baking soda, and baking powder just until combined. Do not overmix or the bars get tough. I learned that the hard way when my first batch came out like hockey pucks. Your hands will be thankful for this soft dough.
Step 4: Spray a 12×17 sheet pan with non-stick spray. Spread the dough evenly using a spatula or lightly buttered hands. It doesn’t need to be perfect — the dough spreads a little while baking. Just get it close and trust the oven.
Step 5: Bake at 350°F for 20-25 minutes until golden brown. Let the bars cool completely before cutting. I know it’s hard to wait, but warm bars will crumble into a mess. Patience makes the prettiest squares.
Step 6: For the frosting, beat room-temperature butter with powdered sugar, salt, and heavy cream. Add your favorite extract — almond is our family’s star. I love how the kitchen smells like almond cookies when this comes together. Spread it thick and happy.
Step 7: Slice your cooled bars into any size squares you like. Sprinkle with colorful summer sprinkles for a party feel. My neighbor once put these in a lunchbox for her grandson — he said they were better than cake. These cookies remind me why simple baking is best.
Creative Twists
… Swap the almond extract for lemon and add a teaspoon of lemon zest to the dough for a sunny twist.
… Fold in a half-cup of mini chocolate chips before spreading for hidden chocolate pockets in every bite.
… Use strawberry extract in the frosting and top with crushed freeze-dried strawberries for a jammy surprise.
Which one would you try first? Comment below!
Serving & Pairing Ideas
Serve these bars alongside a tall glass of cold milk for dunking. They also pair nicely with a scoop of vanilla ice cream for a sundae feel. For a fun platter, place bars on a plate with fresh berries and mint leaves. My grandkids call this a dessert rainbow. A cozy slice of ham on the side feels like a holiday pairing. Which would you choose tonight?
Storing and Reheating Your Sugar Cookie Bars
Let these bars cool completely before you store them. I once put warm bars in a container, and they turned into a sticky mess. Keep them in an airtight container at room temperature for up to three days. For longer storage, wrap them well and pop them in the freezer. They will stay fresh for up to three months. To reheat, just let them thaw on the counter. Batch cooking means you can pull out a treat anytime. Have you ever tried storing it this way? Share below! This matters because proper storage keeps your bars soft and tasty, not dry or crumbly. For a different treat, try my simple chocolate sugar cookies for the holidays.
Three Common Problems and Easy Fixes
First, if your dough is too sticky to spread, chill it for ten minutes. I remember when my first batch was a gooey disaster. Second, if the edges brown too fast, your oven might run hot. Use an oven thermometer to check. Third, if your bars sink in the middle, you likely overmixed the dough. Mix just until the flour disappears. Which of these problems have you run into before? Fixing these issues matters because it builds your cooking confidence. It also matters because even, golden bars taste better and look pretty on a plate. For a make-ahead option, check out my make-ahead toaster oven sugar cookies.
Your Quick Questions, Answered
How do I keep sugar cookie bars from spreading too much? Chill your dough for 15 to 20 minutes before spreading it on the pan. This firms up the butter, so the bars hold their shape. Also, make sure your butter is soft, not melted. Melted butter causes extra spreading. Use a light hand when spreading, too. A little patience now means neat, square bars later. You will love the clean edges.
Can I use a different frosting for these cookie bars? Yes, absolutely. This recipe welcomes any frosting you like. Try a simple cream cheese frosting for a tangy twist. A chocolate buttercream is also a big hit with kids. You can even dust them with powdered sugar for a lighter finish. Just keep the frosting thick enough to hold its shape on the bars. Your kitchen, your rules.
How do I know when sheet pan sugar cookie bars are done? Look for a light golden brown color across the whole pan. The edges will pull away from the sides slightly. Gently touch the center; it should spring back, not leave a dent. A toothpick inserted in the middle should come out clean or with a few dry crumbs. Do not overbake. They set more as they cool.
Can I make these sugar cookie bars gluten-free? Yes, you can swap the all-purpose flour for a good gluten-free baking blend. Look for one that includes xanthan gum for structure. The texture will be slightly more tender, but still delicious. Do not overmix the gluten-free dough. Let the bars cool fully before cutting, as they are more delicate. Your gluten-free family will thank you.
How should I store sugar cookie bars for freshness? Store them in an airtight container at room temperature for up to three days. Place a sheet of wax paper between layers to stop sticking. For longer storage, freeze them in a sealed bag for up to three months. Thaw on the counter, still wrapped, for about an hour. This keeps them soft and the frosting perfect.
Can I add sprinkles or mix-ins to the dough? Yes, add up to half a cup of sprinkles or mini chocolate chips. Gently fold them in after the flour is mixed. For sprinkles, use the round jimmies kind, not sanding sugar. They hold their color best during baking. Press a few extra on top before baking for a pretty finish. Your bars will look like a party. Which tip will you try first? For a cozy fall twist, try my spiced apple cake with sweet brown sugar glaze.
A Warm Send-Off From Elowen Thorn
I hope these tips make your cookie bars turn out just right. Remember, every batch is a little different, and that is the fun of baking. *Fun fact: Sugar cookie bars were invented by home bakers who wanted less rolling and cutting.* Have you tried this recipe? I would love to hear how it went for you. Drop a comment below and tell me about your favorite frosting. Happy cooking! —Grace Ellington. For another sweet idea, try my glazed cider and brown sugar ham for a savory contrast.


Easy Sheet Pan Sugar Cookie Bars
Description
Soft and tender sugar cookie bars baked in a sheet pan, topped with silky buttercream frosting. Perfect for sharing!
Ingredients
Instructions
- Cream together butter and sugar. Add eggs, sour cream, salt and extracts. Blend together until incorporated.
- Add dry ingredients. Mix just until ingredients are incorporated.
- Prepare a sheet pan 12×17 with non-stick spray. Spread dough onto sheet using a spatula, scraper or lightly buttered hands until it is all flat and even. It doesn’t have to be perfect, the dough will spread a bit more during baking, so just get it as even as you can.
- Bake bars at 350° for 20-25 minutes (just until golden brown). ALLOW BARS TO FULLY COOL BEFORE CUTTING.
- For the frosting: Cream 1 cup butter until smooth. Add 3 1/2-4 cups powdered sugar, 1/4 teaspoon salt, 3-3 1/2 tablespoons heavy cream, and 1 teaspoon extract. Beat until silky and smooth.
- Add frosting to fully cooled bars. Slice into bars or squares, any size you would like.
Notes
- This frosting can have many flavor variations depending on your extract. I love using either lemon or almond, and have also found Amoretti’s Wild strawberry flavor to be very delicious! ALMOND is our favorite! Let bars cool completely before cutting for clean slices.