

The Pie That Started With a Laugh
My mama made this pie on a hot July afternoon. She wanted dessert but refused to turn on the oven. I still laugh at how she looked at me and said, “We don’t need heat to make something sweet.” She was right. This no-bake chocolate peanut butter pie takes just ten minutes to put together. The hardest part is waiting for it to chill. Doesn’t that sound perfect for a busy day?
Have you ever made a pie without turning on the stove? I’d love to know your favorite no-bake trick. Share it with me in your head as you read along.
Why We Love Peanut Butter and Chocolate
Peanut butter and chocolate are best friends in the kitchen. They balance each other like sweet and salty on a warm afternoon. This pie uses creamy peanut butter in two layers. You get a soft, fluffy cheesecake-like middle and a rich chocolate pudding top. *Fun fact: Peanut butter was first paired with chocolate in the 1920s by a candy maker named H.B. Reese. He started Reese’s Cups after leaving his job at a chocolate factory.
Why does this matter? Because simple ingredients can make us smile. You don’t need fancy tools or expensive cream cheese candy tricks to create something memorable. Just butter, cookies, pudding, and peanut butter. That’s it.
The Crust That Crunches
Oreo cookies with their cream filling become the perfect crust. You crush them up, mix with melted butter, and press into a pie plate. My granddaughter loves smashing the cookies with a rolling pin. She calls it “angry baking.” I let her do it because it makes her happy. The crust goes into the fridge while you make the filling. Do you let your kids or grandkids help smash things in the kitchen?
This matters because cooking together builds memories. That crunch under your fork is not just texture. It is a little moment you made with your own hands. A peanut butter oatmeal bite might be faster, but this crust is special.
The Creamy Middle Secret
The filling starts with cream cheese, powdered sugar, and peanut butter. You beat it until smooth, then fold in Cool Whip. Folding is a gentle stir that keeps everything light and fluffy. My mama used to say, “Be soft with your batter, and it will be soft with you.” That little wisdom makes a real difference. The peanut butter layer spreads like a dream over the cold crust.
Do you like your desserts extra peanut buttery? You can add more than the recipe asks for. I sometimes sneak in an extra spoonful just because. The creamy peanut butter custard pie taught me that more peanut butter rarely hurts.
The Pudding Layer Dream
Instant chocolate fudge pudding is the hero of this story. You whisk it with milk, let it set, then fold in more Cool Whip. The pudding turns thick and silky like a cloud you can eat. Spread it gently over the peanut butter layer so they don’t mix. I once rushed this step and ended up with a swirl pie. It was still delicious, just not as pretty. Ever had a baking oops that turned out yummy anyway?
Why does this matter? Because mistakes in the kitchen teach us patience. The pudding layer needs time to set before you add the top. Waiting is hard, but it helps the pie hold its shape. An ice cream sandwich cake also needs chill time, so you learn to trust the fridge.
The Pretty Top and Drizzle
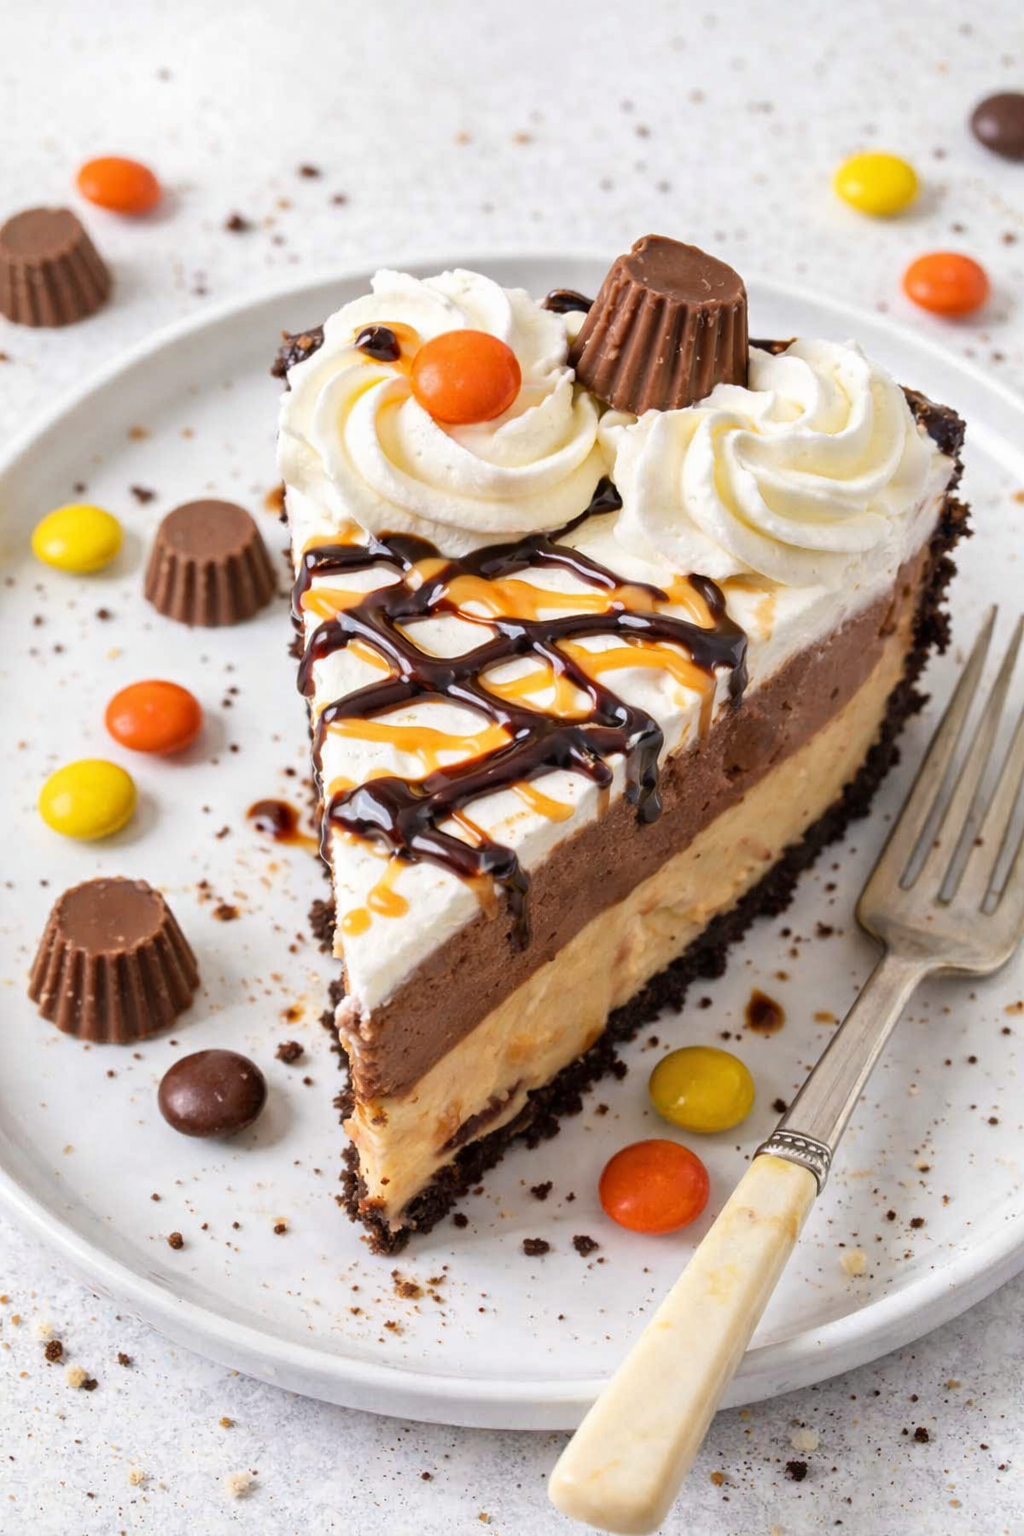
The top gets a blanket of Cool Whip with swirls around the edge. Then you melt peanut butter and hot fudge separately. Drizzle them in opposite directions for a beautiful crisscross. Mini Reese’s Pieces and peanut butter cups go on top for crunch and color. My neighbor saw this pie and asked if a bakery made it. I laughed and said, “Nope, just me and a bag of cookies.” Does this sound like a dessert you would bring to a party?
This matters because presentation makes people feel special. A little drizzle and some candy on top show you care. You do not need to be a fancy baker to make something beautiful. Just a steady hand and a no-bake Oreo cheesecake parfait spirit of fun.
Chill Time and Sharing Time
Let the pie sit in the fridge for at least two hours. Overnight is even better because all the layers get friendly. The slice stays neat and tall when you cut it. I serve this after family dinners or on lazy Sunday afternoons. Everyone asks for seconds, and there are never leftovers. What is your favorite occasion to make an easy dessert like this?
I keep a few extra Oreos in the freezer for snacking while the pie chills. That is my little secret. If you try this pie, let me know how it turned out. Did your family fight over the last piece? I hope they did. That is how you know you made something good.
Instructions
Step 1: Crush your Oreos with the cream still inside. Use a food processor or a zip bag and rolling pin. Mix those fine crumbs with melted butter until it feels like wet sand. (If the crust is too crumbly, add one more tablespoon of butter.) Doesn’t that smell amazing?
Step 2: Press the crumb mixture firmly into a 9-inch pie plate. Cover the bottom and go up the sides a bit. Pop it in the fridge to get cold while you make the filling. I still laugh at how fast this part is.
Step 3: Beat the cream cheese, powdered sugar, and 1/2 cup peanut butter until it’s really smooth. Gently fold in 1/2 cup of Cool Whip until the mix is light and fluffy. Spread this over your cold crust. What’s your favorite brand of peanut butter to bake with? Share below!
Step 4: Whisk the chocolate pudding mix with the milk until it thickens. Fold in one cup of Cool Whip gently until it’s all combined. Spread this pudding layer right on top of the peanut butter layer.
Step 5: Spread the rest of the Cool Whip over the top of the pie. Use a spatula to make it smooth or wavy. Let the whole pie chill in the fridge for a few hours until it is firm.
Step 6: Melt 2 tablespoons of peanut butter in the microwave for 15-20 seconds. Stir it until it is smooth and drippy. Spoon it into a small baggie and snip off a tiny corner.
Step 7: Drizzle the melted peanut butter across the pie one way. Then warm up your hot fudge and drizzle it the other way. It looks so pretty and fancy. No bake treats are so fun to decorate.
Step 8: Use a piping bag with a star tip to swirl extra Cool Whip around the edge. Top it all with mini Reese’s Pieces and mini peanut butter cups. This is the best part for little helpers to do.
Creative Twists
… Swap the Oreo crust for crushed graham crackers mixed with butter and a pinch of salt.
… Use a white chocolate pudding mix instead of chocolate fudge for a sweeter, creamier filling.
… Add a layer of sliced bananas on top of the peanut butter layer for a classic flavor combo.
Which one would you try first? Comment below!
Serving & Pairing Ideas
Serve this pie chilled straight from the fridge for the best texture. It is so rich, a small slice goes a long way. Pair it with a cold glass of milk to balance the sweetness. You could also add a sprinkle of flaky sea salt on top before serving. That little salty crunch makes the chocolate and peanut butter sing. Peanut butter custard pie is another family favorite. Which would you choose tonight?
Keeping Your Peanut Butter Pie Fresh and Tasty
This pie is a dream to make ahead. It stores beautifully in the fridge for up to three days. Just cover it loosely with plastic wrap or foil. I remember my first time making a no-bake dessert for a family picnic. I was so nervous it would melt in the sun. It stayed perfectly chilled and creamy. That is why proper storage matters. It keeps your hard work safe and your pie delicious. You can also freeze this pie for up to a month. Wrap it well in plastic wrap and then foil. When you want a slice, let it thaw in the fridge overnight. Batch cooking saves time for busy weeks. Make two pies at once and freeze one. Then you have a treat ready for unexpected guests. Have you ever tried storing it this way? Share below!
Common Problems and Easy Fixes
Sometimes the filling can be too soft. This happens if the cream cheese is not at room temperature. Let it sit out for thirty minutes before mixing. I once rushed and had lumpy filling. I had to start over. Now I always plan ahead. Another issue is a soggy crust. Press the crumbs firmly into the pan. Chilling the crust before adding the filling helps a lot. The pudding layer can also be runny. Let it thicken completely before folding in the Cool Whip. Why does this matter? Fixing these small problems makes your pie look and taste perfect. It also builds your confidence in the kitchen. You will feel proud serving a beautiful homemade dessert. Which of these problems have you run into before?
Your Quick Questions, Answered
Can I use creamy peanut butter instead of crunchy?
Yes, you can absolutely use creamy peanut butter instead of crunchy. In fact, the recipe calls for creamy peanut butter in the filling and the drizzle. Creamy peanut butter blends smoothly into the cream cheese mixture. This gives you a silky, lump-free filling. Crunchy peanut butter would add little bits that might change the texture. For the best results, stick with creamy. It makes the pie layers smooth and dreamy. You will love how easy it spreads. Give it a try for a perfect peanut butter dessert experience.
How long does this pie need to chill before serving?
This pie needs at least four hours to chill before serving. That gives the pudding layer time to set firmly. For the best results, chill it overnight. This allows all the flavors to come together beautifully. I used to rush and serve it after just two hours. The slices were messy and the layers ran together. Now I always plan ahead. Proper chilling ensures clean, beautiful slices every time. Your family will be impressed with how professional it looks. Patience truly pays off with this no-bake treat.
Can I substitute the chocolate crust with a graham cracker crust?
Yes, you can use a graham cracker crust instead of chocolate. It will still taste delicious. The graham cracker crust adds a lighter, buttery flavor. It pairs nicely with the rich peanut butter and chocolate pudding layers. Just be sure to use the same amount of melted butter. Press the crumbs firmly into the pan. Chill it just like the Oreo crust. My neighbor once tried this swap and loved it. She said it made the pie less sweet. Give it a try and see which version you like best. Either way, you get a wonderful homemade dessert.
What can I use instead of cream cheese for a dairy-free version?
You can use a dairy-free cream cheese alternative. Many stores sell vegan cream cheese that works well. Look for brands made from coconut oil or nuts. These spread and mix just like regular cream cheese. You can also use soaked and blended cashews for a natural option. This swap keeps the pie creamy and tangy. I have made this for friends with dairy allergies. They could not tell the difference. Make sure your Cool Whip is dairy-free too. Some brands offer coconut-based whipped topping. Your pie will be just as tasty and everyone can enjoy it. This is a great way to share a no-bake dessert with everyone.
Do I need to refrigerate leftovers, and how long do they last?
Yes, you must refrigerate leftovers right away. This pie has dairy ingredients that can spoil at room temperature. Cover the pie tightly with plastic wrap or use a cake carrier. It will stay fresh in the fridge for up to three days. After that, the texture starts to change and it may get watery. I always label my leftovers with the date. This helps me remember when to eat them. You can also freeze leftover slices for up to a month. Wrap each slice in plastic wrap and foil. Thaw them in the fridge overnight for a quick treat. This way, you never waste a single bite of your delicious no-bake creation.
Can I make this pie ahead of time and freeze it?
Yes, you can absolutely freeze this pie ahead of time. Prepare the pie completely, but wait to add the toppings. The Cool Whip swirl and candies are best added after thawing. Wrap the pie tightly in plastic wrap and then a layer of foil. It will keep in the freezer for up to one month. When you are ready to serve, let it thaw in the refrigerator overnight. Then add the fresh Cool Whip swirl, drizzle, and candies. This is my favorite trick for holiday baking. It saves so much time and stress. Your pie will taste just as fresh as the day you made it. This is a perfect make-ahead dessert recipe for busy schedules. Which tip will you try first?
A Warm Goodbye from My Kitchen to Yours
Thank you for spending time with me today. I hope these tips help you make the best pie ever. Remember, cooking is about love and sharing. Every pie you make tells a story. Your family will taste the care in every bite. I would love to hear how your pie turns out. Have you tried this recipe? Tell me about your experience in the comments. Did you make any fun changes? Your ideas might help another reader. Keep baking, keep sharing, and keep making memories. Fun fact: The original Oreo cookie was created in 1912. That is over one hundred years of cookie magic! Happy cooking! —Grace Ellington.

Simple No-Bake Chocolate Peanut Butter Pie
Description
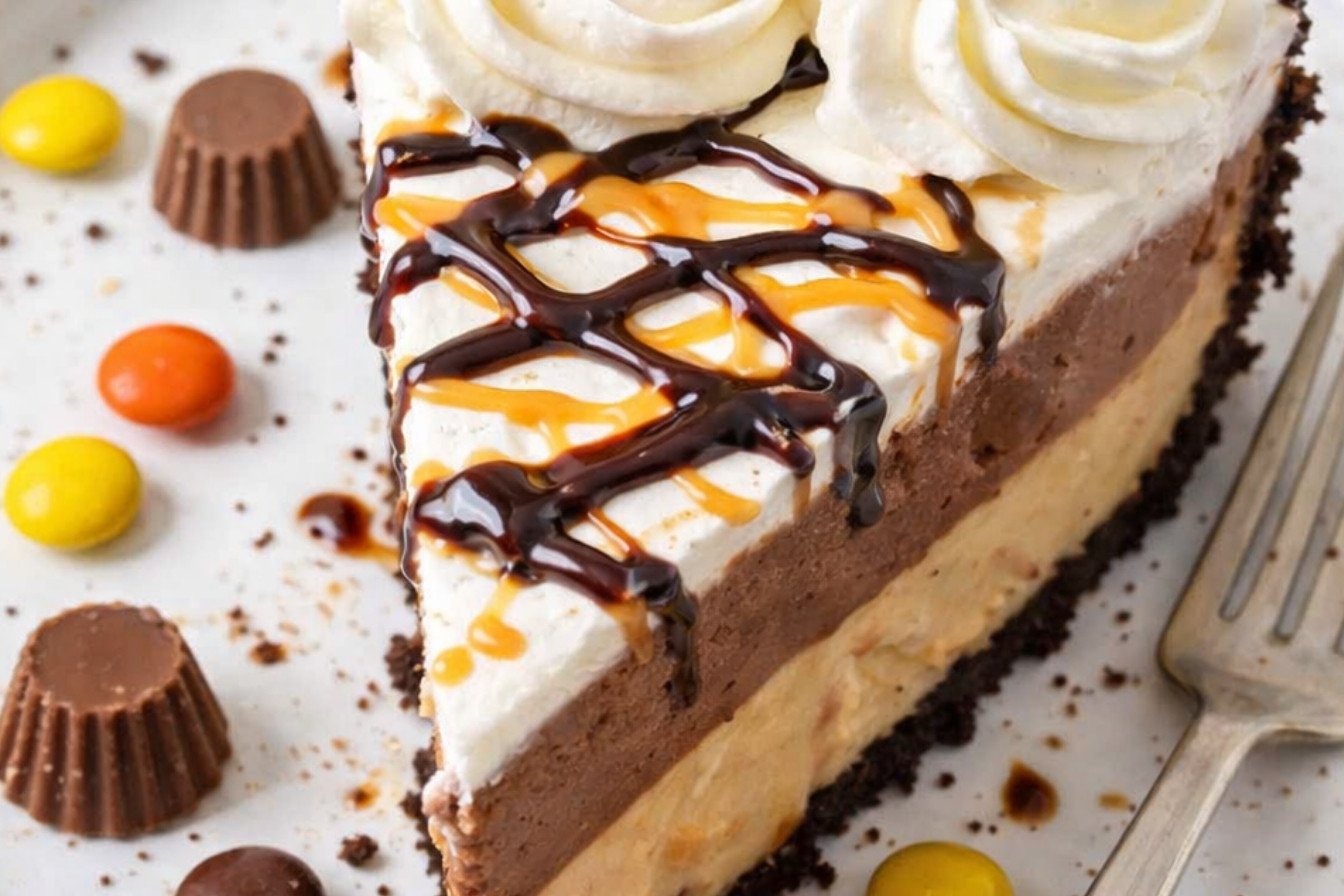
A rich and creamy no-bake pie with layers of Oreo crust, peanut butter cheesecake, chocolate pudding, and topped with Cool Whip, peanut butter drizzle, hot fudge, and mini Reese’s candies.
Ingredients
Instructions
- Crush the Oreo cookies with the cream filling still in them in a food processor. Mix the crumbs and melted butter.
- Press evenly onto the bottom and sides of a 9-inch pie plate. Refrigerate while you make the filling.
- Beat the cream cheese, powdered sugar, and 1/2 cup of peanut butter until creamy. Fold in 1/2 cup Cool Whip gently until light and fluffy. Spread in the bottom of the pie crust.
- Whisk together the dry pudding mix and milk. Let it set until thickened. Gently fold in 1 cup Cool Whip until combined. Spread the pudding evenly over the peanut butter layer.
- Spread 1 1/2 cups of Cool Whip evenly over the top of the pie, then refrigerate until thoroughly chilled.
- Place the 2 tablespoons of peanut butter in a microwave-safe bowl. Heat for 15-20 seconds. Stir until melted and creamy.
- Spoon into a small ziplock baggie, then cut off one corner. Drizzle across the top of the chilled pie.
- Place the hot fudge in a small ziplock baggie and cut off one corner. Drizzle across the pie in opposite directions.
- Fit a piping bag with icing tip 1M and swirl the remaining Cool Whip around the edge of the pie. Top with mini Reese’s Pieces and mini peanut butter cups.
Notes
- For best results, chill the pie for at least 2 hours before serving. You can substitute regular Oreos with gluten-free Oreos if desired.