
My First Fudge That Wouldn’t Set
The first time I tried to make no-bake fudge, I used the wrong peanut butter. It was the runny kind from the health food store. The fudge never got firm, it just stayed a soupy mess. I still laugh at that. My husband called it “peanut butter soup.” So let me save you from that mistake. This recipe uses natural peanut butter, but make sure it is the thick, stirred kind. You know, the one where the oil sits on top? Stir it well before you scoop. Trust me on this one.
Doesn’t that smell amazing when you mix the vanilla and maple syrup? It is like a warm hug in a bowl. I always let my granddaughter sniff the spoon. She says it smells like a candy store. That is why I love this recipe so much.
Why This Fudge Is So Good for Busy Days
This fudge comes together in ten minutes. No oven, no stove, no waiting for butter to soften. You just stir, pour, and freeze. That is a big deal when you have homework, chores, or a hungry family. Why this matters: You can make a treat without heating up the whole kitchen. On a hot summer day, that is pure magic. You also avoid all the sticky mess of boiling sugar.
Another thing I love: there is no refined sugar in this. It uses maple syrup for sweetness. That means the fudge is a little kinder to your tummy. Why this matters: You can share it with friends who eat differently than you. It is vegan, it is gluten-free, and it still tastes like a real dessert. Nobody will guess it is “healthy.” I promise.
Pick Your Own Toppings Adventure
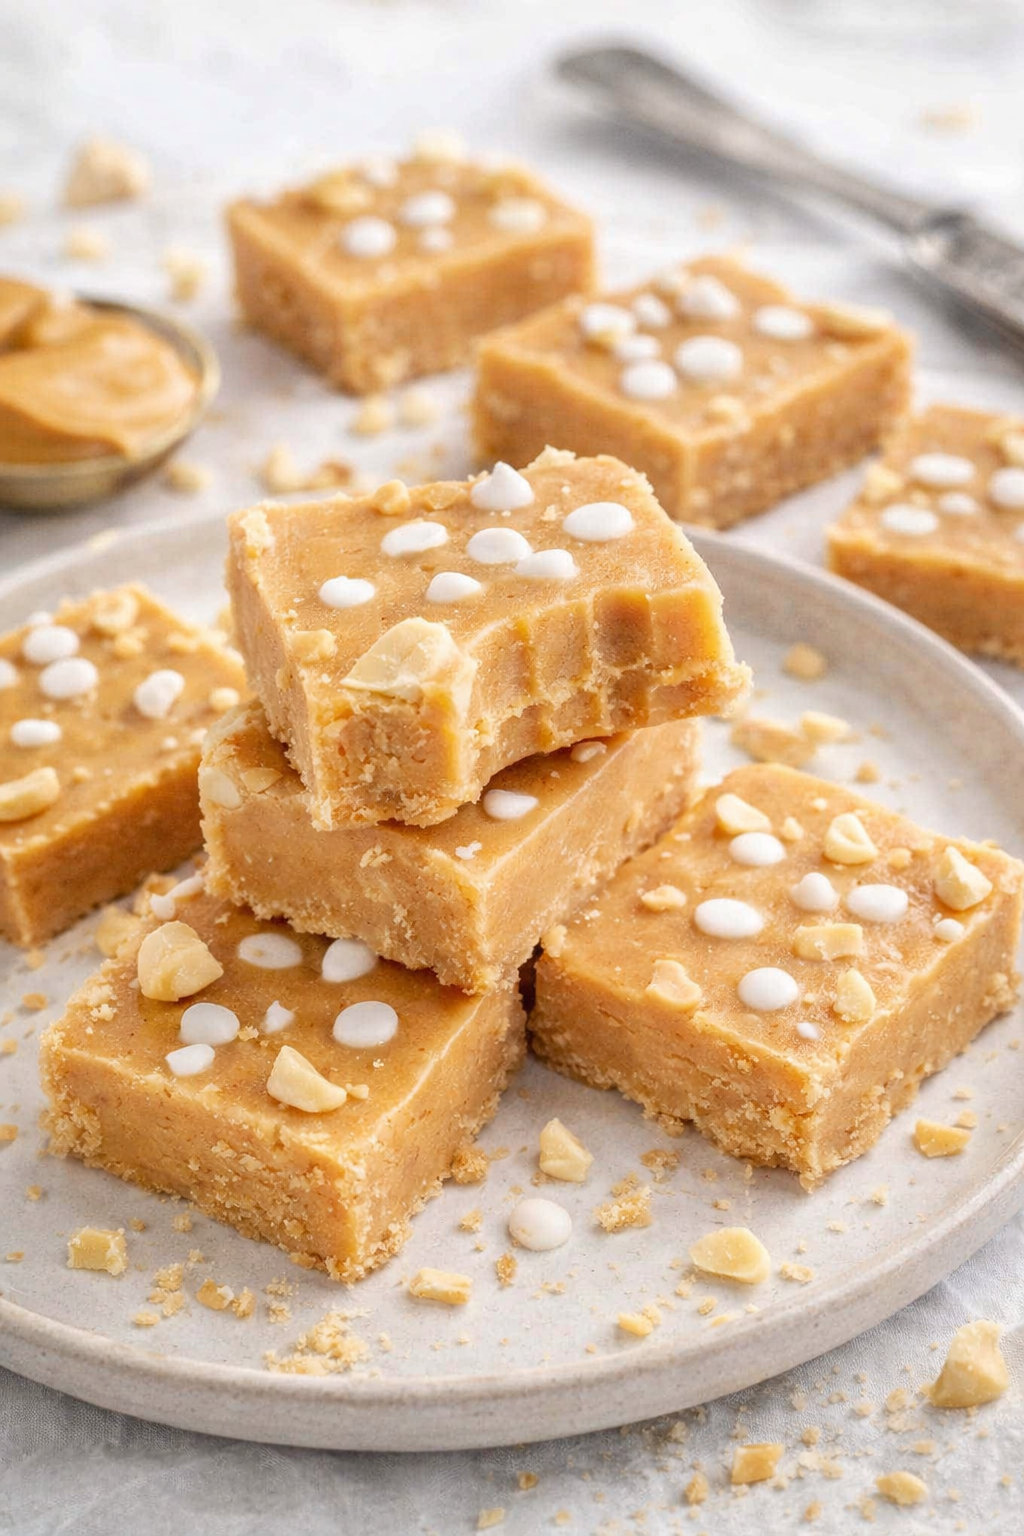
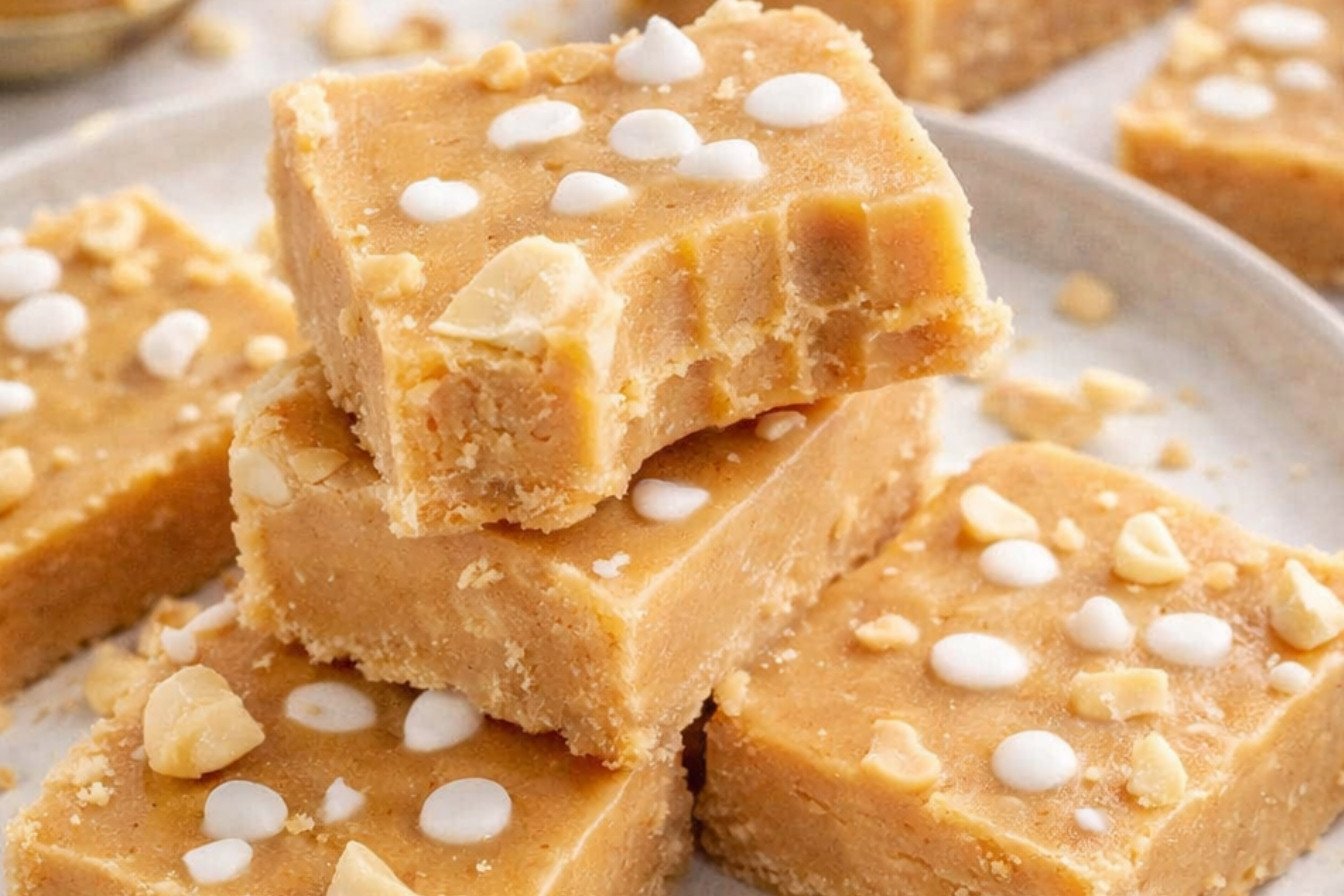
Here is where the fun begins. You get to choose one or two toppings. I love crushed peanuts and a sprinkle of sea salt. That salty-sweet combo gets me every time. My grandson piles on vegan chocolate chips and shredded coconut. He calls it his “snowy fudge.” What is your dream topping? Think about what you love in a candy bar. That is your answer.
I once made a batch with diced chocolate chip cookies crumbled on top. Oh my, that was something special. The cookie bits stayed crunchy against the creamy fudge. Have you ever tried putting cookies on top of fudge? It is a game changer. You should try it at least once.
A Little History of Fudge Everyone Loves
Fudge has been around since the late 1800s. Some say a candy maker in Baltimore messed up a batch of caramels. The result was a soft, creamy, chocolate square. They called it “fudge” because they “fudged” the recipe. I love that story. Mistakes can become treasures. This version is extra special because you do not need a candy thermometer.
Fun fact: The original fudge recipe used sugar, butter, and milk. It took forever to stir by hand. My grandmother said her arms would ache for hours. This no-bake version is the lazy cook’s best friend. Do you have a favorite old-fashioned candy story from your family? I would love to hear it.
The Secret to Perfect Slices
Do not skip the step of letting the fudge sit on the counter after freezing. If you try to slice it straight from the freezer, it will crack. I learned that the hard way. My first batch looked like a broken puzzle. So wait ten minutes. Then run your knife under hot water before cutting. Clean slices every time.
Store these squares in the fridge or freezer. They stay good for about two weeks. But in my house, they disappear in two days. How long do you think these would last in your kitchen? Be honest. I will not judge.
How to Make It Your Own
You can swap the peanut butter for almond butter or sunflower seed butter. Just make sure it is thick and unsweetened. The coconut oil is important too. It helps the fudge get firm in the freezer. Do you think creamy or crunchy peanut butter is better? I like both, but crunchy gives a nice little crunch.
If you want it sweeter, add an extra tablespoon of maple syrup. If you like it saltier, add a pinch of salt to the mixture. This recipe is very forgiving. It is like a blank canvas for your sweet tooth. What toppings will you choose today? I am rooting for the cookie crumbles.
One Last Sweet Reminder
These fudge squares are perfect for gifts. Wrap them in parchment paper and tie with kitchen twine. I gave a batch to my mail carrier last year. He smiled so big. Small treats can make someone’s whole day better. That is why I love sharing food. It is love you can hold in your hand.
So grab your peanut butter and your coconut oil. Stir with love. Freeze with patience. And enjoy every single bite. Who will you share your first square with? I hope it is someone who deserves a sweet surprise.
Instructions
Step 1: Grab a medium bowl and your best stirring spoon. Measure out 3/4 cup of natural peanut butter. I love the kind that’s just peanuts and salt. Drizzle in 1/3 cup of melted coconut oil. (A quick tip: melt your coconut oil gently so it doesn’t get too hot.)
Step 2: Pour in 3 tablespoons of maple syrup and 1 teaspoon of vanilla extract. Stir everything together until it’s smooth and shiny. This mix smells so good, like a cozy kitchen hug. Doesn’t that smell amazing? What is your favorite baking smell? Share below!
Step 3: Line a small loaf pan with parchment paper. Let the paper hang over the edges a little. Now pour your peanut butter mixture right in. Tilt the pan gently to spread it even. I still giggle when I tilt pans, it feels like a little dance.
Step 4: Now for the fun part, add your toppings. You can use chopped peanuts, a sprinkle of sea salt, or even vegan chocolate chips. I once added crushed cookie pieces on top. My grandkids called it “crunchy fudge heaven.” Pop the pan in the freezer for at least one hour.
Step 5: After an hour, take the pan out. Let it sit on the counter for 10 to 15 minutes. This makes unmolding super easy. Lift the parchment paper and slice into small squares. They melt in your mouth, I promise.
Creative Twists
… Swap the maple syrup for honey if you want a different sweetness.
… Add a swirl of melted dark chocolate on top before freezing.
… Mix in some crushed pretzels for a salty-crunchy surprise.
Which one would you try first? Comment below!
Serving & Pairing Ideas
These fudge squares are perfect with a cold glass of milk. I also love crumbling them over a bowl of vanilla ice cream. For a fancy touch, sprinkle a tiny pinch of flaky sea salt on top. Which would you choose tonight?
Storing and Reheating Your Fudge like a Pro
I remember the first time I made this no-bake peanut butter fudge. It melted in my hands before I even took a bite. So I learned to store it right. Keep your fudge in a sealed container in the fridge. It stays firm and fresh for up to two weeks. You can also freeze it for up to three months. Just layer pieces between wax paper. To serve, let it sit on the counter for ten minutes. This softens it just enough. Have you ever tried storing it this way? Share below! Batch cooking matters because you always have a treat ready. It saves time and keeps you from buying sugary snacks at the store.
Three Common Fudge Fixes You Need to Know
Sometimes your fudge turns out too soft. I once added too much coconut oil. The fix is easy: chill it longer or add a spoonful of extra peanut butter. If your fudge is too crumbly, you likely used too much maple syrup. Just stir in a bit more melted coconut oil next time. Another issue is sticking to the pan. Always line your pan with parchment paper. It makes lifting the fudge out simple. Which of these problems have you run into before? Fixing these mistakes helps you feel confident in the kitchen. It also makes your fudge taste perfectly sweet and creamy every time.
Why this matters: when you know how to fix common issues, you become a better cook. You learn to trust your hands and taste. Fun fact: fudge got its name from a mistake in the late 1800s when a candy batch didn’t set right. That mistake became a beloved treat.
Your Quick Questions, Answered
How long does peanut butter fudge take to set?
This fudge needs at least one hour in the freezer to set. If you have time, let it sit for two to three hours. That makes it extra firm and easy to slice. For fridge setting, allow four to six hours. Patience is key. Which tip will you try first?
Can I use natural peanut butter for this fudge?
Yes, natural peanut butter works great here. Just make sure it is unsweetened and well-stirred. Some natural brands have oil on top. Stir it until smooth before mixing. This keeps the fudge from separating. It also gives a pure, nutty flavor. I always use natural peanut butter in my kitchen.
How many calories are in a peanut butter fudge square?
Each square has about 129 calories. This is based on cutting the loaf into eight pieces. The calories come mostly from healthy fats in peanut butter and coconut oil. It is a rich, satisfying treat. Enjoy one square after dinner. It is sweet but not too heavy.
What is the best way to store peanut butter fudge?
Store your fudge in an airtight container in the fridge. It stays good for up to two weeks. For longer storage, freeze it. Wrap each piece in wax paper, then place in a freezer bag. It stays fresh for three months. Thaw on the counter for ten minutes before eating.
Can I add chocolate chips or cocoa powder?
Yes, you can add chocolate chips or cocoa powder. Fold in one tablespoon of cocoa powder for a chocolate-peanut butter flavor. Or stir in a handful of mini chocolate chips before freezing. Both options add a fun twist. I like adding vegan chocolate chips for extra sweetness.
Why is my peanut butter fudge too soft or too crumbly?
Too soft means you used too much coconut oil or maple syrup. Add a little more peanut butter next time. Too crumbly means not enough liquid. Add a teaspoon of melted coconut oil. Freeze for an extra hour. These small changes fix the texture perfectly.
A Warm Send-Off from the Kitchen
I hope you try this simple fudge recipe. It is perfect for a quick dessert or a gift from your kitchen. I love hearing how your batches turn out. Have you tried this recipe? Tell me in the comments below. Your stories make this kitchen feel full of friends. Thank you for stopping by, and remember: good cooking comes from small, happy experiments. Happy cooking!
—Grace Ellington.
Simple Peanut Butter Fudge Squares
Description
Delightful no-bake peanut butter fudge squares with a smooth, creamy texture and optional toppings for extra crunch and flavor.
Ingredients
Instructions
- In a medium bowl, combine the peanut butter, melted coconut oil, maple syrup and vanilla extract. Stir well until smooth and uniform.
- Line a loaf pan with some parchment paper and pour the peanut butter mixture over. Tilt the pan slightly a few times to even out the surface of the fudge.
- Garnish with desired topping ingredients and place in the freezer for at least an hour to set.
- Then, take the fudge out and let it sit on the counter for about 10-15 minutes before unmolding and slicing into squares or bars.
Notes
- Store leftovers in the refrigerator for up to one week, or freeze for longer storage. For best texture, allow to sit at room temperature for a few minutes before serving.