
The Magic of a Cast Iron Pan
My old cast iron pan is my kitchen friend. It makes pizza crust so crispy and golden. I love the sound it makes when the pizza comes out. It’s a happy sizzle.
Why does this matter? That heavy pan holds heat so well. It cooks your crust evenly from bottom to top. No soggy pizza here! Do you have a favorite kitchen tool you always use?
My Secret for the Dough
I use frozen bread dough. It’s a simple trick. Let it thaw all day on the counter. Then it’s ready to stretch.
Sometimes the dough fights back. If it won’t stretch, let it rest. I set a timer for ten minutes. It always works after that. I still laugh at how stubborn dough can be. For more dough ideas, see this easy homemade pizza dough recipe for beginners.
Flavor in Every Layer
First, I brush the crust with herby oil. Doesn’t that smell amazing? Garlic, basil, oregano. It’s like a flavor hug for the dough.
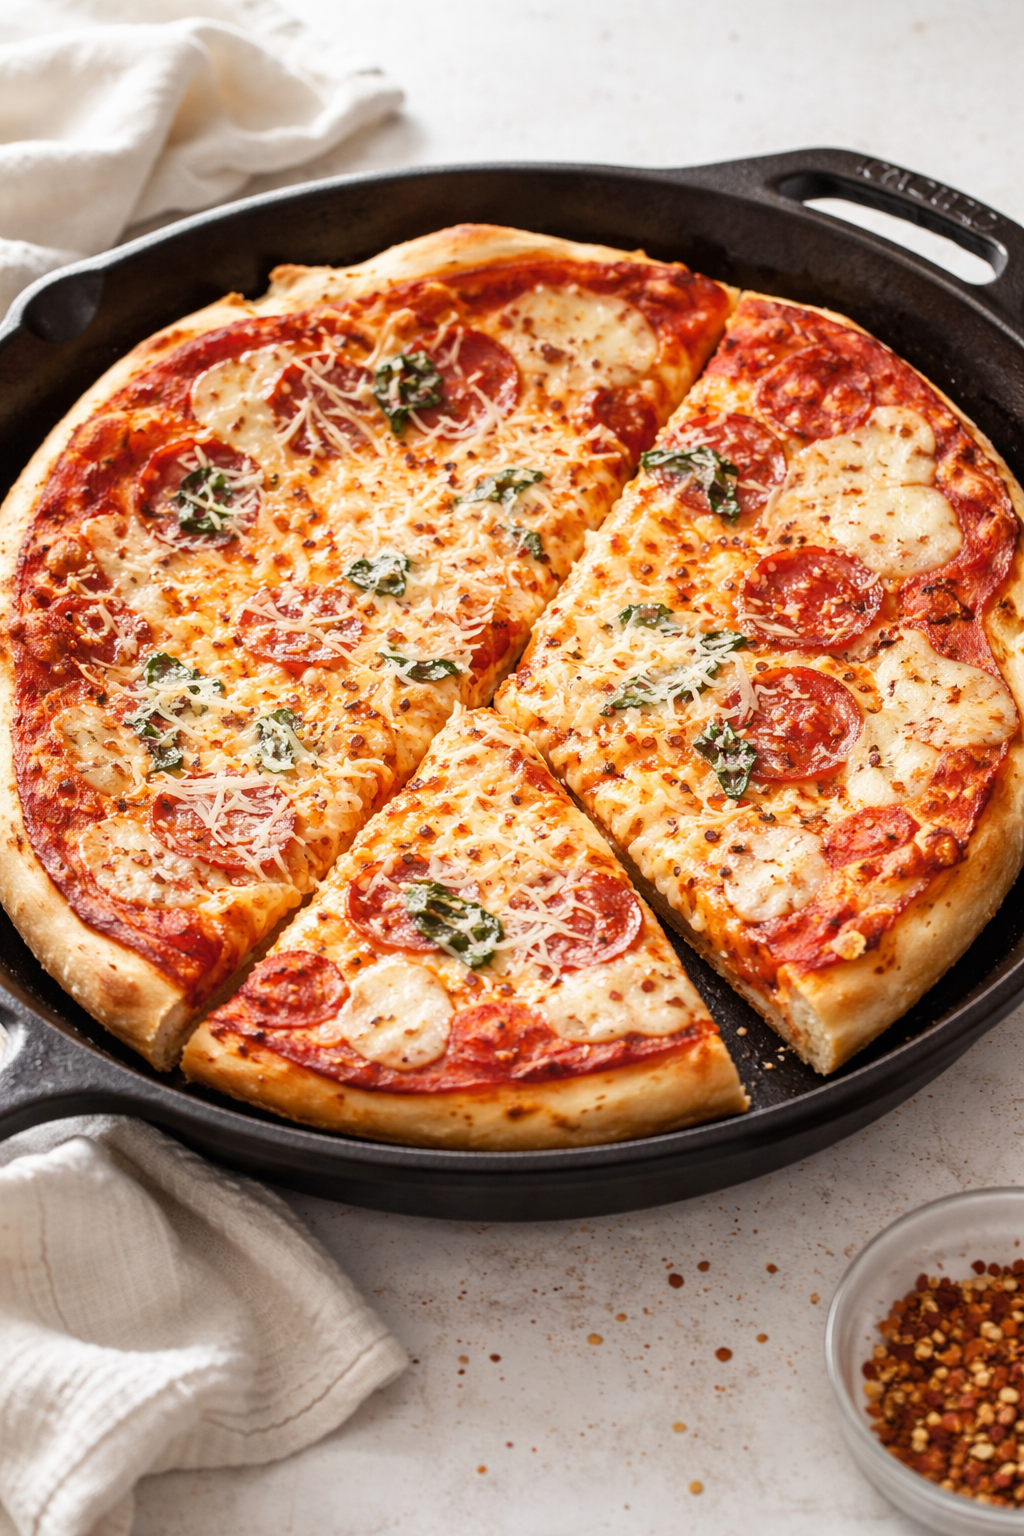
Then the toppings. I use two cheeses for the best melt. Fresh mozzarella and parmesan are perfect together. *Fun fact*: Fresh mozzarella has more moisture. That’s what gives you those lovely cheese pulls! A great pizza sauce makes all the difference too.
The Baking Trick
Here’s my little story. I once baked a pizza only at one temperature. The top wasn’t right. Now I start low, then finish high.
Bake at 350 degrees first. This cooks everything through. Then turn the heat up to 425 degrees. This makes the top golden and perfect. Why does this matter? Patience gives you the best crust. Do you prefer a soft or a crispy pizza top?
Let It Rest, Then Feast
The hardest part is waiting. Let the pizza cool for ten minutes. This lets the cheese set. Then you get clean slices.
Cut it and serve it warm. The crust will be just right. Crispy on the outside, soft inside. It’s a family favorite. This method works for other dishes too, like this cheesy pepperoni pizza tortellini bake. What’s your family’s favorite pizza topping to share?
Instructions
Step 1: First, warm your oven to 350 degrees. Grab your trusty cast iron pan. Give it a light spray with oil. This keeps everything from sticking later. I still laugh at that one time I forgot this step.
Step 2: Press your thawed dough into the pan. Be gentle and patient. If it fights you, let it rest for ten minutes. (A little rest makes dough much easier to handle.) Doesn’t that smell amazing already?
Step 3: Mix olive oil with garlic powder and dried herbs. Brush this all over the dough. Then, poke the crust with a fork a few times. This stops big bubbles from forming. Why do we poke the dough? Share below! Now bake it alone for 15 minutes.
Step 4: Take out your part-baked crust. Now for the fun part! Spread on your pizza sauce. Layer on pepperoni, all the cheese, and fresh basil. I love how the cheeses melt together.
Step 5: Bake it for 25 minutes at 350. Then, turn the heat up to 425. Bake for 10-15 more minutes until golden. Let it cool for ten minutes before you slice. This wait is the hardest part!
Creative Twists
Try a creamy Alfredo sauce instead of tomato.
Make mini pizza sandwiches with the leftover dough.
For a sweet version, think fruit pizza on a cookie crust!
Which one would you try first? Comment below!
Serving & Pairing Ideas
Serve your pizza with a simple green salad. It’s a fresh contrast. For a heartier meal, try it with a side of cheesy tortellini bake. Leftovers are great for breakfast, just like an easy breakfast pizza. Which would you choose tonight?
Keeping Your Pizza Perfect for Later
Let’s talk about storing your delicious pizza. First, let it cool completely. Then, wrap slices tightly. Use plastic wrap or foil. You can keep it in the fridge for three days. For longer storage, the freezer is your friend. Wrap slices well and freeze them for up to two months.
I remember my first deep dish. I was so proud! I wrapped the leftovers warmly. But I put them in the fridge too soon. The steam made the crust soggy. Now I always wait. Storing food right saves your hard work. It also means a tasty lunch tomorrow. Have you ever tried storing it this way? Share below!
Reheating is simple for a crispy crust. Use your oven or toaster oven. Bake at 375°F until warm. Your cast iron pan can help too! Warm a slice in the pan on the stove. Batch cooking makes life easier. Make two pizzas and freeze one. Future you will be so thankful for that ready-made meal.
Simple Fixes for Common Pizza Problems
We all face little kitchen troubles. Here are three easy fixes. First, a soggy crust. Always pre-bake your crust. Prick it with a fork first. This stops big bubbles, too. I once skipped this step. My pizza was a soupy mess!
Second, toppings that slide off. Put cheese down first. Then add your pizza sauce and pepperoni. The cheese acts like glue. Third, cheese that burns. Use full-fat mozzarella. It browns beautifully without burning. Low-fat cheese can dry out. Which of these problems have you run into before?
Fixing these issues builds your confidence. You learn what works. It also makes the flavor so much better. A crispy crust and melted cheese are key. Good technique turns simple ingredients into something special. *Fun fact: The high heat of cast iron creates a wonderful, crispy crust that mimics a real pizza oven!*
Your Quick Questions, Answered
How to get a crispy crust on cast iron pizza
That final high-heat blast is the secret. After baking, turn your oven to 425°F. Bake for 10-15 more minutes. This makes the crust golden and crisp. Letting the pizza cool in the pan for 10 minutes also helps. It lets the crust set. For more crust ideas, see this easy homemade dough recipe.
What temperature should I cook cast iron pizza at
Start at 350°F. This bakes the crust and melts the cheese gently. Then, increase the heat to 425°F. This final high temperature gives you that perfect, crispy, browned top. Always preheat your oven fully. A hot oven is crucial for the best results. This two-temperature method ensures everything cooks through without burning.
Should you preheat the cast iron skillet for pizza
No, do not preheat it for this deep-dish style. You start with a cold pan. Press the dough into the cold, oiled skillet. This method helps form a thick crust that goes up the sides. Preheating is for thin-crust pizzas. For our recipe, a cold pan is the right way to begin your cooking adventure.
How do you keep pizza dough from sticking to cast iron
Always grease your pan well. Use cooking spray or a brush of oil. This creates a non-stick barrier. If your dough is sticky, let it rest. After 10 minutes, it will stretch easier. Press it gently into the greased pan. Proper greasing is the simplest trick for a perfect release every single time you bake.
What is the best cheese for cast iron skillet pizza
Fresh mozzarella and Parmesan are perfect. The fresh mozzarella gives you lovely, creamy melts. The Parmesan adds a salty, nutty flavor. Together, they create the best cheese blend. Avoid pre-shredded bags. They have coatings that prevent melting. For another cheesy idea, try this pepperoni tortellini bake.
Can you make deep dish pizza in a cast iron skillet
Absolutely! A cast iron skillet is the best tool for deep dish. Its heavy weight gives a crispy, fried crust. Press your dough up the sides to form a bowl. This holds all your sauce and toppings. It turns out beautifully every time. Which tip will you try first?
From My Kitchen to Yours
I hope you love this pizza as much as I do. It’s a recipe full of cozy memories for me. Cooking should be fun, not fussy. Don’t worry if your first try isn’t perfect. Mine certainly wasn’t! The most important ingredient is always joy.
I would love to hear about your cooking adventure. Did your family enjoy it? Did you add your own special twist? Your stories make my day. Have you tried this recipe? Tell me all about it in the comments below. For a sweet finish, maybe try a summer fruit pizza next time!
Happy cooking!
—Clara Cooper


Cast Iron Skillet Pizza with Crispy Crust
Description
Cast Iron Deep Dish Pizza
Ingredients
Instructions
- Turn the oven to 350 degrees.
- Lightly spray your cast iron pan (I like to use a 10 or 12 inch pan) with cooking spray or brush with oil.
- Gently press your thawed Rhodes bread dough along the bottom and up the sides of your cast iron pan. If it isn’t stretching nicely give it about 10-15 minutes to rest and try again.
- Mix the olive oil, garlic powder, dried basil, and oregano together and lightly brush it on to your prepared crust.
- To prevent bubbling, use a fork to prick a few holes in your crust. Bake your crust for 15 minutes.
- Remove from the oven and add your sauce, pepperoni, cheeses, and fresh basil.
- Bake for 25 minutes at 350 degrees.
- Turn the heat up to 425 degrees and bake an additional 10-15 minutes or until golden brown.
- Let cool for about 10 minutes before cutting and serving.
Notes
- Nutrition per serving: Calories: 335kcal | Carbohydrates: 28g | Protein: 16g | Fat: 16g | Saturated Fat: 7g | Cholesterol: 39mg | Sodium: 860mg | Potassium: 103mg | Fiber: 1g | Sugar: 1g | Vitamin A: 395IU | Vitamin C: 1mg | Calcium: 314mg | Iron: 1mg