

My Pear Memory
When I was a little girl, my grandma would bake pears on chilly autumn nights. The whole kitchen would fill with a sweet, warm smell. I still remember standing on a stool to watch her. She said pears were like shy friends who needed a little heat to show their sweetness. I still laugh at that because she was right. Have you ever had a baked pear before?
This recipe reminds me of her. It is simple and honest. You do not need fancy tools or special skills. Just a knife, a spoon, and a baking dish. That is all. Doesn’t that sound nice?
Why Pears Are Perfect
Pears are not just sweet. They are also full of fiber, which helps your tummy feel good. When you bake them, they get soft and almost creamy. A little cinnamon makes them taste like a warm hug. This is why this matters: you can have a real dessert that is also good for you.
Another reason I love pears is because they do not need much sugar. Their own juice gets sweeter in the oven. That means less added sugar in your bowl. And a sprinkle of salt brings out all the hidden flavors. Does that surprise you?
The Cozy Streusel Topping
The best part of this dessert is the crumbly topping. You mix flour, brown sugar, butter, maple syrup, cinnamon, salt, and allspice. Then you stir in some granola. It becomes a little crunchy blanket for the pears. The butter makes everything smell like a bakery.
Here is why this matters: that streusel is what makes a simple fruit feel like a party. It gives you a little crunch with every soft bite. And you can use whatever granola you have in your pantry. What kind of granola do you like best?
A Little Trick for Baking
One thing I learned the hard way: pears want to wobble. If you cut them in half, they do not sit flat. So you must slice a tiny piece off the bottom of each half. That way they stay steady in the dish. Then you pour apple juice around them, not on top.
The steam from the apple juice helps the pears get soft. Cover the dish with foil for the first 30 minutes. Then take the foil off and bake five more minutes. That last step makes the streusel extra crispy. Have you ever baked fruit with juice before?
The Yogurt Surprise
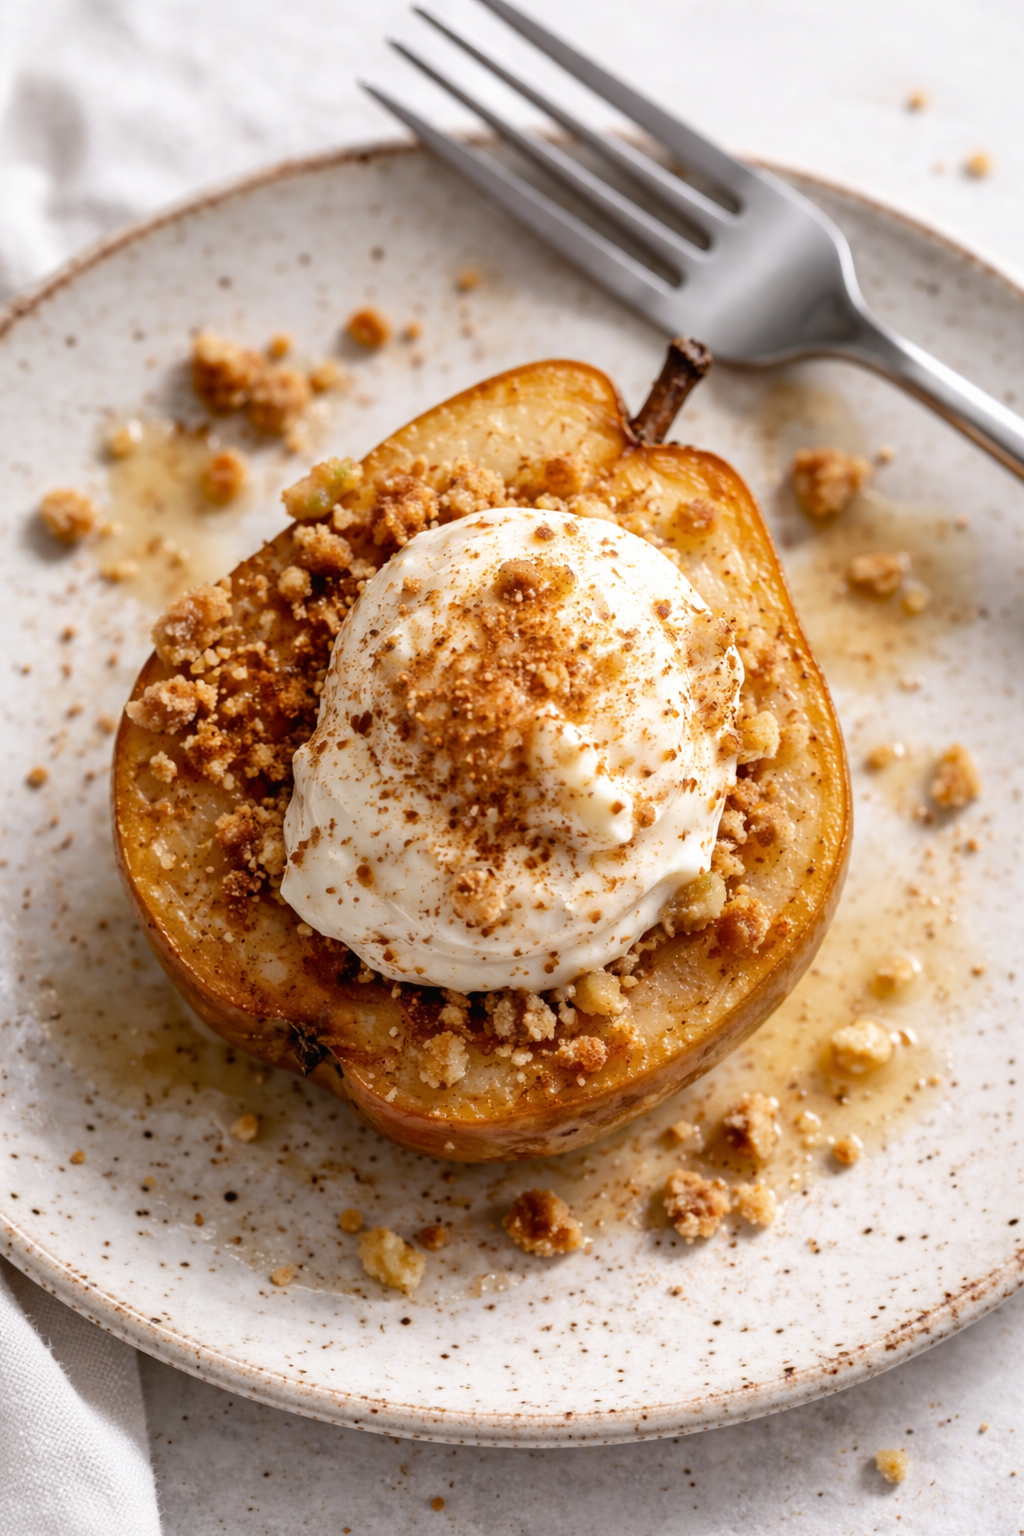
Now here is a twist I love. You serve each warm pear half with a big scoop of plain Greek yogurt. The cold, tangy yogurt is a perfect friend for the sweet, warm pear. It is like a little dance in your mouth. And a drizzle of the cooking liquid on top is like a secret treasure.
This dessert is ready in 30 minutes flat. That is less time than a TV show. You can make it after dinner or even for a fancy breakfast. Would you eat this for breakfast? I have, and it was wonderful.
A Little Pear History
Fun fact: Pears have been around for over 3,000 years. People in ancient China and Europe both grew them. They were a symbol of good luck and long life. So when you bake these pears, you are cooking something very old and very special.
D’Anjou pears are best for this recipe because they hold their shape. They do not turn into mush. You want a pear that stays a little firm. That way you get a soft pear that still looks like a pear. What is your favorite type of pear?
Your Turn to Bake
I hope you try this recipe soon. It is easy enough for a beginner and fancy enough for guests. The ingredients are simple things you might already have. Butter, brown sugar, flour, and cinnamon are kitchen friends. And the granola makes it fun.
Tell me, do you think you will make this for someone you love? Or maybe just for yourself? Both are good reasons. I would love to hear how it turns out for you.
Instructions
Step 1: Preheat your oven to 375°F. This gives it time to get nice and hot while you work. I still remember my first pear dish burning because I rushed the oven.
Step 2: In a small bowl, mix flour, brown sugar, melted butter, maple syrup, cinnamon, salt, and allspice. Stir in the granola until everything looks like crumbly sand. (Pro tip: Melt the butter slowly so it doesn’t splatter everywhere.)
Step 3: Cut each D’Anjou pear in half lengthwise. Use a melon baller or spoon to scoop out the core gently. Trim a tiny slice off the bottom so each half sits flat in your baking dish. Doesn’t that smell amazing already?
Step 4: Spoon your streusel mixture into the hollow of each pear half. Pack it in lightly but don’t squish the pear. Pour the apple juice around the pears in the dish, not over them. What is your favorite fruit to bake with? Share below!
Step 5: Cover the dish tightly with foil and bake for 30 to 35 minutes. Remove the foil and bake another 5 minutes until the pears are fork-tender. The juice will turn into a lovely syrup.
Step 6: Serve each pear half warm with a dollop of Greek yogurt and extra streusel on top. Drizzle a little of that cooking liquid over everything for extra sweetness. This reminds me of the cozy cinnamon sandwich cookies my grandma used to make.
Creative Twists
… Swap the cinnamon swirl granola for crushed ginger snaps for a spicy kick.
… Use chopped walnuts instead of granola for a nutty, crunchy topping.
… Replace apple juice with orange juice and add a pinch of nutmeg for a citrusy twist, like those walnut swirl pastries.
Which one would you try first? Comment below!
Serving & Pairing Ideas
These pears are lovely with a scoop of vanilla bean ice cream instead of yogurt. They also pair well with a warm mug of spiced tea. For a pretty plate, drizzle a little honey and sprinkle extra cinnamon on top. It feels fancy but takes hardly any work, just like those spiced pfeffernusse cookies I bake for the holidays. Or try them with a side of crunchy honey cinnamon cookies for dipping. Which would you choose tonight?
Storing and Reheating Your Baked Pears
Baked pears are a treat you can share with the whole family. I remember the first time I made them for my grandchildren. They loved the warm cinnamon filling so much, we had no leftovers.
If you do have leftovers, store them in a sealed container in the fridge. They will stay fresh for up to three days. When you want to enjoy them again, reheat them gently in the oven at 300 degrees for about ten minutes. You can also pop them in the microwave for thirty seconds. Batch cooking is a lifesaver on busy nights. You can make a double batch on Sunday and have a warm dessert ready all week. Have you ever tried storing it this way? Share below! This matters because it saves time and prevents food waste. We all deserve a sweet treat without extra work.
Common Problems and Easy Fixes for Baked Pears
Sometimes the pears turn out too mushy. I once left mine in the oven for an extra ten minutes. They turned into pear sauce. The fix is simple: check them at the 25-minute mark with a fork. You want them tender but not falling apart.
Another issue is the topping getting soggy. That happens if you cover the dish too long. Uncover them for the last five minutes like the recipe says. This lets the granola and cinnamon topping get nice and crisp. A third problem is the pears not sitting flat. Just cut a small slice off the bottom of each pear. They will stay steady in the dish. Which of these problems have you run into before? Fixing these issues matters because it builds your cooking confidence. When the pears come out perfect every time, you feel so proud. It also makes the flavors shine better.
Your Quick Questions, Answered
How to make baked pears with granola topping First, preheat your oven to 375 degrees. Cut four D’Anjou pears in half and scoop out the cores. Mix flour, brown sugar, melted butter, maple syrup, cinnamon, salt, and allspice in a small bowl. Stir in one cup of granola. Fill the pear halves with this streusel mixture. Pour one cup of apple juice into the baking dish around the pears. Cover with foil and bake for 30 to 35 minutes. Uncover and bake five more minutes until tender. Serve with Greek yogurt and a drizzle of the cooking liquid.
What are the best pears for baking? D’Anjou pears are the best choice because they hold their shape well during baking. They have a firm texture that stays tender without turning into mush. Bosc pears also work nicely with their sweet flavor and sturdy form. Avoid very soft varieties like Bartlett that can break down too quickly. The firmness of D’Anjou pears makes them perfect for holding the cinnamon granola filling. You can find them at most grocery stores year-round.
Can I make cinnamon granola baked pears ahead of time? Yes, you can prepare the streusel topping up to two days ahead and keep it in the fridge. You can also core the pears and store them in lemon water overnight to prevent browning. Assemble everything right before baking for the best texture. If you bake them fully ahead, reheat them gently in the oven. The cinnamon swirl flavors actually get deeper after a day in the fridge.
What to serve with baked pears? Plain Greek yogurt is perfect because it balances the sweetness with its tanginess. A drizzle of honey or maple syrup adds extra richness. You can also serve them with a scoop of vanilla ice cream for a special occasion. A sprinkle of chopped nuts, like walnuts or pecans, adds nice crunch. The cooking liquid left in the dish makes a lovely syrup to pour over everything. This dessert pairs well with a cup of hot tea or coffee.
Are baked pears healthy? Yes, baked pears are a healthy dessert option. Pears are full of fiber and vitamins that are good for your digestion. This recipe uses only a small amount of brown sugar and real maple syrup. The Greek yogurt adds protein and probiotics. You control how much sweetener you use. Compared to cake or cookies, this dessert is light and nourishing. It feels like a treat but leaves you feeling good instead of overly full.
Can I use store-bought granola for this recipe? Absolutely, you can use store-bought granola to save time. Just pick a plain or lightly sweetened kind without big chunks of dried fruit. The recipe calls for one cup of granola mixed into the streusel. Homemade cinnamon pastries work great too if you have them. Store-bought granola works perfectly as long as it has a nice crunch. Check the label to make sure it does not have too much added sugar. Which tip will you try first?
A Sweet Goodbye From My Kitchen to Yours
I hope these baked pears bring warmth to your table. They remind me of autumn afternoons with my family. The smell of cinnamon and baked fruit fills the whole house. It is pure comfort in a bowl. Have you tried this recipe? I would love to hear how it turned out for you. You can share your stories or questions in the comments below. Your kitchen adventures make this community so special.
Thank you for spending time with me today. Keep baking with love and sharing sweet moments with the people you care about. Happy cooking!
—Grace Ellington.


Cinnamon Granola Baked Pears
Ingredients
Instructions
- Preheat oven to 375°F.
- In a small bowl, stir together flour, brown sugar, butter, maple syrup, cinnamon, salt and allspice. Add granola and stir to combine. Set aside.
- Using a melon baller or spoon, scoop out the core from each pear half. To allow pears to sit evenly in baking dish, cut a small piece from the bottom of each pear and place in 9×13″ baking dish.
- Spoon streusel mixture evenly into pear halves.
- Pour apple juice into baking dish around pears.
- Cover baking dish with foil and bake for 30-35 minutes. Uncover and bake and additional 5 minutes or until pears are fork tender.
- Serve each pear half topped with 1/4 cup Greek yogurt and additional streusel. If desired, drizzle with cooking liquid.