
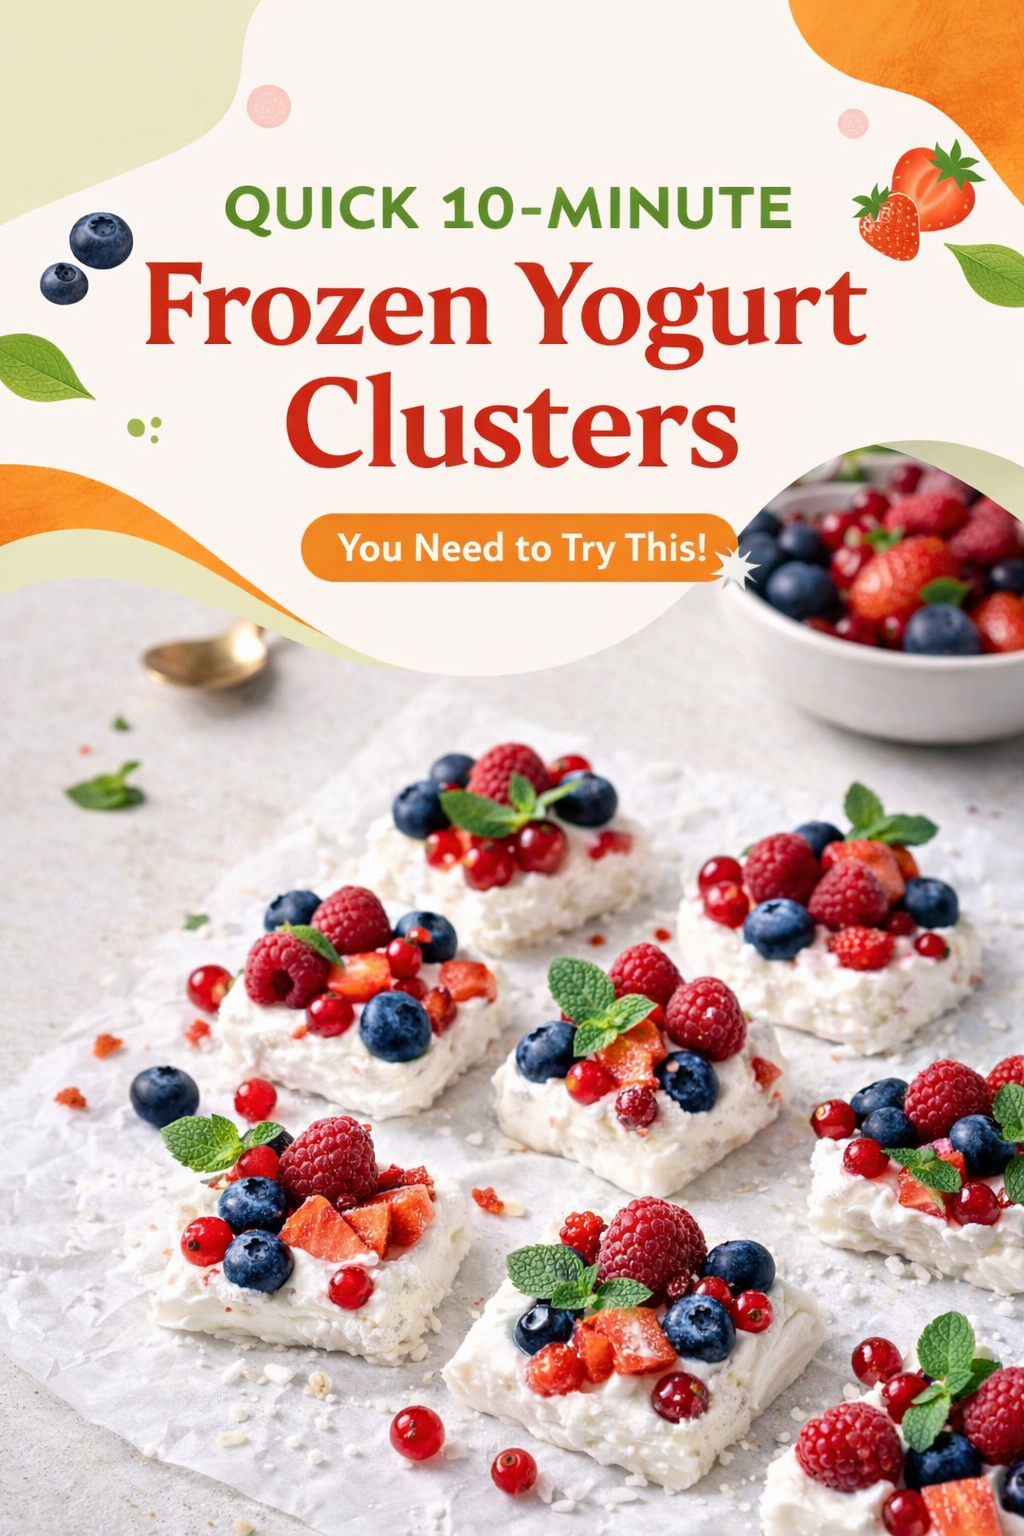
The Day I Found Frozen Yogurt Clusters
I remember a hot July afternoon when my grandkids were too restless for naps. I needed a cool snack fast. I opened the fridge and saw yogurt and berries staring back at me. That is when I first made these frozen yogurt clusters. I still laugh at how simple it was. Doesn’t that smell amazing when you mix it all together? You can find more irresistible sweet treats like this on my site. Have you ever made a frozen snack in a hurry like I did?
This recipe works because it is just five minutes of work. Then the freezer does the rest. It is a real lifesaver on busy days. Why this matters: a quick homemade snack is always better than store-bought junk. You control what goes inside. Plus, it costs less money. Have you ever tried making your own frozen treats before?
What You Need and Why
You only need a few things from your kitchen. Greek yogurt is the star here. It is thick and creamy and full of protein. Berries add sweetness without too much sugar. Honey or maple syrup is optional, but I like a tiny drizzle. Vanilla extract makes everything taste like a special dessert. If you want to explore more healthy lifestyle tips, this snack fits right in. What kind of berries do you have in your fridge right now?
Here is a little story. My friend Sally once used frozen berries because fresh ones were gone. The clusters turned out just as yummy. So do not worry if your berries are not perfect. The mint is a fun add-on if you have it. It gives a cool, fresh pop. Fun fact: Greek yogurt has more protein than regular yogurt, which keeps you full longer. Why this matters: a filling snack helps you say no to unhealthy cravings later. Do you ever add surprise ingredients to your snacks?
How to Mix It All Together
Grab a bowl and spoon in your Greek yogurt. Add the vanilla and a little honey or maple syrup if you like. Stir until it is smooth and creamy. Taste it. It should be gently sweet and smell like vanilla. If you are using lactose-free yogurt, this snack is safe for sensitive tummies. Then gently fold in your mixed berries. You can crush them a bit for a fruity swirl or leave them whole for little berry bites. Check out more appetizer ideas that are just as easy to whip up. Do you like your yogurt smooth or chunky with fruit?
I once crushed the berries too much and ended up with pink yogurt. My grandson laughed and called it “unicorn food.” We ate it anyway. It was delicious. If you have fresh mint, chop it finely and stir it in now. This step is where you make the snack your own. What funny names have your kids given your kitchen experiments?
Freezing and Shaping the Clusters
Now spoon your yogurt mixture into small silicone molds or ice cube trays. Do not overfill them. Leave a tiny space at the top so they freeze evenly. If you do not have molds, a muffin tin works great. I have used mini muffin pans many times. Pop them in the freezer for at least two hours. You can leave them longer if you want a firmer bite. For more simple snacks, check out tasty evening meals that pair well with these clusters. Have you ever frozen yogurt in ice cube trays before?
Here is a tip I learned the hard way. Do not stack the molds on top of each other in the freezer. They will stick together. Spread them out flat. Patience is key here. Waiting two hours feels long, but the result is worth it. The clusters will be just firm enough to pop out cleanly. Why this matters: freezing them right makes them easy to grab and go later. Do you ever get impatient waiting for snacks to freeze?
Popping Them Out and Adding Toppings
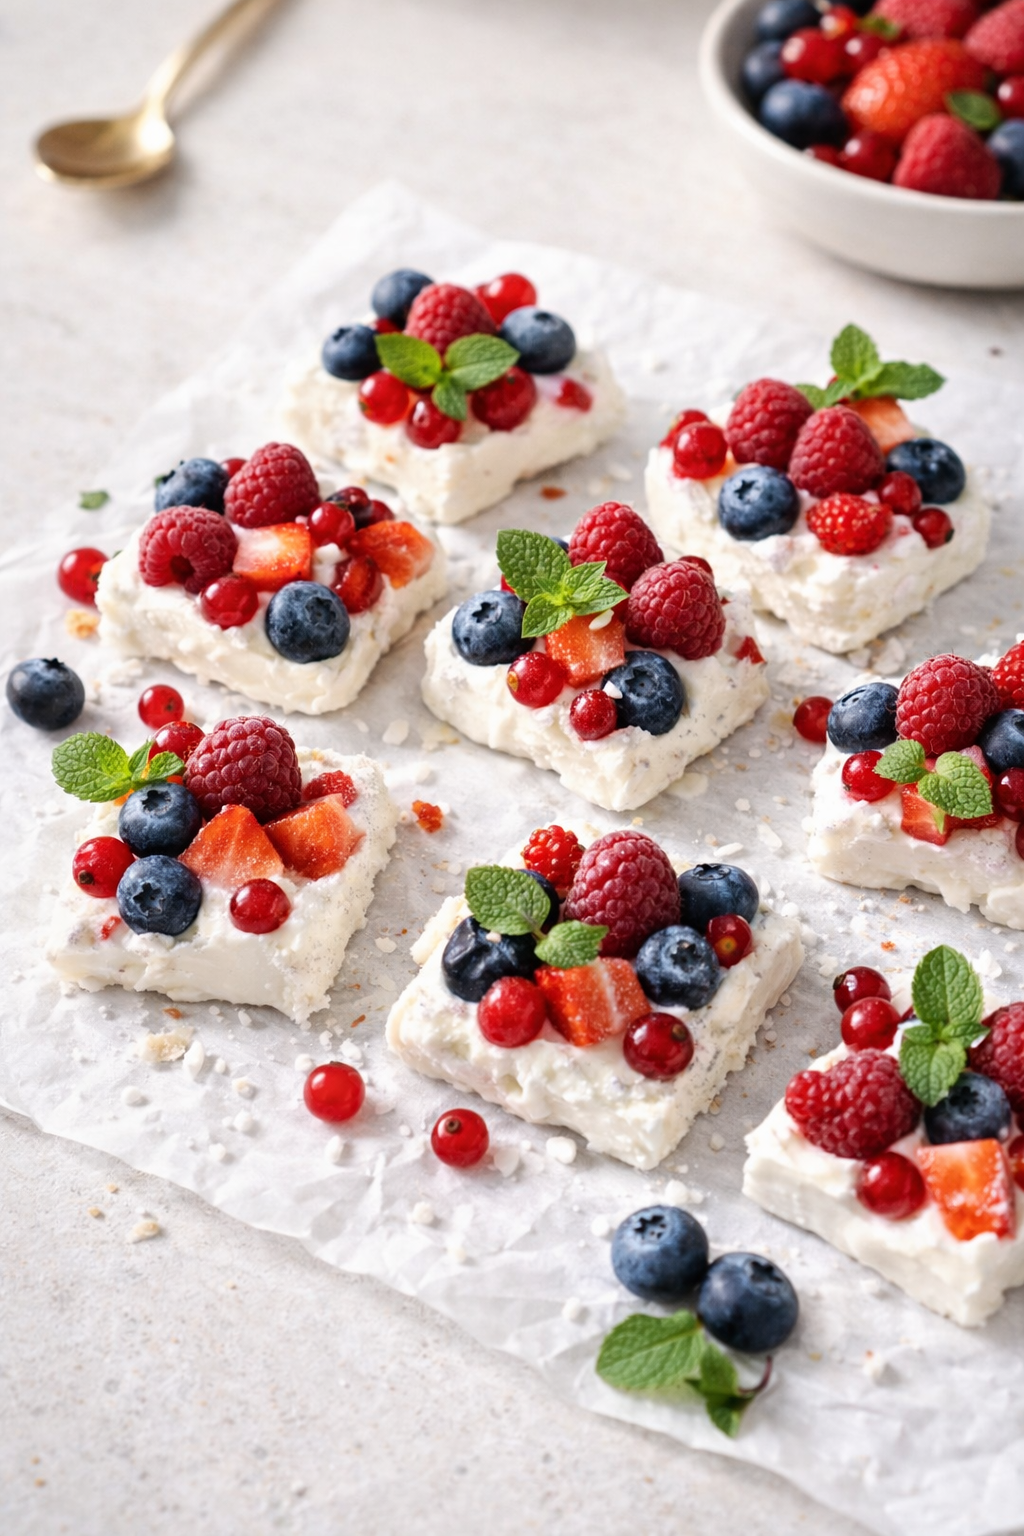
Once the clusters are frozen solid, remove them from the molds. They should pop out easily if you used silicone. If you used metal ice cube trays, run the bottom under warm water for a few seconds. Arrange them on a plate. Now comes the fun part. Sprinkle on some chopped nuts or almonds. They add a nice crunch against the creamy yogurt. You can find more perfect sides that go with these little bites. What is your favorite crunchy topping for frozen treats?
I like to serve these clusters right away while they are still frosty. They melt fast, so eat them within a few minutes. Or you can store them in a freezer bag for later. They keep for up to a week. My granddaughter loves grabbing one after school. Why this matters: having healthy snacks ready in the freezer stops you from reaching for candy. Do you have a go-to snack you keep in the freezer?
A Little Story About Sharing
Last summer, I brought a plate of these clusters to a neighborhood picnic. At first, everyone looked confused. They thought it was weird frozen yogurt. Then one brave mom tried one. She smiled big. Within ten minutes, the plate was empty. People asked for the recipe. I still laugh at how something so simple made everyone happy. If you love sharing food stories, check out beef recipes that are great for big gatherings too. Have you ever brought a simple snack that surprised everyone?
This recipe is special because it brings people together. It does not need fancy tools or expensive ingredients. Just yogurt, berries, and a freezer. You can even make it with your kids. They love helping scoop and sprinkle. Why this matters: cooking together creates memories that last longer than the snack itself. What is a recipe you love sharing with others?
Your Turn to Try
Now you have everything you need to make these frozen yogurt clusters. They take ten minutes of prep and two hours of freezing. That is it. You can change the berries, skip the honey, or add chocolate chips. Make them your own. I promise they will disappear fast. For more fun and easy recipes, visit Spoons Way and look around. Which fruit combination would you try first in your clusters?
I would love to hear how yours turn out. Did your family love them? Did you add a secret ingredient? Send me a message or leave a comment. Your ideas might end up in my next article. Let us keep making simple, joyful food together. Do you have a kitchen win you want to share with me today?
Instructions
Step 1: In a bowl, mix your Greek yogurt with vanilla and honey. Stir until it feels smooth and creamy. Did your grandma ever let you lick the spoon? Share below! (A little tip: taste it first before freezing, so you don’t end up with a boring bite.)
Step 2: Gently fold in your mixed berries, like raspberries or blueberries. You can crush them a bit for a fruity swirl or leave them whole for texture. I still remember my first batch looking like a colorful little painting.
Step 3: Spoon the mixture into small silicone molds or an ice cube tray. Don’t overfill them or they might freeze into funny shapes. Muffin tins work great too if you’re in a pinch.
Step 4: Pop the molds into the freezer for at least two hours. You can leave them longer if you want a firmer bite. Doesn’t that smell amazing? Well, wait until you taste it.
Step 5: Once frozen, pop the yogurt bites out and arrange them on a plate. Sprinkle on chopped nuts or almonds for a little crunch. Enjoy them right away or store them in the freezer for later.
Creative Twists
… Swap the berries for diced mango and a squeeze of lime for a tropical surprise.
… Drizzle a tiny bit of melted dark chocolate over the clusters before freezing. Pure magic.
… Add a pinch of cinnamon or cocoa powder into the yogurt mix for a cozy twist.
Which one would you try first? Comment below!
Serving & Pairing Ideas
Serve these clusters on a small plate with a handful of fresh mint leaves. They look so pretty next to a warm cup of tea or a glass of cold milk. You can also pile them into a bowl with granola and sliced banana for a quick breakfast. Which would you choose tonight?
For more yummy ideas, check out Spoons Way. Want sweet treats? Try this page. Need healthy tips? Visit here. Looking for sides? See these ideas.
Keeping Your Yogurt Clusters Fresh and Ready
Storing your frozen yogurt clusters right makes all the difference. I learned this the hard way when I first made a batch and they all clumped into one icy rock. Now I always freeze them on a tray first, then pop them into a zip-top bag. This keeps each cluster separate and easy to grab. You can also keep them in a sealed container for up to a month. Batch cooking matters because it means you always have a healthy treat ready for a snack attack. Have you ever tried storing it this way? Share below! For more easy kitchen wins, check out Spoons Way and our irresistible sweet treats.
Three Common Problems and Easy Fixes
Problem one: your clusters are too soft and melt fast. The fix is simple—freeze them for at least two hours, not less. I once pulled them out after one hour and ended up with yogurt soup on my plate. Problem two: they taste a little bland. Just add a pinch of salt or an extra drop of vanilla extract to your mix. Problem three: they stick to the mold. A light spray of oil on the mold before filling works wonders. Why this matters: fixing these small issues builds your cooking confidence and makes every bite taste better. Which of these problems have you run into before? For more flavor ideas, see our healthy lifestyle tips.
Your Quick Questions, Answered
Can I use Greek yogurt instead of regular yogurt? Yes, you absolutely can. Greek yogurt is thicker and creamier than regular yogurt. It makes your clusters hold together better and gives them a richer taste. If you use Greek yogurt, you might need a little less honey or syrup because it is already tangy. Just mix it well with your berries and vanilla. The result is a firmer, more satisfying frozen treat that feels like a mini cheesecake bite. This works great for anyone who wants a higher protein snack. You can find more recipe hacks at Spoons Way.
How do you make frozen yogurt clusters not stick together? The trick is to freeze them individually first. Spread your yogurt spoonfuls on a tray lined with wax paper. Make sure they are not touching each other. Let them freeze for two hours until they are solid. Then you can transfer them to a bag or container. This method stops them from clumping into one big block. It also makes it easy to grab just a few at a time. I use this trick for all my frozen snacks now. For more storage tips, visit healthy lifestyle tips.
What are the best toppings for frozen yogurt clusters? My favorites are chopped nuts like almonds or walnuts for crunch. You can also try shredded coconut, dark chocolate chips, or a sprinkle of sea salt. For a fruity twist, add dried cranberries or a tiny bit of lemon zest. The key is to add toppings right after you spoon the yogurt into molds. That way they stick to the surface as it freezes. Each topping adds a new layer of flavor and texture. Experiment and find your favorite combo. For more ideas, check out irresistible sweet treats.
How long do frozen yogurt clusters last in the freezer? They stay fresh and tasty for up to one month if stored properly. Use an airtight container or a zip-top bag with all the air squeezed out. This stops freezer burn and keeps them from picking up other food smells. After a month, they are still safe to eat but may lose some texture and flavor. I always label my bag with the date I made them. That way I know when to enjoy them at their best. For more batch-cook tips, see Spoons Way.
Can I make frozen yogurt clusters without chocolate? Yes, you do not need chocolate at all. The recipe calls for yogurt, berries, and a little sweetener. You can skip the chocolate and the clusters will still be delicious. They will be lighter and more refreshing. My granddaughter loves them plain with just blueberries and a drizzle of honey. Chocolate is just one option. Feel free to make them your own. For more dairy-free or chocolate-free ideas, visit healthy lifestyle tips.
What can I use instead of parchment paper for freezing? You can use wax paper, a silicone baking mat, or even a clean, dry kitchen towel. Just make sure the surface is non-stick and clean. I have used silicone muffin cups many times with great results. The yogurt pops right out after freezing. You can also freeze the clusters directly on a metal tray if you lightly oil it first. The goal is to keep them from sticking while they freeze. For more kitchen swaps, check out Spoons Way. Which tip will you try first?
A Warm Send-Off from Grace Ellington
I hope you feel ready to make these little frozen bites of joy. They are so simple and fun to play with. My kitchen always smells like berries and vanilla when I make them. Have you tried this recipe? I would love to hear how yours turned out. Drop a comment below and tell me your favorite topping or a trick you discovered. Remember, cooking is about sharing and learning together. Fun fact: yogurt was first made accidentally thousands of years ago by nomads carrying milk in animal skins. Happy cooking! —Grace Ellington.

Fast Frozen Yogurt Clusters Ready in 10 Minutes
Description
A quick and refreshing no-bake treat, these frozen yogurt clusters combine creamy Greek yogurt with mixed berries for a healthy snack ready in just minutes.
Ingredients
Instructions
- In a bowl, mix the Greek yogurt with vanilla extract and honey or maple syrup (optional) until a smooth, creamy consistency is achieved. The yogurt should taste slightly sweet and vanilla-flavored. If using lactose-free yogurt, the recipe remains suitable for lactose-intolerant individuals.
- Gently mix the berries into the yogurt. You can slightly crush the berries if you prefer a more fruity consistency or leave them whole for more texture. If you're using mint, add it at this stage.
- Spoon the yogurt-berry mixture into small silicone molds or ice cube trays. If you don't have specific molds, you can use muffin tins as an alternative. Be careful not to overfill the molds to ensure the yogurt bites freeze evenly.
- Place the molds in the freezer and freeze for at least 2 hours, or until the yogurt bites are firm. You can leave them in longer for a firmer texture.
- Once frozen, remove the frozen yogurt bites from the molds and arrange them on a plate. Optionally, sprinkle with chopped nuts or almonds. Enjoy immediately or store in the freezer until you're ready to eat.
Notes
- For best texture, enjoy within 2 weeks of freezing. Can be stored in an airtight container in the freezer.