

The Day I Learned Not to Bake
One summer, my oven broke right before a big family picnic. I panicked. Then I remembered my grandma’s trick: no-bake desserts. This cherry cheesecake tart saved the day. Doesn’t that smell amazing? I still laugh at how simple it was. Have you ever had to skip the oven for a dessert? You just press a crumb crust into little cups. No heat needed. That’s why this matters: you can make a fancy treat without any baking skills. Anyone can do it, even on a hot day.Why the Crust Is the Best Part
The crust is buttery and sweet, just like a graham cracker hug. You mix crumbs, melted butter, and sugar. Press it into cupcake liners. I use silicone liners because they pop right off. (Paper liners stick, trust me.) What’s your favorite crust for cheesecake? Here’s my mini-anecdote: My nephew once ate three crusts before I added the filling. I didn’t blame him. That’s why this matters: the crust gives you crunch and flavor. No crust, no joy.The Creamy Cherry Secret
The filling is a dream. You blend cream cheese, powdered sugar, and heavy cream. Then add cherry juice and vanilla. It turns pink and fluffy. My daughter calls it “cloud cheese.” Doesn’t that sound fun? *Fun fact*: Maraschino cherry juice is just cherries soaked in sugar syrup. But it gives the cheesecake that beautiful pink color and sweet taste. You can also use fresh cherry juice if you want.Patience Is a Little Hard
You must chill these tarts for three to four hours. Overnight is even better. I know, waiting is tricky. But trust me, it sets the filling perfectly. If you freeze them, they get firmer, almost like ice cream cake. Have you ever frozen a cheesecake? This is why patience matters: the longer it sits, the smoother and richer it gets. I once tried to eat one after one hour. It was a runny mess. I still laugh at that. Lesson learned.Toppings Make It Pretty
Before serving, add a dollop of whipped cream and a cherry on top. That’s it. You can also sprinkle a little graham cracker crumb for crunch. My friend adds chocolate chips. What do you like on top of your cheesecake? This small step turns plain tarts into something special. That’s why this matters: the topping is the first thing people see. Make it cute. A single cherry can make a grown-up smile.How to Serve and Share
These tarts are perfect for parties, picnics, or a quiet night. You can double the recipe easily. They keep in the fridge for three days. I once brought them to a book club, and they disappeared in five minutes. That’s a good feeling. Would you serve these for a birthday or just because? Let me know in your kitchen stories. I love hearing how you make recipes your own.Instructions
Step 1: Grab a mixing bowl and stir together 2 cups graham cracker crumbs, 1/2 cup melted butter, and 1/4 cup sugar. Press this mixture into cupcake liners, filling them about 1/4 full. (I use silicone liners because they never stick, a trick I learned the hard way.) Doesn’t that buttery smell remind you of summer picnics? Step 2: In another bowl, beat 16 ounces of softened cream cheese with 1 cup powdered sugar until smooth. Pour in 1 cup heavy cream, 1/2 cup cherry juice, and 1 teaspoon vanilla extract. Mix until it’s thick and creamy, just like my grandma used to do by hand. What’s your favorite no-bake dessert? Share below! Step 3: Spoon that lovely cherry cream cheese filling into each crumb-lined cup. Cover the pan with plastic wrap and pop it in the fridge for 3 to 4 hours. I still laugh at the time I tried to rush this step and ended up with a runny mess. Step 4: For a firmer cheesecake, you can freeze these tarts instead of refrigerating them. Just let them sit in the freezer for about 2 hours before serving. (Freezing works great for a quick treat on a hot afternoon.) Step 5: When the tarts are set, top each one with a dollop of whipped cream and a maraschino cherry. Serve them cold, right from the fridge or freezer for the best texture. My family always fights over the last one, so make a double batch.Creative Twists
… Swap the cherry juice for lemon juice and top with fresh blueberries for a bright, tangy twist. … Mix in some crushed chocolate cookies into the crust for a chocolate-cherry surprise. … Add a pinch of cinnamon to the cream cheese filling for a warm, cozy flavor. Which one would you try first? Comment below!Serving & Pairing Ideas
Serve these tarts next to a tall glass of cold milk or a warm cup of chamomile tea for a cozy treat. They also pair wonderfully with fresh sliced strawberries on the side. For a party, arrange them on a pretty platter with mint leaves for color. Which would you choose tonight?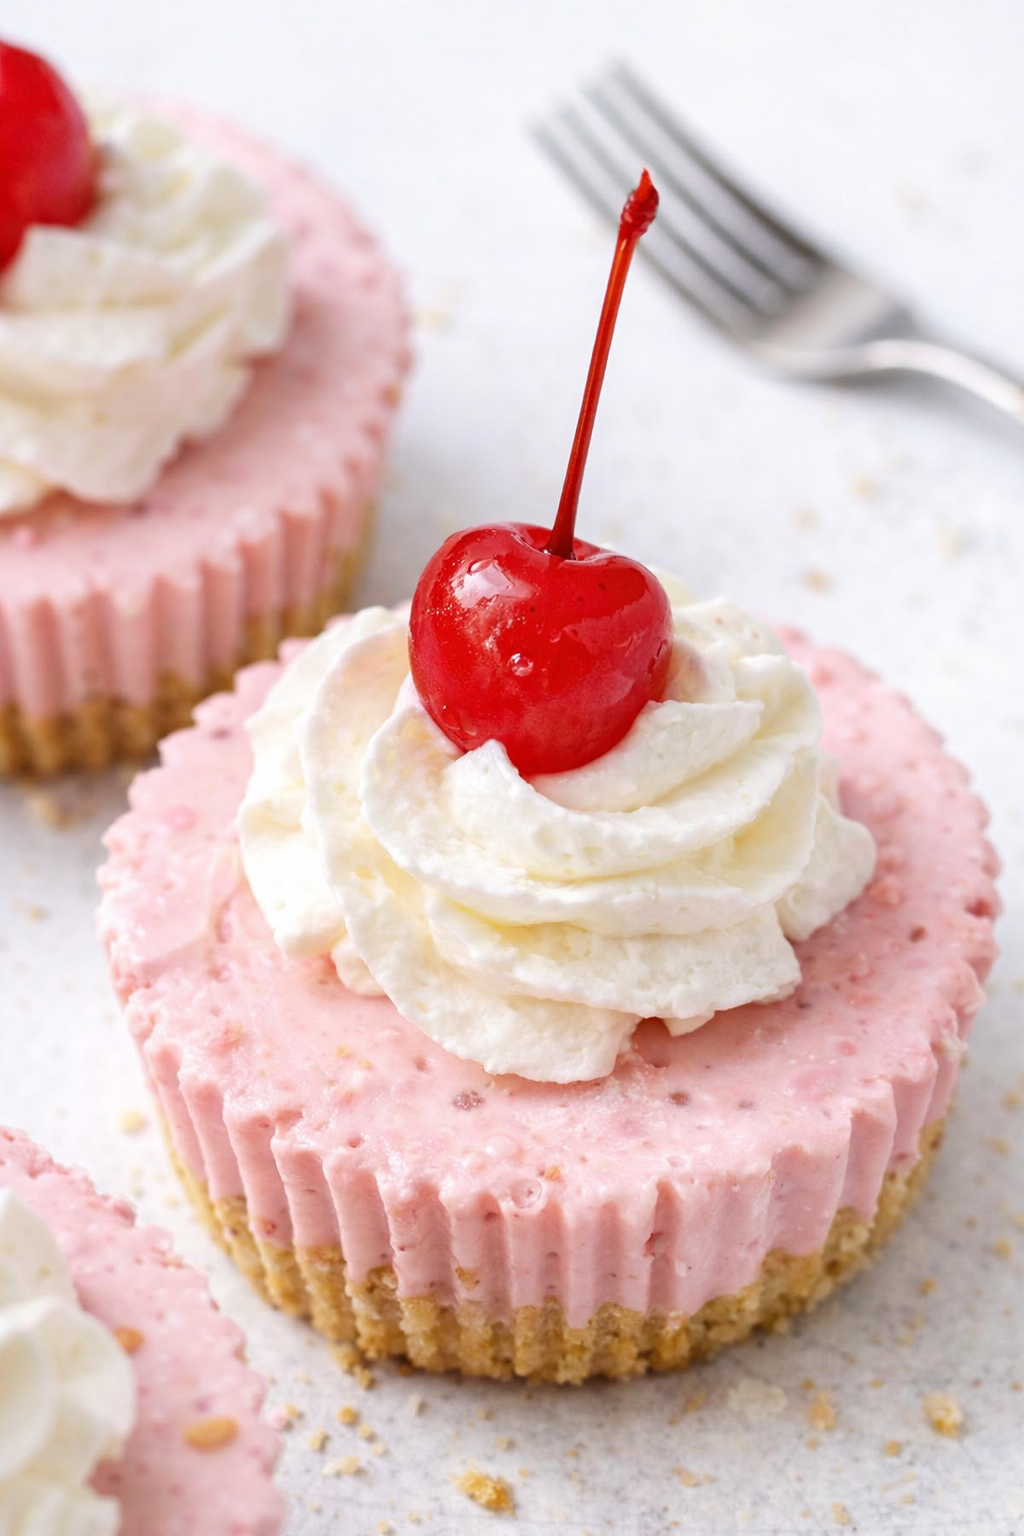
The Secret to Keeping These Tarts Fresh
Let me tell you about the first time I made these tarts. I was in a hurry and forgot to cover them in the fridge. The next day, they tasted a bit dry and had picked up onion smells from leftovers. Lesson learned! For the best results, store these cherry cheesecake tarts in an airtight container in the fridge. They stay fresh for up to four days. If you want a firmer bite, pop them in the freezer for an hour before serving. I like to batch cook a double batch on Sunday. That way, I have a quick treat all week long. When reheating is needed (say, for the crust to get crisp again), just warm them in a 300-degree oven for five minutes. Do not use the microwave. It makes the filling weepy. Why does this matter? Because proper storing saves you money and waste. You get to enjoy every last bite without a sad, soggy mess. Have you ever tried storing it this way? Share below!Three Common Problems (And Easy Fixes)
I remember when my filling turned out too runny. I had used warm cream cheese by accident. The fix is simple: always let your cream cheese sit out for 20 minutes, not longer, and use cold heavy cream. Another issue is the crust crumbling apart. I once pressed it too lightly into the liners. Now I pack it down firmly with the bottom of a small glass. It holds together perfectly. A third problem is the tarts sticking to paper liners. Silicone liners are your best friend here. They pop right off. If you only have paper, spray them lightly with nonstick spray first. Why does this matter? Fixing these little mistakes builds your cooking confidence. And when the texture is just right, the flavor really sings. Which of these problems have you run into before?Your Quick Questions, Answered
Can I use frozen cherries instead of fresh? Yes, you can. Thaw them first and drain off any extra liquid. Frozen cherries are picked at peak ripeness, so they work wonderfully in this no bake cherry cheesecake tarts recipe. Just pat them dry with a paper towel so they dont water down the filling. This swap saves you money and works any season of the year. How long do these tarts need to set in the fridge? They need at least three to four hours to set properly. Overnight is even better. The filling gets thick and creamy during that time. If you are in a big hurry, you can freeze them for one hour. But the fridge gives you the best texture for these cherry cheesecake tarts. What kind of crust works best for no-bake tarts? Graham cracker crust is the classic choice here. It is sweet, crunchy, and pairs perfectly with the creamy filling. You can also use crushed vanilla wafers or shortbread cookies. Both hold up well without baking. Just stick with a crumb crust for that no-fuss, no-bake cherry cheesecake tarts success. Can I make these cherry cheesecake tarts vegan or dairy-free? Absolutely. Use a vegan cream cheese block (not the tub kind) and coconut cream instead of heavy whipping cream. For the crust, use a vegan butter stick. The texture will be slightly different but still creamy and delicious. Many home cooks make this swap and love the result for their special diets. How do I prevent the cheesecake filling from being too runny? Runny filling usually comes from warm ingredients or skipping the cherry juice measurement. Make sure your cream cheese is softened but not warm. Measure the cherry juice exactly one half cup. Beat the heavy cream until stiff peaks form before folding it in. This keeps these cherry cheesecake tarts thick and sliceable. Can I use a different fruit topping instead of cherry? Yes, you can swap in any fruit you like. Try fresh blueberries, sliced strawberries, or even a spoonful of raspberry jam. Just keep the cherry juice in the filling for that signature pink color and tang. It works beautifully with any fruit topping you choose for your cherry cheesecake tarts. Which tip will you try first?A Warm Goodbye from My Kitchen to Yours
Thank you for spending time with me today. I hope these tips help you make the most wonderful cherry cheesecake tarts for your family. There is something so special about a treat made with love and shared around the table. Remember, every cook starts somewhere. My first batch was a little messy, but it tasted just fine. Yours will be even better. I love hearing from you. Have you tried this recipe? Drop a note in the comments. Tell me how it turned out or ask a question. I read every single one. *Fun fact: Maraschino cherries are soaked in syrup, giving them that deep sweetness and bright color.* You can also find more easy dessert ideas and quick dinner recipes on the site. Keep cooking with joy. Happy cooking! —Grace Ellington.

Simple No-Bake Cherry Cheesecake Tarts
Description
In a mixing bowl, combine graham cracker crumbs, melted butter and granulated sugar. Press into cupcake liners (silicone works best), about 1/4 to 1/3 full. Set aside. In a mixing bowl, combine cream cheese, powdered sugar, heavy cream, cherry juice and vanilla extract and mix well. Spoon mixture into prepared cupcake liners. Refrigerate (covered) for 3-4 hours or overnight. Freezing will yield a firmer cheesecake. Top with whipped cream and cherries.
Ingredients
Instructions
- In a mixing bowl, combine graham cracker crumbs, melted butter and granulated sugar. Press into cupcake liners (silicone works best), about 1/4 to 1/3 full. Set aside.
- In a mixing bowl, combine cream cheese, powdered sugar, heavy cream, cherry juice and vanilla extract and mix well. Spoon mixture into prepared cupcake liners.
- Refrigerate (covered) for 3-4 hours or overnight. Freezing will yield a firmer cheesecake. Top with whipped cream and cherries.
Cherry, Cheesecake, Tarts, No-Bake, Easy