My First Taste of This Dessert
The first time I made this Oreo lasagna, my grandson watched every step. He kept asking, “Grandma, is it done yet?” I laughed and told him good things take time. When I finally cut that first slice, his eyes got big. Doesn’t that sound like a memory you want to make? Have you ever had a dessert that made a child’s face light up like that? I still laugh at how fast that pan disappeared. You can find more sweet treats like this at this collection.
This recipe is special because you do not need an oven. No turning it on, no waiting for it to heat. You just mix, layer, and let the fridge do the work. Why this matters: it saves you time and keeps your kitchen cool. That is a big help on a hot summer day. It also means kids can help without getting near a hot stove. For more easy desserts, check out these ideas.
The Crust That Holds Everything Together
Start by crushing 16 Oreo cookies into fine crumbs. You can put them in a bag and smash them with a rolling pin. That is what I do, and it feels good to let out a little steam. Mix the crumbs with 4 tablespoons of melted butter. Press this mixture into your dish firmly. Think of it like packing a snowball. Why this matters: a good crust keeps all the soft layers from sliding around. Have you ever made a crust like this before? You can see how I use a similar trick in these savory biscuits.
After you press the crust, put it in the freezer for at least 30 minutes. This makes it hard and ready for the next layers. I once forgot to freeze mine long enough. The crust got a little soft, but it still tasted great. So do not worry if you are in a hurry. Just do your best. *Fun fact: Oreo cookies were first made in 1912. That is over 100 years of cookie happiness!*
The Creamy Layers That Make It Rich
While the crust freezes, make the first creamy layer. Beat 4 ounces of cream cheese with 1/2 cup of powdered sugar until fluffy. Then fold in 1 cup of Cool Whip. Spread this over your frozen crust. It feels like spreading soft clouds. Next, make the chocolate pudding. Mix one box of instant pudding with 1 and 1/2 cups of milk. Whisk until smooth, then let it sit in the fridge for 20 minutes. This is the layer that tastes like a chocolate hug. Does that not smell amazing just thinking about it? For a fun twist, try my honey garlic chicken for a savory balance.
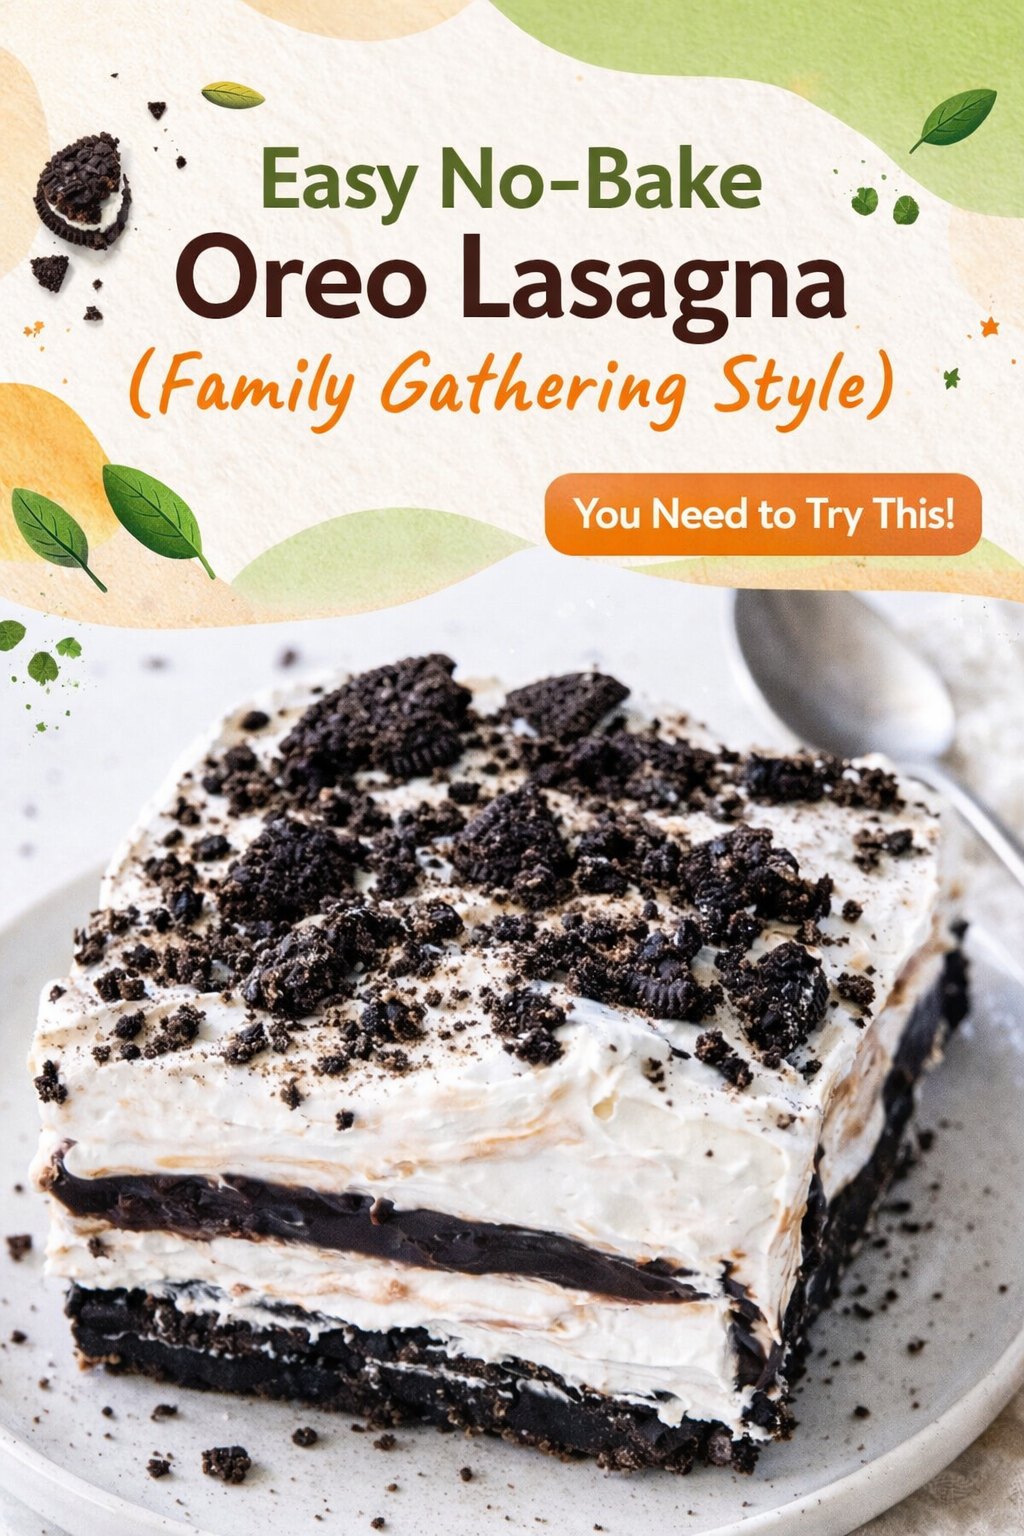
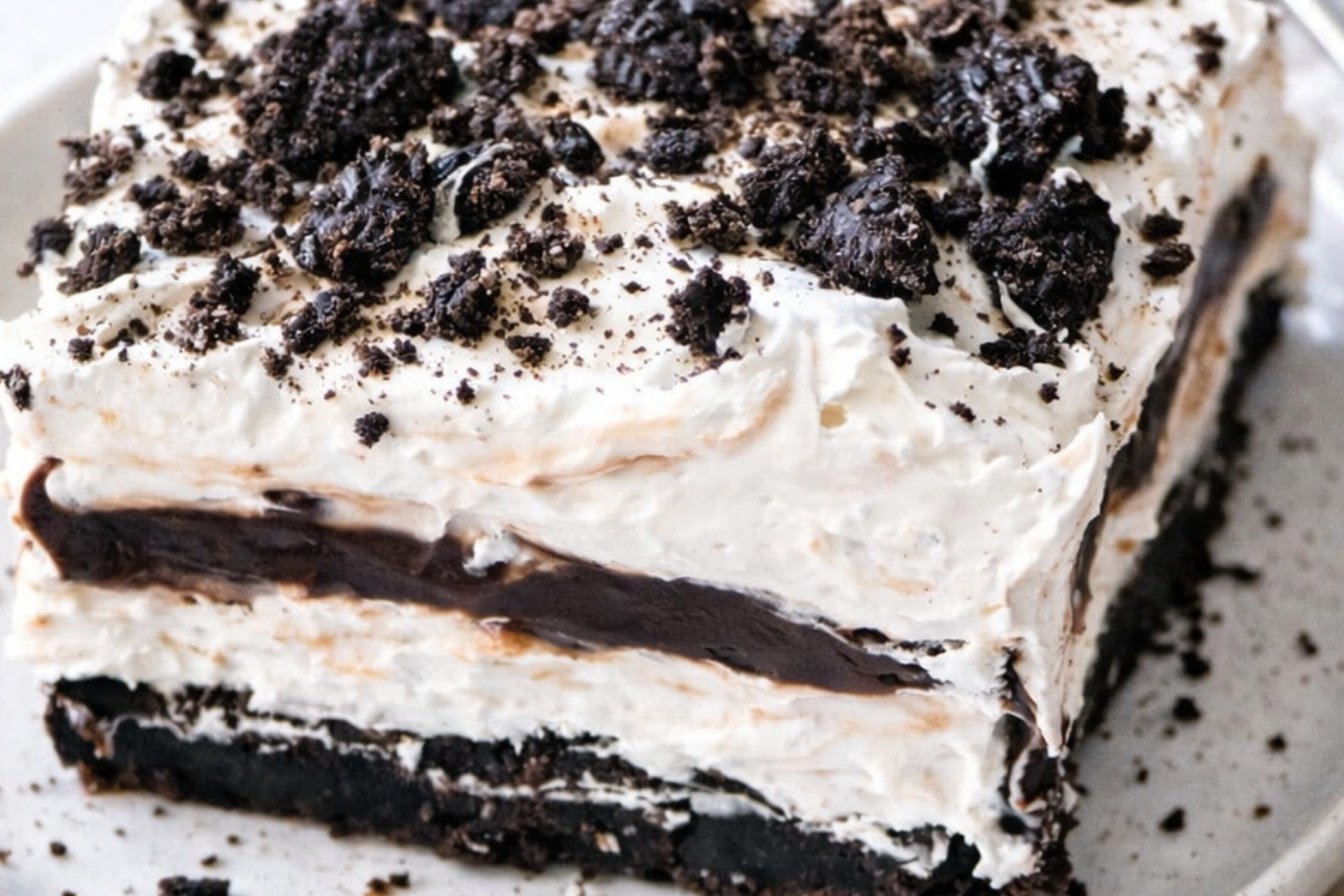
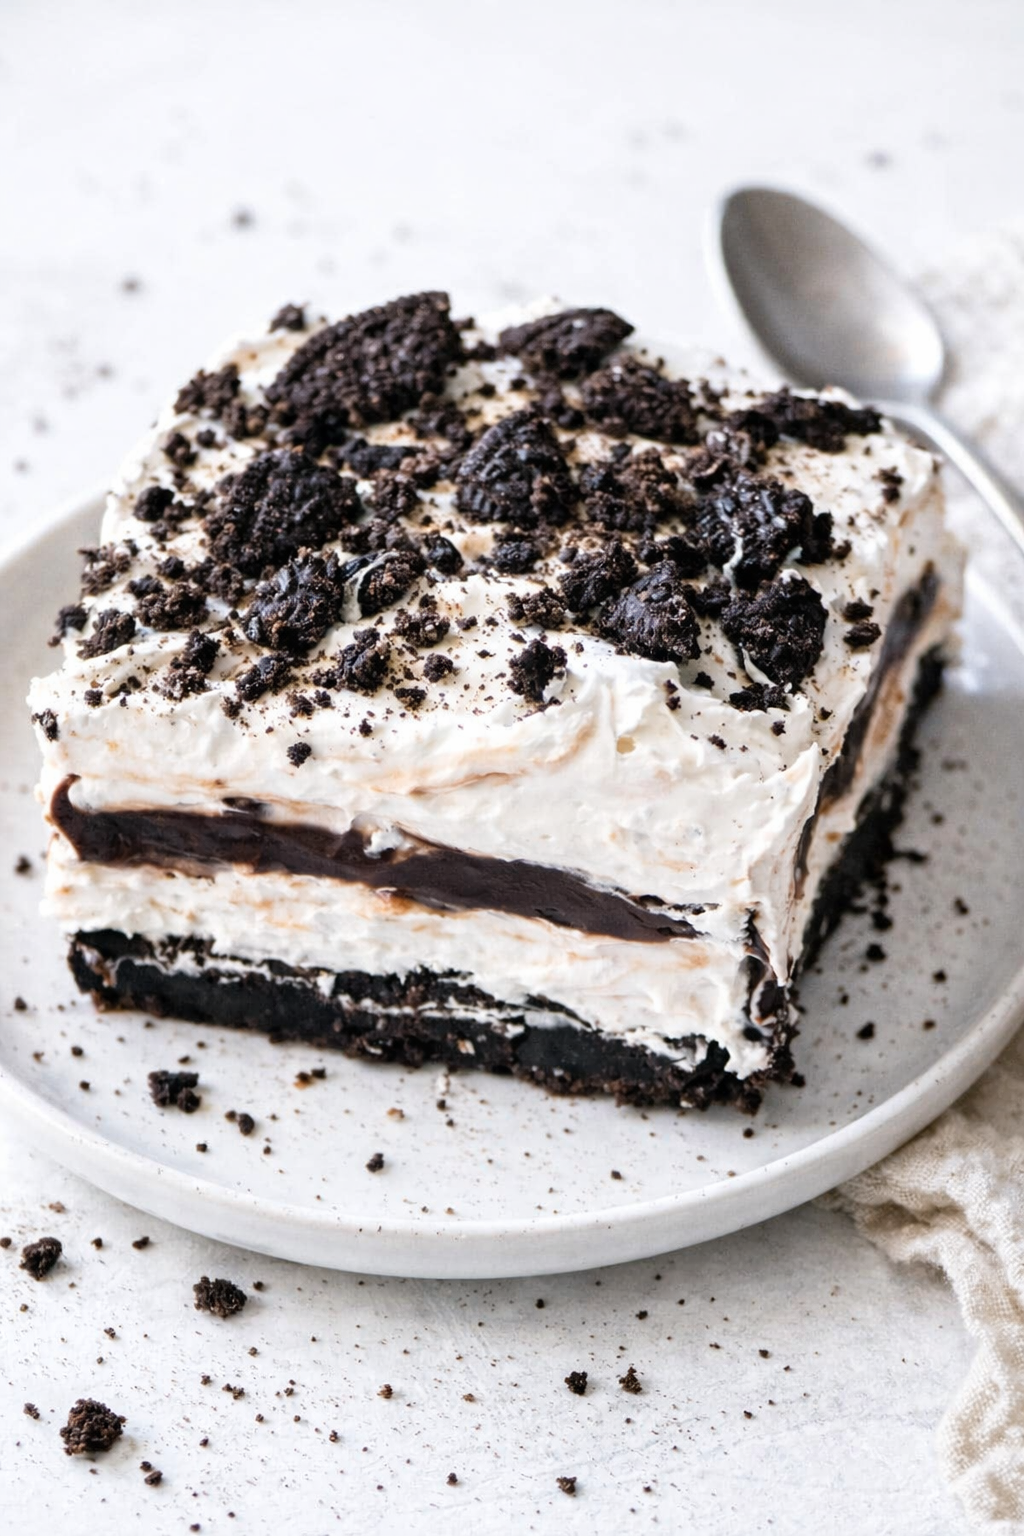
Spread the chocolate pudding over the cream cheese layer. Then top it with the rest of your Cool Whip. Use the whole 8-ounce container, minus the cup you already used. Smooth it out gently. Sprinkle crushed Oreo crumbs on top. I like to save a few cookie pieces to make a pretty pattern. This dessert is like building a little house of flavors. Each layer has its own job. Tell me, what is your favorite layer in a no-bake dessert? I would love to know.
The Waiting Game
Now comes the hardest part: waiting. Cover your dish and put it in the fridge for at least 4 hours. If you are impatient like my family, try the freezer for 90 minutes. The cold helps the layers set so you can cut clean slices. I once tried to cut it after only two hours. It was a delicious mess, but a mess all the same. So be patient. Why this matters: letting it rest makes the flavors marry together. That means every bite tastes perfect. For a breakfast that also takes time, look at this healthy breakfast bowl.
When I serve this at family gatherings, I watch people take their first bite. They always close their eyes and smile. That is the best thank you I ever get. You can serve it cold right from the fridge. It is rich and creamy, so a small square is plenty. Do you have a go-to dessert for big family dinners? I am always looking for new ideas. This one has never let me down. Pair it with something savory like creamy lemon chicken for a full menu.
Why This Dessert Deserves a Spot at Your Table
This Oreo lasagna is a crowd favorite for a reason. It is simple, fast, and uses ingredients you probably already have. No eggs, no flour, no fancy tools. Just a bowl, a spoon, and a fridge. That makes it perfect for new cooks or tired parents. I remember making it for a potluck once. A man asked me for the recipe three times before I wrote it down. That is when I knew it was a winner. Why this matters: good food does not have to be hard. Simple recipes bring people together. You can also try a fresh salad to go with it, like this kale Caesar salad.
So next time you need a dessert fast, remember this recipe. It feeds a crowd and makes everyone happy. And the best part? You get to lick the spoon. I always do. Do you have a no-bake recipe you love? Share it with me. I am always happy to learn a new trick from a friend.
Instructions
Step 1: Spray an 8-inch square baking dish with non-stick spray. Set it aside for now. In a bowl, mix the melted butter with the crushed Oreos. (I once used a zipper bag and a rolling pin to crush them — works great!) Press this mixture firmly into your dish. Cover it and pop it in the freezer for at least 30 minutes. What is your favorite way to crush cookies? Share below!
Step 2: In a separate bowl, whisk the instant chocolate pudding mix with the milk until smooth. Cover the bowl and put it in the fridge for 20 minutes to set up. My granddaughter always sneaks a spoonful before it sets. Doesn’t that smell amazing? While that chills, get your next layer ready.
Step 3: Beat the cream cheese and powdered sugar together until fluffy. Gently fold in 1 cup of Cool Whip. Spread this creamy mixture over your frozen crust. Take your time — it makes the layers look pretty. (A small offset spatula helps here more than a spoon.)
Step 4: Now spread the chocolate pudding mixture on top of the cream cheese layer. Then, spread the remaining container of Cool Whip over the pudding. Sprinkle crushed cookie crumbs over everything. Cover the dish and let it set in the fridge for at least 4 hours. For a quicker treat, use the freezer for 90 minutes before slicing.
Creative Twists
… Swap the chocolate pudding for vanilla or butterscotch for a new flavor.
… Add a layer of sliced bananas or strawberries between the cream cheese and pudding.
… Drizzle warm caramel or chocolate sauce over each slice just before serving.
Which one would you try first? Comment below!
Serving & Pairing Ideas
Serve this lasagna chilled, straight from the fridge, for the best clean slices. Pair it with a tall glass of cold milk or a hot cup of coffee for the grown-ups. A sprinkle of sea salt on top brings out the chocolate even more. I also love adding a few fresh mint leaves for a pop of color. Which would you choose tonight? Check out more irresistible sweet treats for your next gathering, or browse our sweet treat collection for more ideas. You might also enjoy our savory herb biscuits with cream for a savory side, or the honey garlic skillet chicken thighs for a main dish that balances the sweet.
Storing and Reheating Your No-Bake Oreo Lasagna
This dessert loves the fridge. Keep it covered in the baking dish for up to five days. The layers stay soft and creamy that way. I remember my first time making it. I left it out on the counter by mistake. It got too runny, and I learned my lesson fast. For the freezer, wrap the dish tightly in plastic wrap and foil. It will keep for up to three months. When you want a slice, thaw it in the fridge overnight. Do not microwave it. The cool whip will melt and get watery. Batch cooking is a lifesaver for big family gatherings. You can make two pans at once and freeze one. That way, you always have a dessert ready for unexpected guests. Why does this matter? Because a stored dessert saves you stress and time. You can enjoy the party instead of working in the kitchen. Have you ever tried storing it this way? Share below!
When reheating, do not use heat. This is a no-bake dessert, so it is meant to be cold. If the crust feels too hard straight from the freezer, let it sit on the counter for ten minutes. That softens it just enough. I once served a frozen slice to my neighbor. She smiled and said it tasted like a frozen pudding bar. It was a happy accident. Now I always let it rest a bit before serving.
Three Common Problems and Easy Fixes
First problem: the crust crumbles when you cut it. This happens when the butter and cookie crumbs are not pressed firmly enough. Use the bottom of a glass to push them down flat. Chill the crust for at least thirty minutes before adding layers. I remember when my crust fell apart on my first try. My daughter laughed and called it “cookie soup.” We fixed it by pressing harder the next time. Which of these problems have you run into before?
Second problem: the pudding layer is too runny. This happens when you do not let the pudding set in the fridge first. Always let it sit for twenty minutes before spreading. Why does this matter? A runny pudding makes the whole dessert soggy. You lose that lovely layered look. Third problem: the cream cheese layer has lumps. This happens when the cream cheese is too cold. Let it sit on the counter for thirty minutes before mixing. Beat it until it looks fluffy and smooth. My grandma always said, “Cold cream cheese is a grumpy cook’s enemy.” She was right. Fixing these three issues gives you a dessert you are proud to share. It builds your confidence in the kitchen.
Your Quick Questions, Answered
How long does No-Bake Oreo Lasagna need to set?
You need at least four hours in the fridge for the layers to firm up properly. This waiting time lets the pudding thicken and the crust hold together. If you are in a hurry, you can set it in the freezer for ninety minutes. I have done that before a family dinner, and it worked beautifully. Just remember to let it rest on the counter for five minutes before slicing. This tip helps you get clean, pretty pieces every time. The longer you let it set, the better the flavors blend together. Overnight is best if you can plan ahead.
Can I use a different flavor of pudding mix?
Yes, you can swap the chocolate pudding for any instant flavor you like. Vanilla, butterscotch, or cheesecake pudding work very well. I have tried banana pudding once, and it tasted like a creamy dessert pie. Just make sure you use the same box size, which is 3.9 ounces. Stick with instant pudding, not cook-and-serve. Instant sets up in the fridge without heat. This swap changes the whole personality of your lasagna. It is a fun way to make the recipe your own. My nephew loves the vanilla version with extra crushed Oreos on top.
What is the best way to soften cream cheese for this recipe?
The best way is to take the cream cheese out of the fridge thirty minutes before you start. Let it sit on the counter in its foil wrapper. If you forget, do not panic. Place the unwrapped block on a microwave-safe plate. Heat it for ten seconds at a time until it feels soft to the touch. Be careful not to melt it. Melted cream cheese will make your layer runny. I once microwaved mine for thirty seconds straight. It turned into a puddle. My husband called it “cheese soup.” Now I use the slow method. Soft cream cheese blends into the powdered sugar smoothly. That gives you a fluffy, dreamy first layer.
Can I make No-Bake Oreo Lasagna ahead of time?
Yes, you can make this dessert a full day ahead of time. In fact, it tastes even better the next day. The layers have time to settle and soak together overnight. Assemble everything in the baking dish, cover it tightly with plastic wrap, and keep it in the fridge. Do not add the crushed cookie topping until right before you serve. That keeps it crunchy. I always make mine the night before a big party. It takes the pressure off my cooking schedule. You can also freeze it for up to three months. Just wrap it well. Thaw it in the fridge overnight before serving. This is a perfect make-ahead dessert for busy family dinners.
How do I store leftover Oreo lasagna?
Leftover Oreo lasagna stores very well in the fridge. Cover the baking dish with plastic wrap or a tight lid. It will stay fresh for up to five days. The layers might soften a little, but that is normal and delicious. If you have extra slices, you can freeze them individually. Wrap each slice in plastic wrap, then place them in a freezer bag. They keep for up to three months. When you want a treat, pull one out and let it thaw in the fridge for a few hours. I love having frozen slices for a quick dessert after a long day. This storage trick saves money and reduces food waste.
Can I use whipped cream instead of Cool Whip?
Yes, you can use homemade whipped cream instead of Cool Whip. Whip one cup of heavy cream with two tablespoons of powdered sugar until stiff peaks form. It will taste fresher and lighter. Just know that homemade whipped cream is less stable. It may start to weep or deflate after a day in the fridge. Cool Whip holds its shape longer because it contains stabilizers. If you serve the lasagna the same day, whipped cream works perfectly. I have used both, and my family loves the homemade version for special occasions. For a party that lasts all day, stick with Cool Whip. Either choice gives you a creamy, dreamy dessert.
Which tip will you try first?
A Warm Send-Off from My Kitchen to Yours
I hope these tips help you make the best No-Bake Oreo Lasagna for your family. This dessert has been a star at my table for years. It brings smiles every single time. I love hearing how recipes travel from kitchen to kitchen. *Fun fact: This recipe was first shared with me by a neighbor during a summer picnic.* Now it is a family tradition. Have you tried this recipe? Tell me how it turned out in the comments below. I always read every one of your stories. Your little kitchen wins make my day. Happy cooking!
—Grace Ellington.