

Why These Little Cheesecakes Feel Like a Hug
Sometimes you need a dessert that doesn’t need an oven. This is that dessert. I remember making these for a rainy Sunday when my grandkids were restless. We all gathered around the counter and crushed cookies together. Doesn’t that smell amazing? The warm butter and sweet Biscoff biscuits filled the whole kitchen. These shooters feel like a warm hug in a tiny cup. That day, my youngest granddaughter said they tasted like “happiness in a spoon.” I still laugh at that. It’s true, though. You don’t need fancy tools or a hot oven. Just a bowl, a whisk, and a little patience. Have you ever made a no-bake dessert with your family?The Secret to That Buttery Crunch
The base is simple but magical. You crush Biscoff biscuits into crumbs, then mix them with melted butter. Press it down firmly in your pan or cups. Then freeze it for 30 minutes while you make the filling. That little step keeps the base from getting soggy. Why this matters: A crunchy base makes every bite feel special. It gives your cheesecake a little surprise texture. *Fun fact: Biscoff cookies were first made in Belgium in 1932. They were created to go with coffee. Now they are famous all over the world. I love that a simple cookie can travel so far. Have you ever tried making your own Biscoff pie crust at home?How to Get the Filling Silky Smooth
The filling is where the magic really happens. First, whisk your cream cheese until it is fluffy. That takes about two minutes. Then add powdered sugar, vanilla, and Biscoff spread. In another bowl, whip the cold cream until it forms stiff peaks. This means the cream stands up tall when you lift the whisk. Be careful not to over-whip it, or it will turn into butter. My grandma taught me that trick, and I still use it today. Fold the whipped cream into the cream cheese mixture gently. Slow and steady wins the race here. Why this matters: folding keeps the filling light and airy. If you stir too fast, you lose all that lovely fluff. I once rushed this step and ended up with a flat cheesecake. We still ate it, of course. Have you ever had a baking mistake that you ate anyway?The Waiting Game Is Worth It
This part is hard for me. You have to let the cheesecake chill for at least 8 hours. Overnight is even better. I know that feels like forever, especially when the kitchen smells sweet. But the fridge is doing important work. It helps the flavors settle together. It also makes the texture firm and creamy. You can also freeze it for one hour before adding the topping. That makes the melted spread stay on top instead of soaking in. I usually make this the night before a party. Then I don’t have to rush the next day. It is one of those easy no-bake desserts that makes me look like a hero with almost no work. Do you like to plan your desserts ahead of time, or are you a last-minute cook?The Final Sweet Touch
Now comes the fun part. Warm your Biscoff spread in the microwave for a few seconds. Just until it is slightly runny. Pour it over the top of the chilled cheesecake and spread it quickly. It will start to harden because the cheesecake is cold. Then sprinkle crushed biscuits around the edges. The topping looks so pretty, like a bakery dessert. I love how the warm spread meets the cold filling. It creates a little moment of joy in your mouth. This is why small details matter in cooking. A little extra effort makes everything feel special. Which topping do you like best on your cheesecake? Crushed cookies, fruit, or something else?Why This Dessert Is Perfect for Beginners
If you have never made a cheesecake before, this is the one to start with. There is no water bath. No worrying about cracks on top. No oven timer to watch. You just mix, pour, and wait. It is very forgiving. Even if your layers are a little messy, it still tastes amazing. I have taught many kids to make this, and they all succeed. You can also make these in small cups instead of a big pan. That way everyone gets their own little treat. It is perfect for parties or sleepovers. Why this matters: cooking should be fun, not stressful. Simple recipes like this one build confidence. Would you try making these with a young chef in your life? I bet you would both smile.Mix It Up and Make It Yours
This recipe is a great starting point. You can swap the Biscoff spread for chocolate hazelnut spread. Or add a little cinnamon to the base. Some people like to pipe the filling into fancy glasses. I have even made a Biscoff rice krispie treat version for extra crunch. The possibilities are endless. That is the beauty of a simple recipe. Another idea: top each shooter with a tiny dollop of whipped cream and a whole cookie. It looks so cute. Or drizzle caramel sauce on top for extra sweetness. Cooking is about playing and finding what you love. I still discover new things every time I make this. What is your favorite way to dress up a simple dessert? I would love to hear your ideas.Instructions
Step 1: Crush 26 Biscoff biscuits into fine crumbs using a blender. Mix with melted butter until it looks like wet sand. Press this into your serving cups or a small pan. (The trick is to press firmly or the base will fall apart later.)
Step 2: Whisk room-temperature cream cheese for 2-3 minutes until fluffy. Add powdered sugar, vanilla, and smooth Biscoff spread. Mix until smooth. I always taste a little here — quality control, you know! What is your favorite cookie spread? Share below!
Step 3: In a separate bowl, whip cold heavy cream until stiff peaks form. Be careful not to over-whisk or it turns into butter. Gently fold the whipped cream into the cream cheese mixture. Slow folding keeps it light and airy.
Step 4: Pour the filling over the base and spread it evenly. Gently tap the cup on the counter to remove air bubbles. Chill for at least 8 hours or overnight. Patience is hard, but it makes the texture perfect.
Step 5: Warm half a cup of Biscoff spread in the microwave until runny. Pour it over the chilled cheesecake and spread fast before it sets. Sprinkle crushed biscuits on top. Doesn’t that smell amazing?
Step 6: You can also make these as fun no-bake shooters in small glasses. Layer crumb, filling, and topping for individual treats. They are perfect for parties or a quick sweet craving. My grandkids love building their own layers.
Creative Twists
… Swap the base for crushed graham crackers and a pinch of cinnamon for a cozy twist. … Add a layer of salted caramel between the base and filling for a sweet-salty surprise. … Top with a dollop of pumpkin spice whipped cream for a fall flavor. Which one would you try first? Comment below!
Serving & Pairing Ideas
Serve these shooters with a tall glass of cold milk. It cuts the richness perfectly. For a fancy dessert board, pair them with fresh berries and extra crushed cookies. You can also drizzle each shooter with melted dark chocolate for extra flair. Which would you choose tonight?

How to Store Your No-Bake Biscoff Cheesecake Shooters
Storing these shooters is easy, but you need to do it right. Keep them in the fridge, covered with plastic wrap. They stay fresh for up to three days. I once left a batch uncovered overnight, and the tops got a little dry. A hard lesson learned. Have you ever tried storing it this way? Share below!
You can freeze them, too. Just put them in airtight containers. Freeze for up to one month. When you want one, let it thaw in the fridge for a few hours. Batch cooking matters because it saves time. You can make a big batch on Sunday and enjoy them all week. It is like having a little treat waiting for you. Always let the cheesecake sit at room temperature for ten minutes before eating. This brings back the creamy texture. For a fun twist, try using my homemade Biscoff cookies for the crust.
Three Common Problems and How to Fix Them
The first problem is a runny filling. This happens when your cream cheese is too cold. I remember making this for a party, and I was in a hurry. I used cold cream cheese straight from the fridge. The filling was soupy. The fix is simple. Let your cream cheese sit out for an hour before mixing. This helps it get fluffy. Which of these problems have you run into before?
The second problem is a crust that falls apart. This happens when you do not press it down hard enough. Use the bottom of a glass to really pack it in. Chill it for a full thirty minutes. The third problem is overmixing the whipped cream. It turns into butter if you whisk too long. Stop as soon as you see stiff peaks. Why does this matter? Fixing these issues gives you a perfect texture every time. It also makes you feel like a real home cook. Confidence comes from little wins like this. Try my easy 3-ingredient Biscoff pie crust for a foolproof base.
Your Quick Questions, Answered
Can you use cream cheese straight from the fridge for no-bake cheesecake? You should not use cold cream cheese straight from the fridge. It will not mix smoothly and will leave lumps. For the best result, let it sit on the counter for 45 to 60 minutes. It should be soft to the touch. This ensures a creamy, lump-free filling. If you are short on time, cut the cream cheese into small cubes and let them soften for 20 minutes. Cold cream cheese also prevents the sugar and spread from blending in evenly. Always plan ahead for the best texture. You can pair this filling with my wonkywonderful Biscoff cheesecake recipe for a full dessert.
How far in advance can you make Biscoff cheesecake shooters? You can make these shooters up to three days in advance. Keep them covered in the fridge. The flavors actually get better after a day. The crust stays crunchy if you press it well. If you want to make them even earlier, freeze them for up to one month. Just thaw them overnight in the fridge before serving. This is great for party planning. You can serve them straight from the fridge. No need to worry about last-minute prep. For a fun variation, try my Biscoff Rice Krispie treats recipe as a crunchy topping.
What can I use instead of Biscoff spread? You can use any cookie butter, like Speculoos or Trader Joe’s cookie butter. Nutella also works, but it changes the flavor. Peanut butter is a good substitute if you want a nutty taste. For a lighter option, try almond butter. The texture will be similar. Just remember that the sweetness level might change. Start with less sugar if you use a sweet nut butter. The filling will still be creamy and delicious. Each swap gives a new twist to the recipe. Try my Biscoff layer cake with cookie butter frosting for another cookie butter idea.
Can you freeze no-bake cheesecake shooters? Yes, you can freeze these shooters. Use airtight containers or wrap each cup in plastic wrap. Freeze for up to one month. When you are ready to eat, move them to the fridge. Let them thaw slowly for a few hours. Do not microwave them. The texture will stay creamy if thawed slowly. The crust might get a bit softer, but it will still taste good. This is perfect for making a big batch. You can also use my no-bake Biscoff banoffee pie delight for a different frozen treat.
How do you crush Biscoff cookies without a food processor? Place the cookies in a sturdy zip-top bag. Seal it tight and remove the air. Use a rolling pin to crush them. You can also use the bottom of a heavy glass. For even crumbs, press firmly and roll back and forth. Another method is to put them in a bowl and use a potato masher. This works great for small batches. The crumbs do not need to be perfect. Small chunks add nice texture. I like to leave a few bigger pieces for crunch. For extra flavor, use my spiced pumpkin ice cream cake for a fall dessert idea.
Can I use a different type of cookie for the crust? Yes, you can use any crunchy cookie. Graham crackers, vanilla wafers, or ginger snaps work well. Chocolate cookies also taste great with the Biscoff filling. For a gluten-free option, use gluten-free graham crackers or almond flour cookies. The amount of butter may need to change. Drier cookies need a little more butter. Start with the same amount and add if needed. The crust should feel like wet sand. Press it firmly into the cups. This swap lets you use what you have at home. Which tip will you try first?
A Warm Goodbye from My Kitchen to Yours
Thank you for spending time with me today. I hope you feel ready to make these shooters. Remember, cooking is about having fun and making mistakes. I still mess up sometimes, and that is okay. Your family will love the effort you put in. Have you tried this recipe? Tell me about your version in the comments. I would love to hear your stories. Until next time, keep your kitchen warm and your heart full. Happy cooking! —Grace Ellington.

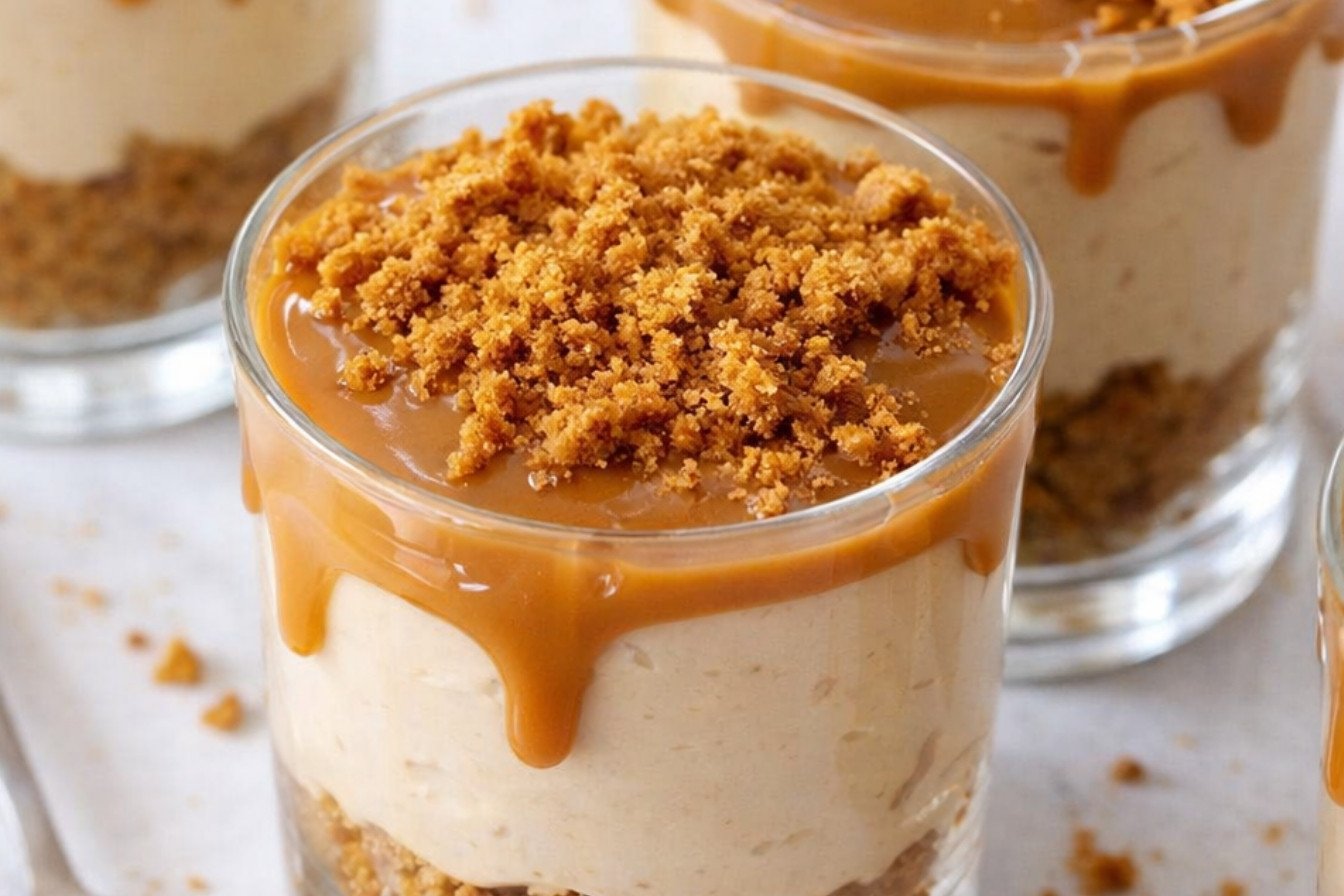
Easy No-Bake Biscoff Cheesecake Shooters
Description
A creamy, indulgent no-bake cheesecake with a crunchy Biscoff biscuit base, smooth Biscoff filling, and a luscious Biscoff topping. Perfect for any occasion!
Ingredients
Instructions
- Crush the Biscoff biscuits using a small blender. Mix with melted butter. Pour and press into a 9-inch (23cm) springform pan. Freeze for 30 minutes.
- Whisk cream cheese for 2-3 minutes using a handheld whisk or a standing mixer until creamy and fluffy. Mix in powdered sugar, vanilla extract, and Biscoff spread.
- In a separate bowl, whisk the cream until stiff peaks form. Use medium-high speed, taking care not to over whisk it to avoid splitting. Add whipped cream to the cream cheese mixture and gently fold everything together, ensuring you do it slowly to avoid deflating the whipped cream. Pour the filling into the pan and spread it evenly using an offset spatula. Gently shake the pan back and forth to help the filling settle.
- Chill in the refrigerator for a minimum of 8 hours, preferably overnight. Freeze the filling for 1 hour before decorating.
- Crush some Biscoff biscuits. Warm the Biscoff spread in the microwave or on the stove, using low heat. Leave until it’s slightly warm before using. Carefully remove the cheesecake from the springform pan and place it on a cake stand. Pour the melted spread on top, then quickly spread it evenly to prevent it from hardening due to the cold cheesecake. Finally, sprinkle crushed biscuits around the edges.
Notes
- Nutrition per serving: Calories: 524.4kcal, Carbohydrates: 50.5g, Protein: 13.3g, Fat: 30.1g, Saturated Fat: 11.8g, Cholesterol: 38.9mg, Sodium: 489.1mg, Potassium: 203.2mg, Fiber: 0.6g, Sugar: 32g, Calcium: 223.9mg, Iron: 0.8mg