

The Smell That Pulls Everyone to the Kitchen
There is nothing quite like the smell of baked apples filling up your house. It makes you feel safe and cozy all at once. My grandmother used to say it was the smell of a happy home. I still believe that every time I make this recipe. Doesn’t that smell amazing the moment it hits your nose?
I remember the first time I baked apples all by myself. I was maybe twelve years old, standing on a little stool. The apples bubbled and the cinnamon swirled in the air. I felt so proud, like I had made magic happen. What is a smell that makes you feel happy right away? I would love to know.
Picking the Perfect Apple for Your Bowl
You do not need fancy apples for this dessert. A simple gala apple works like a charm. It is sweet and soft when it bakes. You can also use six small apples if you have them. Gala apples are easy to find and they do not cost a lot. That matters because good food should not empty your wallet.
Why this matters: When you pick an apple that bakes soft, you get a cozy bite every time. You also waste less food because small apples are perfect for one serving. Have you ever tried a different fruit with this filling? Maybe a pear? Tell me what you discovered in your kitchen.
A Little Trick for Coring Without Crying
Coring an apple sounds tricky, but it is not. I like to cut the apple in half first. Then I use a knife to trace around the core and a spoon to scoop it out. A melon baller works great too. Try not to cut all the way through because you want a little bowl for the filling.
*Fun fact: An apple core tool was invented over 100 years ago and is still the same today.* That shows you how smart old-timey kitchens really were. Do you have a favorite kitchen tool that feels like a secret weapon? Share it with us.
The Sweet and Crunchy Filling Inside
The filling is the real star here. You mix rolled oats, chopped walnuts, coconut sugar, and a little maple syrup. Then add vanilla, cinnamon, nutmeg, and a pinch of salt. It should be sticky but not wet. If it feels dry, add two tablespoons of water until it holds together. That sticky mixture is what bakes into a warm crumble.
Why this matters: When you make your own filling, you control how much sugar goes in. That means a sweet treat that still feels light and good for you. Plus, walnuts give you healthy fats that make your brain happy. Have you ever tried pecans instead of walnuts? I think both are wonderful. Which nut is your favorite?
Baking Low and Slow for Soft Apples
You bake these apples at 350 degrees for about 50 minutes. That sounds long, but your kitchen will smell like a bakery. After 30 minutes, drizzle the hot liquid from the dish over the apples. This keeps them from drying out and makes them extra juicy. The apples should be tender but not falling apart.
I once forgot to drizzle the liquid halfway through. The apples came out a little shriveled and sad. I still laugh at that mistake. Now I set a timer so I never skip that step. Have you ever forgotten a simple step and learned a funny lesson? Tell me your story.
Ways to Make It Yours
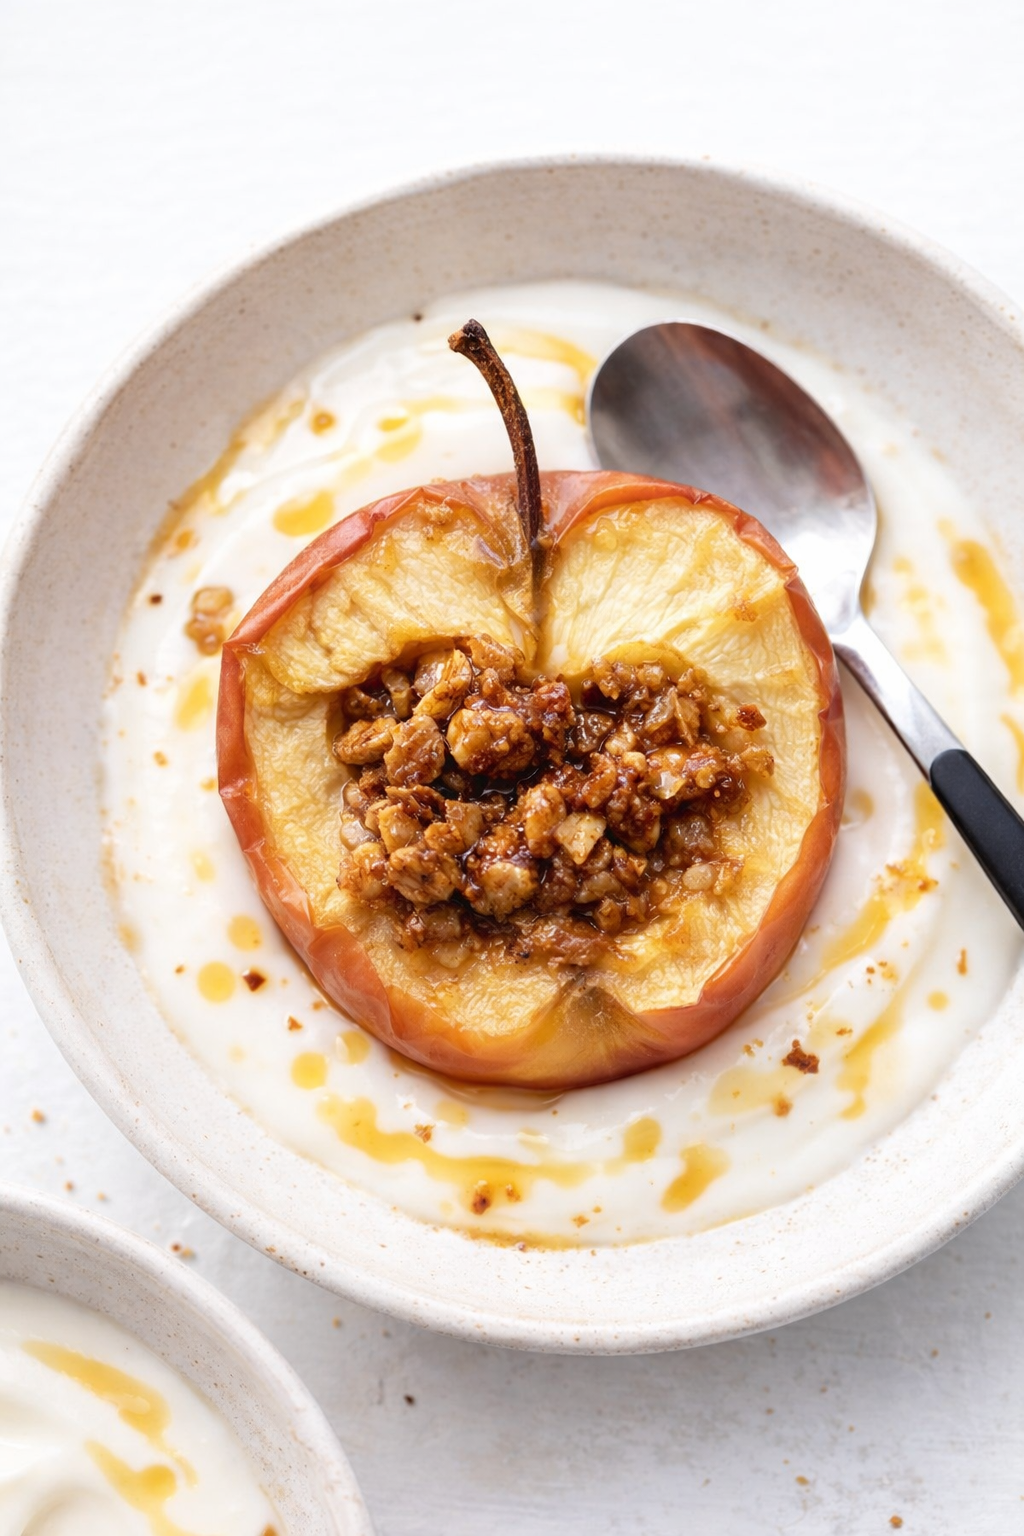
This recipe is a blank canvas. You can serve it with a scoop of vanilla ice cream or a big dollop of yogurt. I love it with soy yogurt because it adds a cool tang. You can also drizzle a little extra maple syrup on top for more sweetness. Every family has its own twist, and that is what makes cooking special.
Mini-anecdote: My neighbor once added a handful of raisins to her filling. I thought it sounded strange, but it was delicious. She said her mom did it back in Poland. That is how recipes travel through time and love. What do you add to make a dessert feel like your own? I am curious to hear.
The Coziest Dessert for Any Day
These baked apples are perfect for a fall evening or a chilly spring night. They take about 30 minutes of work and then the oven does the rest. You do not need fancy equipment or rare ingredients. Just apples, oats, walnuts, and warm spices. That is the kind of dessert that feels like a hug.
I hope you try this recipe and make it your own. Would you rather have baked apples with ice cream or yogurt? Take a quick poll in your head and let me know. Cooking is better when we share our little choices with each other.
Instructions
Step 1: Preheat your oven to 350°F. Rinse and core the apples carefully. I like cutting them in half and scooping out the middle. (Here is a tip: a melon baller works better than a spoon.) Doesn’t that apple smell fresh and sweet?
Step 2: In a medium bowl, mix rolled oats, chopped walnuts, coconut sugar, and maple syrup. Add the vanilla, cinnamon, nutmeg, and a pinch of salt. Stir until the filling is sticky and a little moist. Does this remind you of a warm snickerdoodle morning?
Step 3: Spoon the oat mixture into each apple cavity. Pack it in gently but firmly. Place the apples in a baking dish or cast-iron pan. Pour hot water carefully around them, not over the top. My grandma always said this keeps them from burning.
Step 4: Bake for about 50 minutes. After 30 minutes, drizzle the juices from the dish over the apples. This stops them from drying out. The apples should be soft but not falling apart. What do you think makes them turn golden brown? Share below!
Step 5: Drizzle a little extra maple syrup over the warm apples before serving. They are perfect just like this. Or add a scoop of yogurt or ice cream for a treat. I still laugh at how fast my family eats these.
Creative Twists
… Swap walnuts for pecans and add a dash of pumpkin pie spice for a fall twist.
… Mix in a handful of dried cranberries or raisins with the filling for extra sweetness.
… Top each apple with a crumble of dulce de leche sandwich cookie crumbs before baking.
Which one would you try first? Comment below!
Serving & Pairing Ideas
Serve these baked apples warm with a scoop of vanilla ice cream melting on top. The cold and hot together is magic. A dollop of thick sourdough pumpkin cinnamon roll glaze would be amazing too. For a crunchy side, add a few cinnamon swirl cookies on the plate. Pair it with a mug of hot cider or tea. It feels like a hug in a bowl. Which would you choose tonight?
Storing Your Baked Apples Like a Pro
Once your cinnamon walnut baked apples cool, pop them in the fridge. They last up to five days in a closed container. I remember my first time storing them; I forgot to cover the dish. The apples dried out and got chewy. That taught me a good lesson. Batch cooking these apples is a lifesaver for busy weeks. Make a double batch on Sunday, and you have dessert ready for days. Why does this matter? It saves you time and keeps you from reaching for store-bought sweets. Have you ever tried storing it this way? Share below! You can also try these cinnamon sandwich cookies for another easy treat.
To reheat, place an apple in a small dish with a splash of water. Warm it in the oven at 300°F for ten minutes. The microwave works too, but the oats get softer. I like using the oven for that crunchy oat topping. Why does this matter? Reheating the right way keeps the apple tender, not mushy. Batch cooking also means less cleanup later. You just warm and serve. These cinnamon swirl cookies are also great for making ahead. Which tip will you try first?
Three Common Baking Problems and Easy Fixes
First problem: apples that turn to mush. This happens when you bake them too long. I once got distracted by a phone call and my apples turned into applesauce. The fix is simple. Check them after 40 minutes by poking with a fork. They should be soft, not falling apart. Why does this matter? Cooking apples just right gives you that perfect bite. It builds your confidence in the kitchen. Which of these problems have you run into before?
Second problem: the oat filling is too dry. This means you did not add enough liquid. My grandma always said, “Dry filling means a sad apple.” Add a splash of water or maple syrup until the oats stick together. The filling should feel like damp sand. Third problem: the apples slide around in the dish. Place them snug together in your baking dish. This keeps them steady. These walnut swirl pastries have a similar filling that stays moist. Why does this matter? Fixing these small issues makes your dessert come out perfect every time. You will feel like a pro!
Your Quick Questions, Answered
Can I make Cinnamon Walnut Baked Apple Delight ahead of time? Yes, you can. Prepare the apples and filling the night before. Store the cored apples in water with a squeeze of lemon to keep them from browning. Keep the oat mixture in a separate bowl in the fridge. When you are ready to bake, stuff the apples and pop them in the oven. This saves you 20 minutes of prep time. It also means you can serve warm baked apples for breakfast or dessert without rushing. This apple slab cake is also good for making ahead.
How do I keep the apples from getting mushy? Choose firm apples like Gala or Honeycrisp. Do not over-bake them. Check your apples at the 40-minute mark. Insert a fork into the side. It should slide in with a little resistance. If the fork goes in easily, they are done. Also, avoid cutting the apples too thin. Thicker apple halves hold their shape better during baking. This trick works every time for me. These pumpkin pie bites also bake up perfectly with this method.
What are the best apple varieties for baking? Gala, Fuji, and Honeycrisp are my top picks. They are sweet and hold their shape well. Avoid Red Delicious, as they turn grainy. Granny Smith is good if you like a tart apple. You can mix two types for a more complex flavor. I once used Golden Delicious and they got too soft. Stick with firm, crisp apples for the best results. These sourdough cinnamon rolls pair nicely with baked apples for a fall treat.
Can I use a different nut instead of walnuts? Yes, you can swap walnuts for pecans, almonds, or even hazelnuts. Chop them the same size as walnuts for even texture. If you have a nut allergy, use sunflower seeds or pumpkin seeds. They add crunch without the nuts. I once tried pistachios and they were lovely with the cinnamon. The recipe is very flexible, so feel free to experiment. These snickerdoodle muffins also use walnuts and would work with pecans.
Is this dessert gluten-free or dairy-free? This recipe is naturally dairy-free. It uses coconut oil and maple syrup instead of butter. To make it gluten-free, use certified gluten-free rolled oats. Regular oats sometimes have traces of gluten from processing. The filling is already free of wheat flour. Serve it with coconut yogurt or vegan ice cream for a completely dairy-free treat. *Fun fact: Oats are naturally gluten-free, but they are often processed in facilities that handle wheat.*
How long do leftovers last and how do I reheat them? Leftover baked apples last up to five days in the fridge. Keep them in a closed container so they do not dry out. To reheat, place an apple in a small baking dish with two tablespoons of water. Warm at 300°F for ten minutes. You can also use the microwave for one minute, but the topping will be softer. The oven gives you that crunchy oat texture back. Never freeze baked apples. The texture changes and gets watery when thawed. Which tip will you try first?
A Warm Send-Off From My Kitchen to Yours
I hope these tips make you feel at home in your kitchen. Baked apples are like a hug in a dish. They smell like fall and taste like love. Have you tried this recipe? I would love to hear how yours turned out. Drop a comment below and tell me your favorite apple variety. Maybe you added a dollop of ice cream or a drizzle of caramel. Every kitchen has a story, and I want to hear yours. Happy cooking! —Grace Ellington.
Cinnamon Walnut Baked Apple Delight
Description
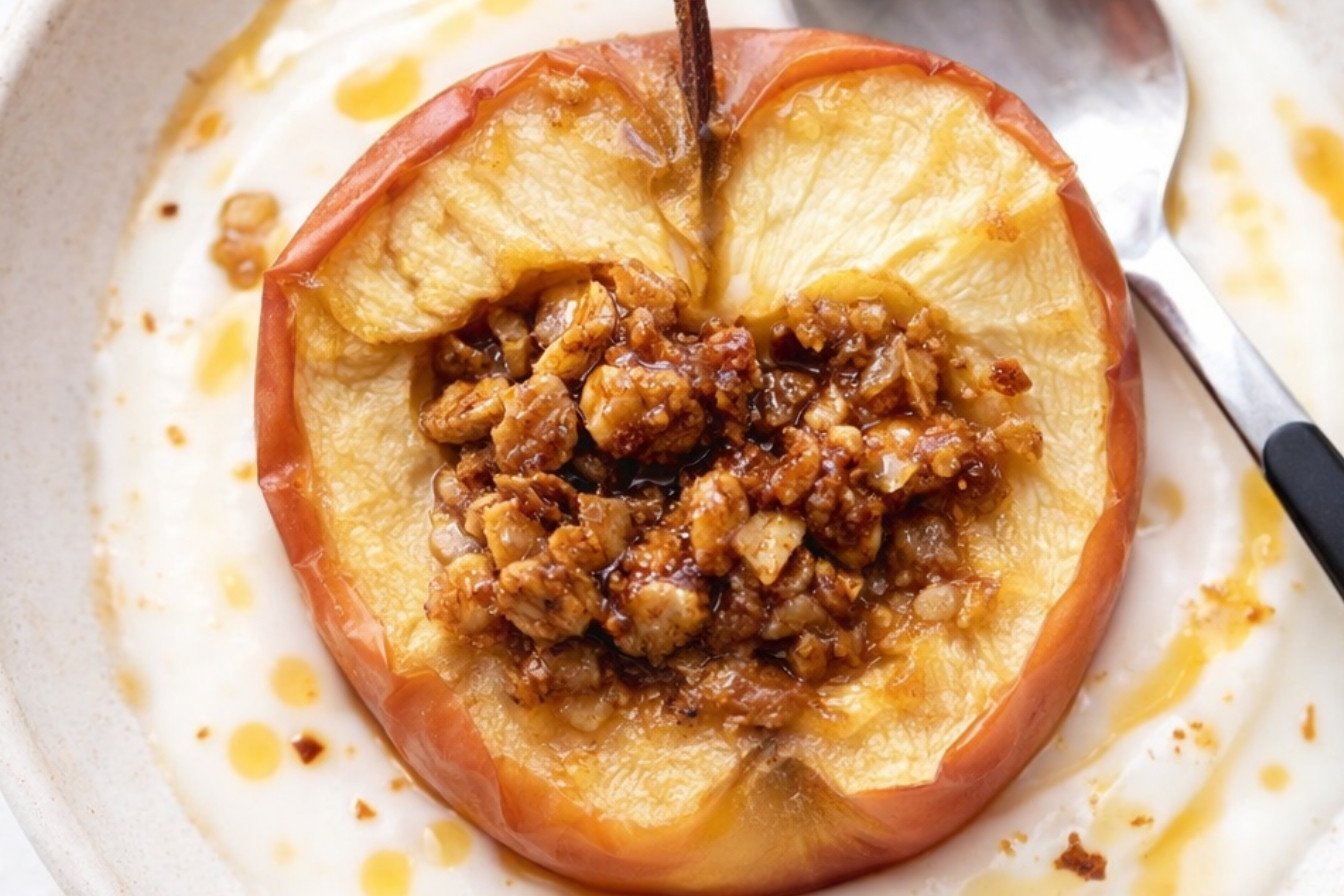
Experience the delightful contrast of textures and flavors with this Cinnamon Walnut Baked Apple Delight, featuring warm baked apples with a crunchy oat and walnut filling.
Ingredients
Instructions
- Preheat oven to 350°F / 180°C. Rinse and core the apples. Try to avoid cutting through the apple. I like to cut the apple in half and scoop out the inside to create open baked apples. Start with a knife around the core and continue with a spoon to scoop out the center of the apple. You can also use a melon baller scoop to dig out the core, or an apple core tool. See the video for a demonstration.
- In a medium bowl, combine rolled oats, chopped walnuts, coconut sugar, maple syrup, coconut oil, vanilla, salt, cinnamon, and nutmeg. The filling should be a sticky slight moist mixture. If the mixture doesn’t stick, add 2 tablespoons water (or more) until all the oats stick together.
- Spoon mixture into the cavity of each apple. Place the apples into a baking dish or cast-iron pan and carefully pour the hot water into the dish. Bake apples at 350°F / 180°C for about 50 minutes. After 30 minutes drizzle the liquid in the dish over the apples so they don’t dry out. The apples should be tender (soft) but not fall apart. The oat mixture should be browned. Drizzle with a bit of maple syrup before serving. Serve as is or with yogurt or ice cream.
Notes
- For added flavor, drizzle with extra maple syrup before serving. Serve with yogurt or vegan vanilla ice cream for a decadent treat.